
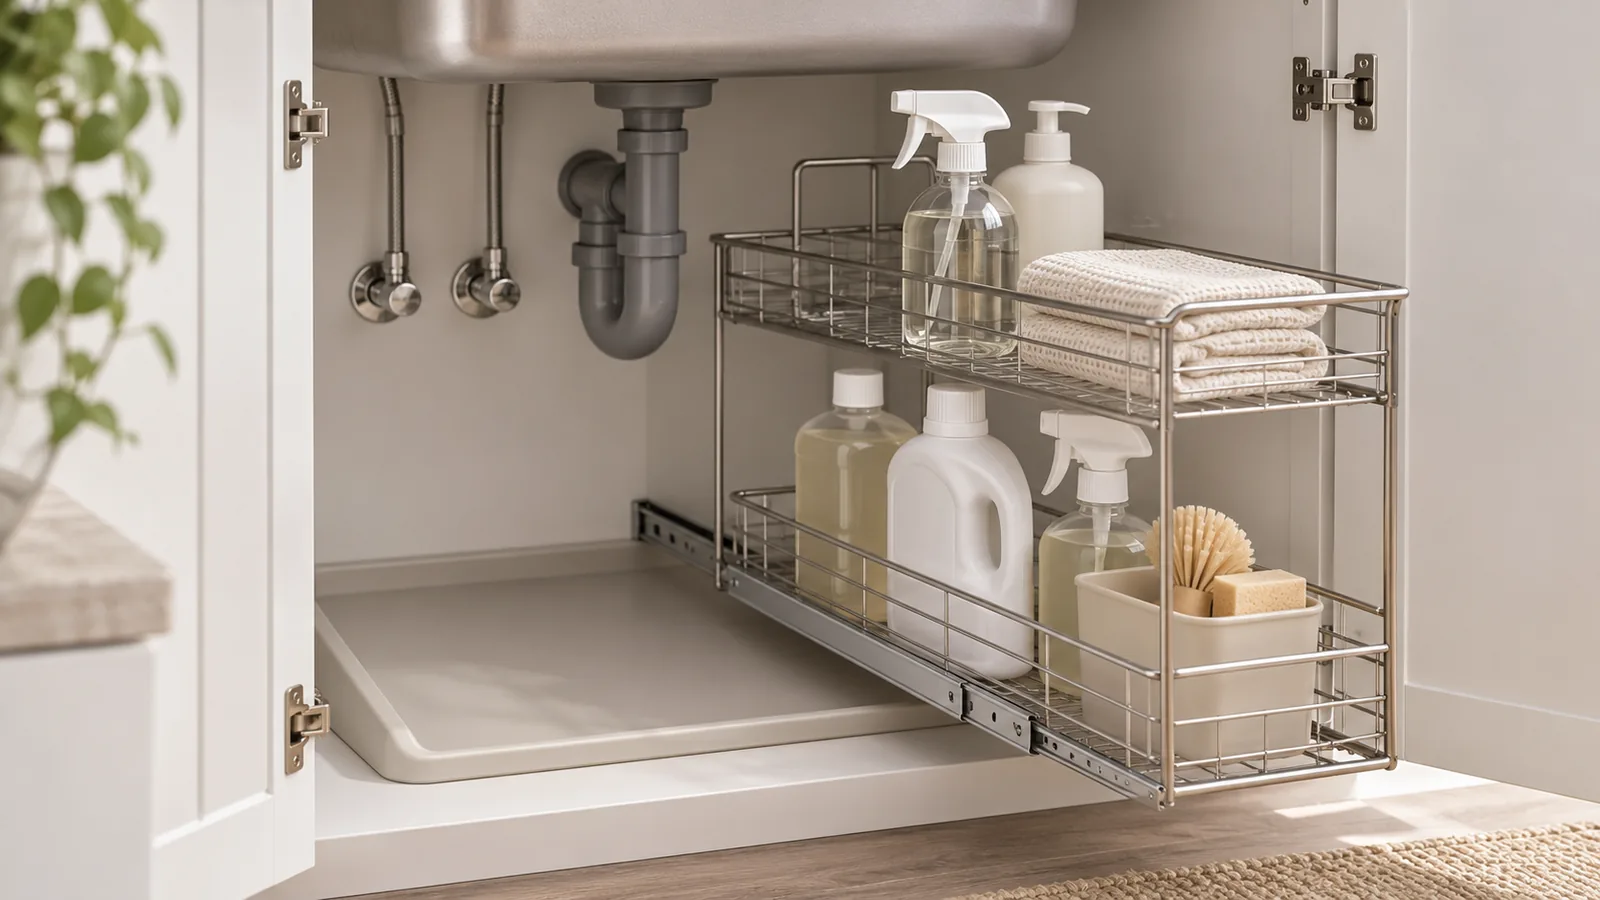
Under sink organizer drip tray leak access is a sample-approval question about two components that occupy the same cabinet but have different responsibilities. A metal organizer can create useful storage while a separate liner or tray may remain on the cabinet floor. The buyer must check that the organizer does not hide the tray, block a useful view of the plumbing joints, or make a chosen tray difficult to remove. This guide explains how importers can turn those concerns into drawing inputs, a sample sequence and a clear approval record.
A rack does not detect a leak, repair a pipe or guarantee that water will be contained. A tray does not make an inaccessible cabinet easy to inspect. Treat each part according to its verified purpose, identify who supplies it, and check the assembled arrangement with the actual cabinet, plumbing layout and intended stored goods. The objective is a practical review method, not a claim that one configuration suits every vanity.
Why under sink organizer drip tray leak access needs a separate review
Under a sink, the cabinet floor, plumbing, stored products, doors and organizers compete for the same limited space. A pull-out basket may make stored items reachable, yet its rails, side frame, front edge or contents can cover the sightline to a floor tray. A fixed rack can also sit over the area where a tray needs to be lifted. Neither outcome is necessarily a defect: it depends on the buyer’s inspection plan and on how the separate products are designed. It becomes a specification problem when the product concept assumes that a person can see, reach or remove the tray but the approved assembly does not allow it.
Define the parts before evaluating performance. The rack is a storage frame, shelf or drawer. The cabinet-bottom tray is a separate component selected by the cabinet, plumbing, property-maintenance or accessory supplier. The plumbing joints and valves belong to the plumbing system. A sensor, if one is present, is another component with its own power, placement and service requirements. Do not assume that the rack includes the tray, that the tray is a water alarm, or that either component has been tested to protect the cabinet.
This distinction shapes the article’s use of under sink organizer drip tray leak access. It means reviewing the relationship among frame geometry, stored contents, floor tray, pipes and access—not promising leak prevention. If the buyer needs an alarm, certified containment, a particular liner material or a prescribed inspection routine, that requirement must be specified and substantiated by its responsible supplier. A drawing of a metal rack alone cannot prove any of those outcomes.
The U.S. Environmental Protection Agency’s WaterSense program encourages householders to check plumbing fixtures and connections for leaks during maintenance. That is a general maintenance reminder, not a recommendation for a specific organizer or tray design. It reinforces why a buyer may want a visible inspection zone, but it does not set a universal rack clearance or prove that a tray will reveal every leak. The real access requirement should come from the project’s cabinet, plumbing and maintenance plan.
Map ownership before combining the components
Write down who owns each interface. The cabinet maker controls the interior width, depth, floor surface, door swing and any face frame or hinge projection. The plumbing designer or installer confirms pipe route, shutoff positions and service access. The organizer supplier controls the rack envelope, shelf positions, rail or foot locations and its installation method. A tray supplier controls the tray’s outer dimensions, lip, material, shape and handling instructions. The importer or project buyer coordinates the final assembly and approves the sample against the chosen combination.
This ownership map prevents a common sourcing mistake: asking one supplier to guarantee a system assembled from components that supplier neither selected nor tested. A metal fabricator may be able to discuss rack geometry, drawing revisions, sample fit and packaging. That does not make it the manufacturer of the tray, plumbing components or sensor. If the buyer wants one supplier to own a complete assembly, that scope must be expressly confirmed and the included parts must be listed.
Ask for the exact tray reference or a dimensioned substitute before a metal rack is frozen. “Leave room for the tray” is too vague. Provide its length, width, height, lip profile, handle or grasp points, material and intended removal direction. If these are unknown, mark them as unresolved inputs and keep the design provisional. A nominal cabinet size does not identify its usable interior after hinges, pipe traps, valves and mounting hardware are considered.
What a buyer should establish before the RFQ
A useful RFQ package combines a cabinet drawing, the selected tray, a plumbing layout and an organizer concept. It should distinguish finished interior dimensions from nominal cabinet width. Include the cabinet opening, side panels, face frame, door and hinge sweep, shelf supports, floor level, rear wall and any toe-kick obstruction. For plumbing, identify the sink bowl underside, drain tailpiece, trap, supply lines, shutoff handles and any required access direction. The buyer should mark what is measured and what remains estimated.
Describe the intended stored items as real envelopes rather than a vague request for “cleaning bottles.” Show the tallest container, trigger-sprayer head, refill pouch or bulk bottle that the rack must accommodate. Specify whether the products sit in a fixed basket or are frequently moved. A load and use pattern may affect shelf spacing, rail height and access, but no load value should be guessed from a product photograph. If the project has a defined design load, provide it through the responsible engineering owner and approve the test method separately.
For the tray, clarify whether it is already used in the cabinet, supplied as part of a project kit, or still under selection. Ask its supplier for a current specification sheet and handling instructions. If there is no selected tray, use a dimensioned mock-up and record that the final fit remains conditional. A mock-up can check physical space and movement. It cannot establish water capacity, leak detection, chemical resistance, cleanability or regulatory compliance.
The buyer’s wording “under sink rack leak visibility” should be translated into observable acceptance steps. For example: when the rack is installed and empty, can the inspector see the designated floor area and pipe joints? When the rack contains representative products, is the view still useful? Can the tray be removed without lifting the sink, disconnecting plumbing or damaging the rack? Those are questions for a sample, not claims inferred from the concept sketch.
A concise RFQ input list includes:
- Cabinet inside width, height and depth at several points, with unit and drawing revision.
- Door opening and hinge sweep, plus face-frame or drawer obstructions.
- Sink bowl and drain dimensions, trap position, supply lines and shutoff operating envelope.
- Tray manufacturer or project owner, model/revision, outer dimensions, lip and removal direction.
- Organizer type: fixed, hinged, pull-out, single level or multi-level; include the travel mechanism if applicable.
- Intended stored-item envelopes and the buyer-defined load/use conditions.
- Desired inspection zone and the person expected to view or remove the tray.
- Finish, appearance, packaging and sample approval requirements for the metal organizer.
- Items excluded from the supplier’s scope, including tray, plumbing, sensors and installation.
- The person authorized to approve fit, maintenance access and any claimed protective function.
The item that often gets missed is the inspection zone. A tray can be technically present but functionally hidden under a deep basket, cleaning supplies or a low shelf. Mark the area that must remain visible. If the buyer expects periodic inspection, state whether that means looking through the door opening, extending a pull-out, removing stored goods or removing the organizer. Those are materially different operating sequences and should not be blended into one word such as “accessible.”
Keep dimensions tied to their datums
When the rack or tray is measured, use clear datums and define whether the dimension describes the outermost projection, the part body or a usable opening. Wire diameter, rolled lips, bent returns, feet and rail heads can change the practical envelope. If rails mount to the cabinet sidewalls, specify the rail position and the cabinet features from which it is measured. If a frame stands on the floor, show the support contact points and floor irregularities that the sample must accommodate.
A sketch can communicate intent, but dimensions control production. Mark critical interfaces, non-critical decorative details and any cosmetic face separately. Do not copy a dimension from an illustrative image or from an unrelated tray model. Tolerances should be set by the responsible product engineer for the application; this article does not prescribe universal clearances.
Use a four-state sample review, not a single empty-cabinet photo
One attractive product photo shows appearance at one moment. It rarely answers whether a buyer can inspect and service the cabinet over time. A more useful under sink organizer drip tray leak access review has four states: rack installed and empty, rack extended if it moves, representative items loaded, and tray removed or accessed for cleaning or inspection. Photograph each state from the cabinet opening and from the direction an actual maintainer will use.
State one: installed, empty. Confirm the rack’s attachment, level, clearances and relationship to the plumbing. Identify the intended sightline to the tray. If a frame bar crosses that sightline, decide whether the remaining view is sufficient for the named inspection task. “Visible” should have an owner and a practical viewing angle, not a purely aesthetic interpretation. Record any cabinet details that are absent from the sample cabinet.
State two: rack moved through its intended travel. For a pull-out, extend it to its designed stop and check whether any component collides with the door, hinges, trap or supply lines. Observe whether the movement exposes or obstructs the tray. Do not assume the rack can be removed unless the design actually provides a removal path and instructions. For a hinged or fixed unit, test the specific movement that the product is supposed to permit.
State three: loaded with representative goods. Use the buyer’s actual or dimensionally representative bottles and supplies. Keep their size and placement recorded; a photograph with arbitrary props is not a load test. Check whether tall bottles, handles or packages block the sightline or catch on a rail. Confirm that the tray remains where it belongs and that stored items do not rest on an unapproved tray edge. If the buyer’s use case includes full containers, use that configuration during approval.
State four: tray access. Remove or expose the tray using the expected maintenance method. Note whether the rack must be extended, partially unloaded or lifted. Check if a person can grasp the tray without sharp edges or awkward reach. Reinstall it and confirm the organizer returns to the approved position. If cleaning involves a particular detergent or temperature, the tray supplier—not the metal-rack supplier—must confirm that material and care requirement.
Record the result in a sample checklist: date, cabinet model, rack drawing revision, tray model, plumbing layout revision, stored-item set, reviewer, observation, photo reference, action owner and disposition. The options can be pass, revise, accept with a documented limitation, or not applicable. A “pass” should describe what was observed; it should not silently become a guarantee for every cabinet or every tray.
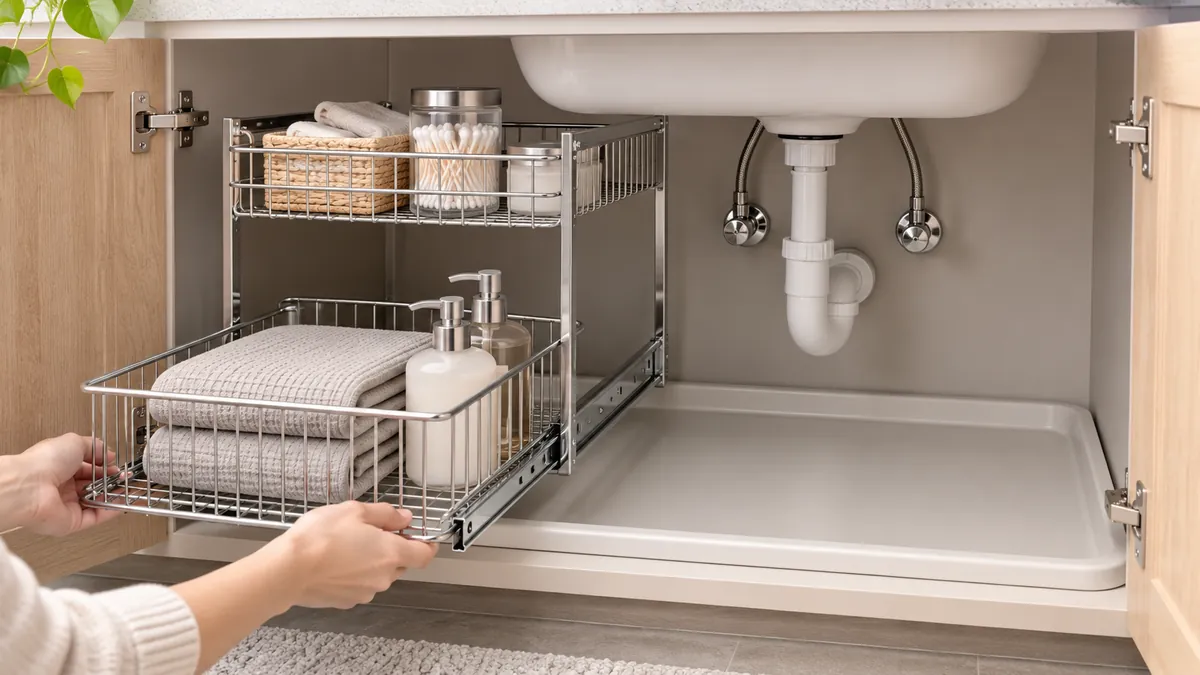
A buyer should check visibility again after the rack is moved and loaded, because the empty sample state may not represent the final storage arrangement.
Treat visibility and removal as separate acceptance questions
A tray may be visible from the doorway but not removable with the organizer in place. Conversely, it may be easy to pull out but not visible during a quick inspection. Define both outcomes independently. “Can see a portion of the tray” may be enough for one review routine and inadequate for another; only the buyer or building-maintenance owner can decide that.
Removal also depends on what surrounds the cabinet. A loose tray may be removable in a mock-up but trapped by a fixed toe kick, pipe connection or neighboring side panel after installation. Ask the cabinet owner to verify the actual opening and assembly sequence. If removal requires tools or disassembly, state that plainly and get the appropriate project acceptance. Avoid describing a path as “quick” or “tool-free” unless it has been demonstrated in the actual configuration.
Interface risks that deserve a sample check
The purpose of a risk review is not to claim that every listed problem will happen. It is to identify interactions that should be tested against the buyer’s configuration before production. A metal rack might cover part of a shallow tray, a drawer rail might compete with a tray handle, or stored goods might shift over a viewing area. Plumbing can vary between cabinet models, even when the outside width is identical. A buyer should turn each plausible interference into a measurable observation rather than a broad supplier promise.
Tray lip versus rack foot. If a tray has a raised perimeter, compare it with every foot, rail and lower crossbar. Interference may prevent the tray from sitting flat or from sliding in its selected direction. Test the named tray against the rack and cabinet floor. Do not assume a different tray with the same overall length has the same lip or handle geometry.
Rail versus removable path. Pull-out organizers often use side rails or runners. Their location may leave insufficient room for a tray to turn, tilt or lift through the cabinet opening. Draw the movement path, then test it. A static top-view dimension may not show the rotation required to clear the face frame.
Plumbing versus storage envelope. A drain trap or shutoff handle may occupy the same space as a rear corner or side shelf. A shape cut-out can address an interference only if it is based on the actual cabinet and plumbing layout. Do not prescribe a generic U-shaped opening: the correct shape, position and structural consequences vary. A product supplier should receive approved drawings and identify any requested change to the rack’s load path or construction.
Stored items versus sightline. A tall trigger bottle may obscure a floor area that was visible when the basket was empty. A user can also relocate products after installation. If inspection depends on a clear zone, mark that zone and explain how stored goods should be positioned. The buyer can decide whether a partition or a different shelf layout is useful, but no organizer geometry guarantees that a consumer will maintain the intended arrangement.
Tray material versus cleaning routine. Some trays are polymer, coated metal or another material, each with its own chemical and temperature limitations. A metal rack supplier should not infer the tray’s resistance from the rack finish. Use the tray maker’s technical information and the project cleaning specification. If the buyer does not yet know the cleaning agent, record the limitation rather than approving compatibility by appearance.
Floor slope or cabinet irregularity. A tray may move or sit differently on an uneven surface. The installer or cabinet designer determines the surface condition and any required leveling. A rack’s feet can affect contact points but should not be described as stabilizers unless the product design and test support that claim.
Distinguish fit evidence from protection evidence
A fit sample can confirm dimensions, movement and visibility under the tested conditions. It does not prove that a tray will contain a specified volume of water, that an alarm will activate, or that plumbing will not fail. Those claims require separate, product-specific evidence and a defined test method. If the buyer’s requirement is protective rather than organizational, involve the component owner and the responsible technical reviewer before any performance statement appears on packaging or in a listing.
That distinction is important when sales teams ask for a simple phrase such as “leak-proof under-sink storage.” A rack with an adjacent tray does not make the system leak-proof. A tray could have a limited purpose, a specific lip and a stated material; it cannot be assumed to protect a cabinet without evidence about seams, capacity, drain routing, sensor function and installation. Keep marketing language within the proof available for the exact model.
Build a buyer approval matrix
The matrix should make ownership and evidence visible. It can be a spreadsheet, project submittal or annotated sample record. The essential point is to preserve the actual combination of components, not merely a drawing of the rack. For each row, identify the supplier, source revision, acceptance evidence and approver.
| Approval item | Evidence to attach | Responsible owner | What the buyer should record |
|---|---|---|---|
| Cabinet envelope | Dimensioned cabinet drawing and opening | Cabinet supplier / project designer | Interior size, frame, doors and revision |
| Plumbing interface | Pipe and valve layout | Plumbing designer / installer | Trap, lines, shutoff access and service direction |
| Metal organizer | Drawing, material/finish description and sample | Rack supplier | Rail/foot position, movement, shelf layout |
| Separate floor tray | Maker/model, drawing and care instructions | Tray supplier or project owner | Dimensions, lip, material and removal path |
| Inspection zone | Marked image or drawing | Buyer / maintenance owner | Area to view and required viewing position |
| Stored goods | Actual items or dimensional set | Buyer / category owner | Size, arrangement and use condition |
| Fit sample | Signed sample checklist and dated photos | Buyer with suppliers | Tested configuration and open actions |
| Claims and labels | Approved evidence and scope statement | Product compliance/marketing owner | What can and cannot be represented |
The buyer should keep one approved reference sample or reliable photo record, plus its revisions. If the organizer changes, repeat the checks affected by that change. A relocated rail may alter tray removal; a new tray lip may alter floor contact; a changed cabinet or pipe route may hide the inspection area. Use a simple trigger list rather than re-running every approval step automatically.
When a fit sample fails, note the exact configuration and observed interference. “Tray does not fit” is a starting point, not an engineering instruction. Specify where it catches, how it was oriented, the cabinet revision, whether the rack was extended and which tray model was used. The supplier can then evaluate a change without guessing at the condition. The buyer should approve any dimensional or structural revision against the final cabinet and selected tray.
A source such as the EPA WaterSense leak-maintenance guidance can support general awareness that plumbing leaks merit attention. It does not define a product test. Keep that reference separate from supplier evidence and use it only for the maintenance context it actually supports.
Change control for reorders and cabinet variants
Under-sink programs often include several cabinet widths, plumbing layouts or organizer versions. Treat each as a variant requiring an explicit fit decision. A 600 mm exterior cabinet is not enough to establish internal space or tray compatibility. Track cabinet model, production revision, hinge, pipe kit, rack and tray as separate identifiers. If two variants share a rack, document why their actual envelope and maintenance paths remain compatible.
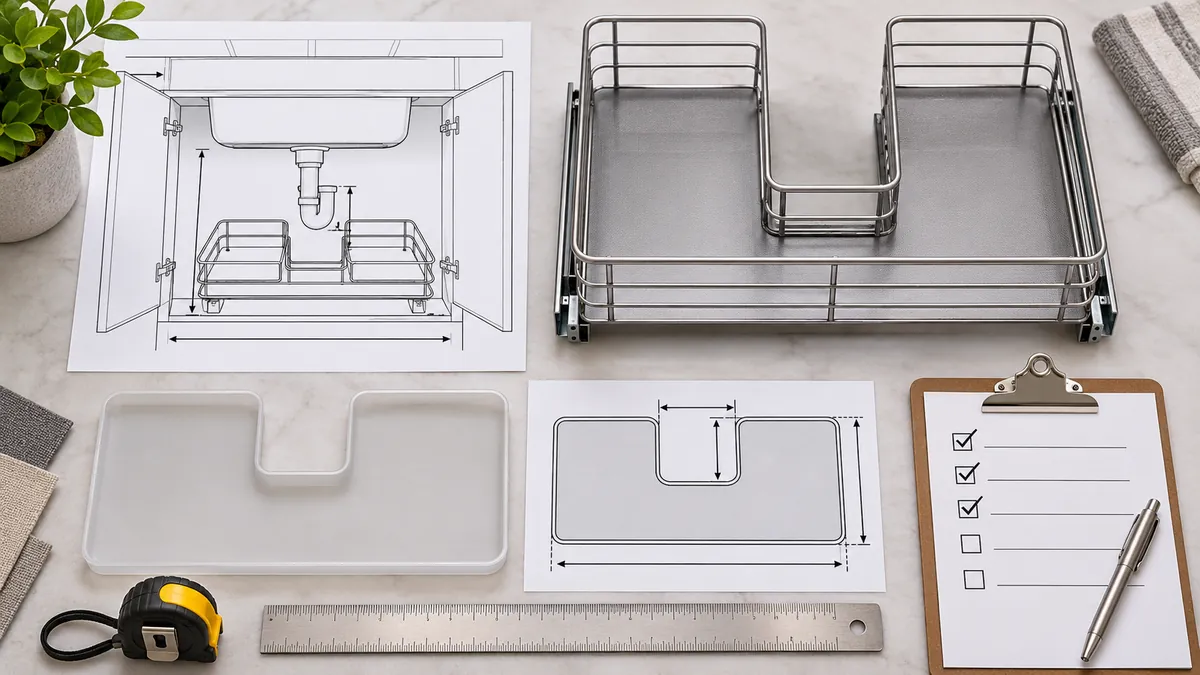
Before a reorder, compare the current bill of materials and drawings with the sample record. Ask whether the tray supplier changed its model, wall thickness or material; whether the rack’s mounting method or finish changed; and whether the cabinet owner changed doors, rails, plumbing or floor details. Any answer may trigger a targeted recheck. Do not assume that unchanged marketing photography proves unchanged geometry.
If the tray is buyer-supplied, write the custody and update process into the project workflow. The buyer should notify the rack supplier when a substitute tray is proposed. The rack supplier should identify which interfaces require new samples. The tray supplier should confirm its own material and care instructions. The final system owner should decide whether a substitute still meets the cabinet’s maintenance objective. This makes responsibility visible without assigning unverified performance obligations.
For a multi-SKU assortment, create one matrix row per approved combination. Include cabinet model, rack SKU, tray reference, pipe-layout revision, compatible stored-item envelope, photos and approval status. A “universal fit” label should not be used unless the supplier has evidence covering the defined range and the buyer has approved the claim. It is safer to state the combinations actually checked.
Pack the sample and production units to preserve the approved condition
The approval sample should arrive intact, with rails, brackets and loose components protected from deformation. Packaging can affect how a metal rack reaches the buyer, but a protective package does not establish transit-proof performance. If the tray is a separate part, identify whether it ships in the same carton, as a kit or through another supplier. Confirm that the item count, labels and instruction sheet make the separate ownership understandable at receiving.
During the sample review, note whether unpacking or assembly changes the rack geometry. A bent rail or missing fastener can create a false fit failure. Conversely, a sample that was carefully adjusted by hand may not represent the production configuration. Record the state delivered and any assembly performed. If a production control or inspection requirement matters, define it with the supplier and buyer rather than relying on an informal photo.
A product-specific manufacturing conversation can begin with the drawing, sample and packaging requirement. Koitor’s verified scope includes metal hardware fabrication and buyer-led drawing/sample review; this article does not assert that Koitor supplies the separate liner, plumbing system or leak sensor. For related metal-frame work, review custom metal storage basket production and the custom kitchen storage rack information as relevant manufacturing context, not as proof of fit for a specific cabinet.
Buyer checklist and FAQs
What dimensions should an importer send for an under-sink rack?
Send the cabinet’s usable interior dimensions, opening, frame and door/hinge envelope, sink underside, pipe and valve positions, floor shape, selected tray dimensions and removal path, plus the stored-item envelopes. Mark the drawing revision and distinguish measured values from assumptions. Include photos only as supporting references; dimensions and datums should control the specification.
Does a metal organizer prevent cabinet leaks?
No. A storage rack is not a leak detector or plumbing repair. A separate tray may be part of a maintenance concept, but its containment or alert function must be established by the tray or sensor supplier for the exact product and installation. Do not infer a protective claim from the presence of a rack and tray.
Should the tray be visible when the rack is fully loaded?
That depends on the buyer’s maintenance procedure. If a clear view is required, define the inspection zone and test it with representative stored goods. An empty-cabinet photo is not enough. If the project accepts inspection only after extending or unloading the rack, record that operating step.
Is a removable tray always better than a fixed tray?
Not universally. Removability can support cleaning or replacement, but the tray still needs adequate access, a grasp point and a compatible cabinet opening. A fixed design may suit another project. The buyer should compare real handling, cleaning instructions, space and part ownership rather than using “removable” as a blanket quality signal.
Can a supplier approve the complete plumbing arrangement?
Only the responsible system and installation owners can approve plumbing suitability. A metal organizer supplier can assess its own frame against supplied drawings and samples, but it should not assume responsibility for plumbing service, leak detection, tray performance or code compliance without explicit scope and evidence.
How should a change to the tray be handled?
Treat it as a component revision. Compare the new tray’s outer envelope, lip, material, handling and care instructions with the existing approval. Recheck floor contact, removal travel, rack interference and the intended sightline. If the change alters a claimed protective function, the responsible tray or system owner must provide new supporting evidence.
What should be included in an under sink organizer drip tray leak access sample sign-off?
Record the cabinet and plumbing revisions, rack drawing, tray manufacturer/model, stored-item set, four tested states, photos, visible/access zones, observations, open actions and approvers. State what the sample proves and what it does not. This makes the decision repeatable when the next SKU or reorder is reviewed.
For help discussing a custom metal frame, provide the cabinet drawing, plumbing layout, chosen tray specification and stored-item envelope. Koitor can review the metal organizer’s fit and manufacturing inputs within its confirmed scope. Use the contact page to send your drawing or sample, and identify the tray and plumbing as separate project components.
Review an Under-Sink Organizer Fit
Send the cabinet dimensions, plumbing layout, selected tray and representative stored items. Koitor can review the metal organizer interface within its confirmed manufacturing scope.
OEM / EIGENE MARKE
Verwandeln Sie diesen Beschaffungsleitfaden in ein Produktdossier
Teilen Sie uns Ihr Zielprodukt, die Größe, die Oberflächenausführung, die Bestellmenge und Ihre Verpackungsanforderungen mit. Ihr Team erhält vor der Angebotserstellung eine praxisorientierte Prüfung der Herstellbarkeit.

 English
 Español
 Português
 Français
 Deutsch
 العربية