
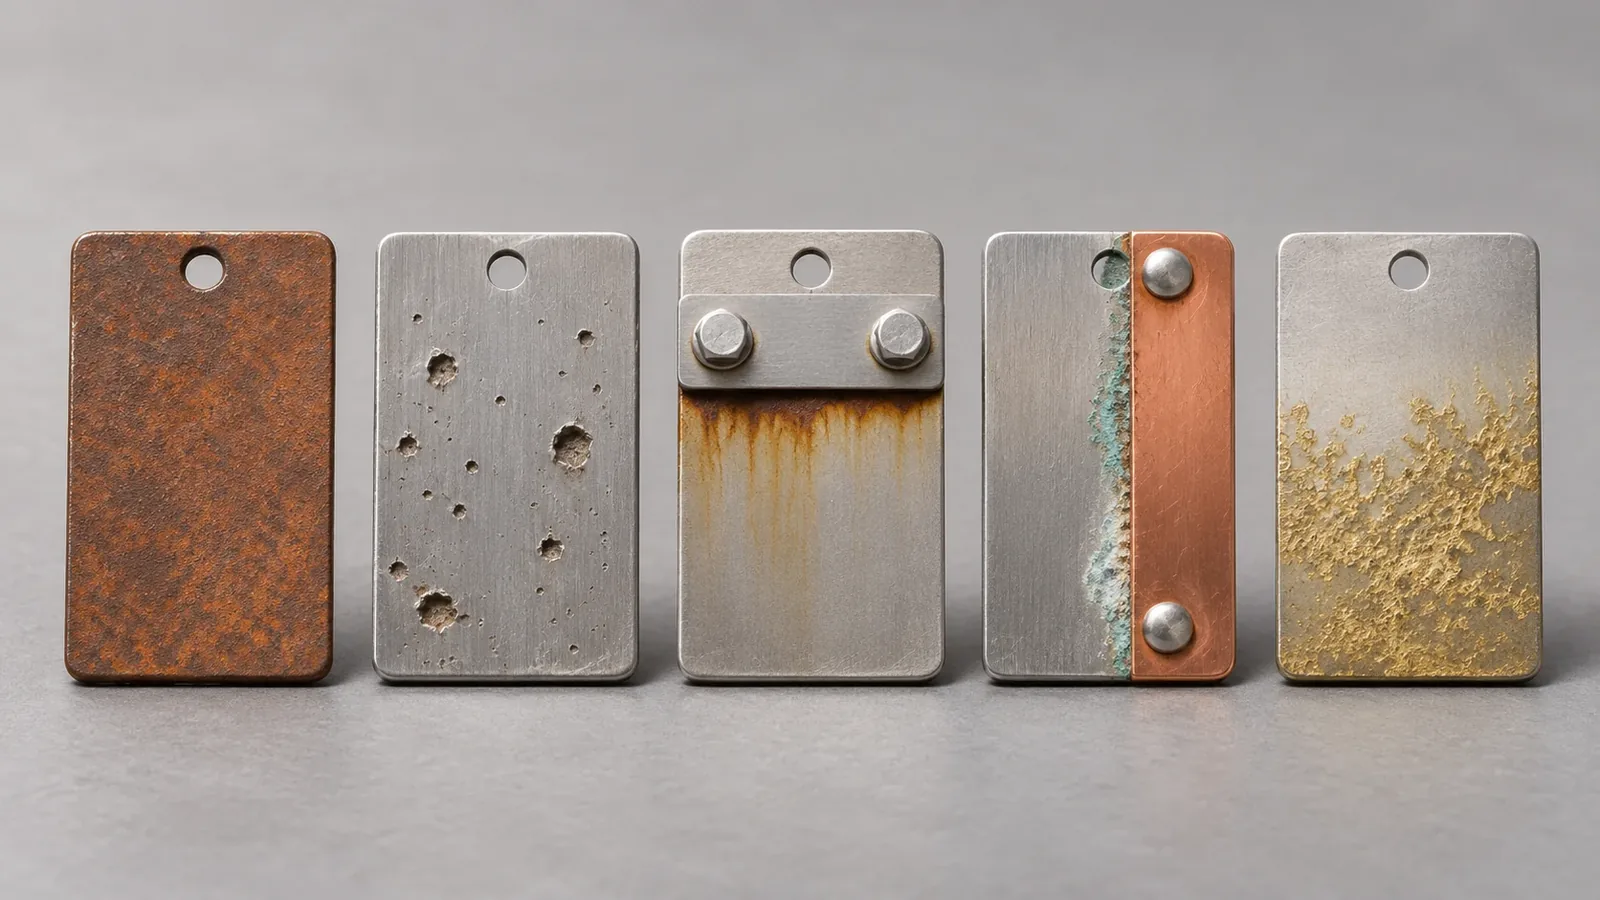
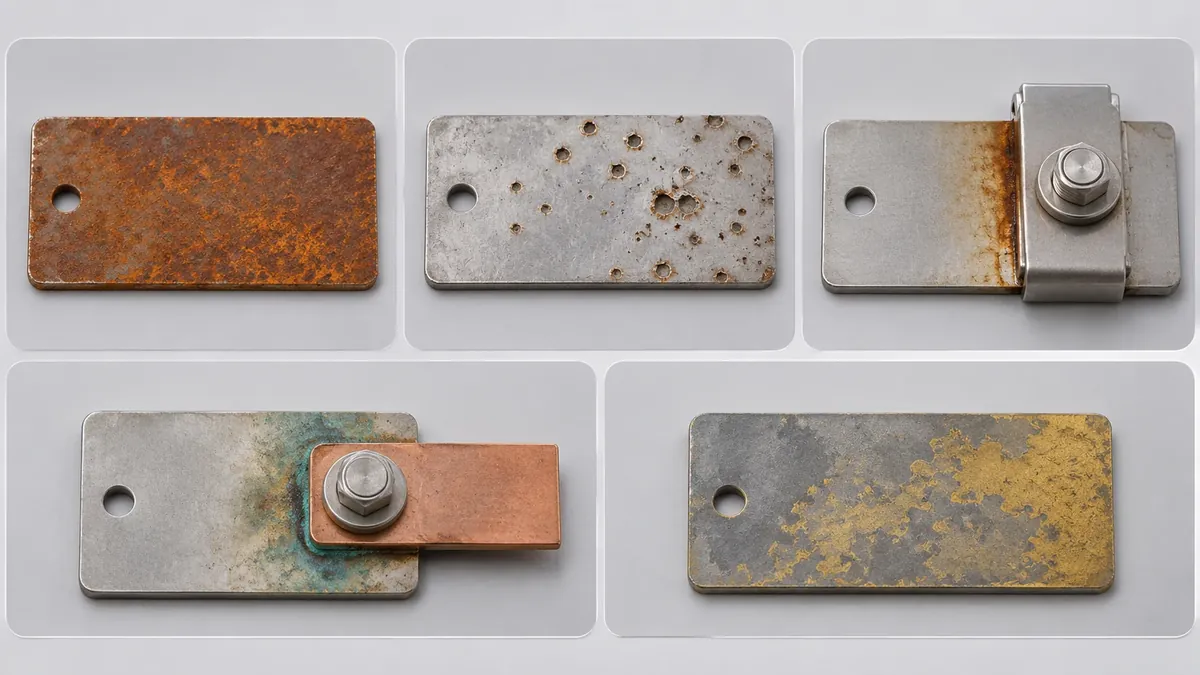
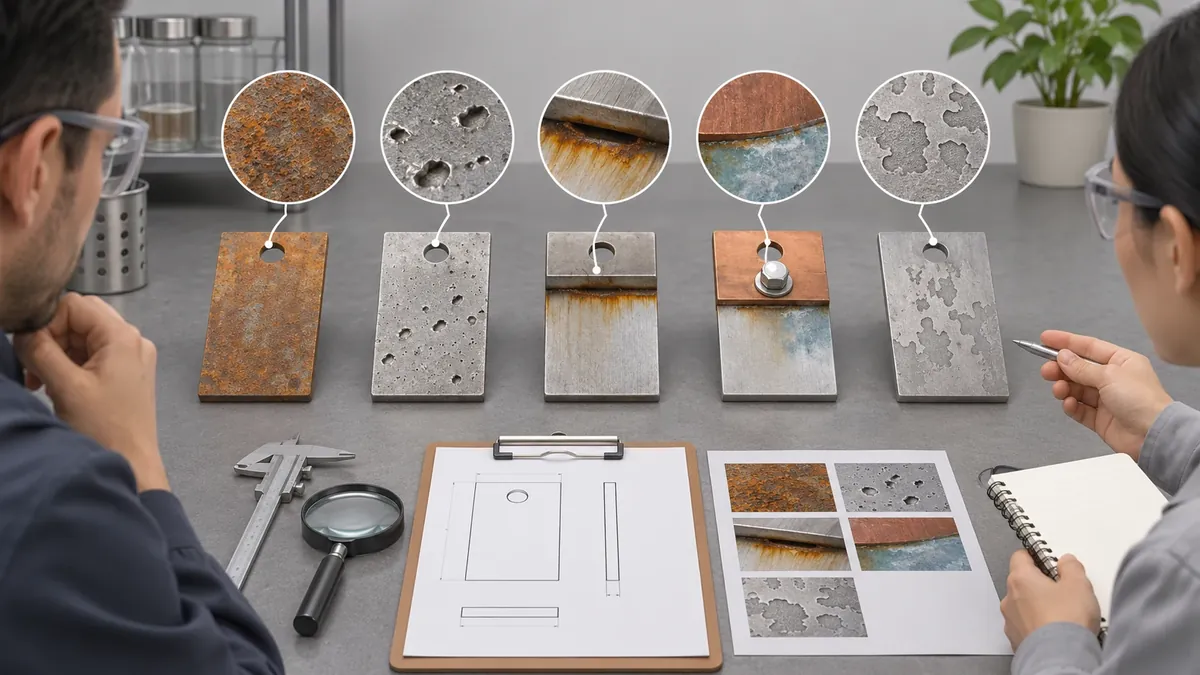
The types of corrosion are commonly distinguished by the pattern of metal loss or the mechanism involved. Uniform attack affects a relatively broad surface, while pitting is localized; crevice corrosion develops in shielded regions, and galvanic corrosion involves dissimilar materials in electrical contact in an electrolyte. Other forms include selective leaching and environmentally assisted cracking. These are useful categories for describing an observation, but a visual pattern alone does not prove the exact cause, remaining strength, or responsibility for a product failure.
For an importer reviewing a bathroom or home-storage hardware issue, first record what is visible, where it occurs, the product revision, exposure and handling history, and any relevant material or finish information. Then determine whether specialist inspection or testing is needed. Do not diagnose from a photograph or treat a broad corrosion label as a repair instruction.
Why classify corrosion by form
“Rust” is often used colloquially for visible deterioration, especially on iron-containing materials. Corrosion is broader: it can describe material degradation through chemical or electrochemical interaction with the environment. The observed form helps people communicate what a surface looks like and where damage is concentrated. It does not necessarily identify the underlying process.
One component can show overlapping forms. A pit may occur near a crevice; a coating defect may expose a substrate; a dissimilar-metal contact may exist in a wet joint. Deposits, cleaning residues, handling damage, and the product’s service conditions can complicate interpretation. The first useful step is to describe the observation precisely rather than forcing it into a single familiar label.
| Observation or category | General description | Evidence still needed |
|---|---|---|
| Uniform corrosion | Relatively distributed attack over an exposed surface | Material identity, exposure history, and measured condition if performance matters |
| Pitting corrosion | Localized cavities or small areas of deep attack | Close examination, location mapping, material and environment review |
| Crevice corrosion | Attack associated with a shielded gap or tight interface | Joint geometry, deposits, wet/dry conditions, and detailed examination |
| Galvanic corrosion | A mechanism involving electrically connected dissimilar materials and an electrolyte | Contact materials, electrical path, environment, and component arrangement |
| Selective leaching | Preferential removal of one or more alloy constituents | Material identification and appropriate analytical evidence |
| Intergranular corrosion | Attack associated with grain-boundary regions in susceptible material conditions | Material and processing history, plus suitable technical examination |
| Environmentally assisted cracking | Cracking associated with a material, stress, and environment combination | Fracture evidence and qualified engineering analysis |
This table is an introductory map, not a complete taxonomy or diagnosis protocol. Terminology can vary by application and technical discipline. Some categories describe a visible form; others emphasize a mechanism. The AMPP overview identifies multiple forms and notes that visual observation may not be enough for deeper characterization. A buyer should not convert the table into an acceptance standard without defining the product and evidence requirements.
Types of corrosion: common forms
Uniform corrosion
Uniform corrosion is relatively widespread attack across an exposed area. The term describes distribution, not a guarantee that every point has lost the same amount of material. A surface may appear generally dulled, discolored, or degraded, but those appearances can also have other causes. A photograph cannot establish the depth of metal loss.
For a product review, record the affected area, extent, time observed, cleaning history, and comparison with unaffected areas or an approved sample. If wall thickness, load, or service capability is in question, a qualified person must select and perform appropriate measurements or tests. Do not estimate remaining strength by visual inspection alone.
Pitting corrosion
Pitting corrosion involves localized attack that can create small cavities. Because the affected areas may be concentrated, an overall surface can look mostly intact while local damage deserves closer examination. A small spot or hole in a photograph is not automatically a corrosion pit; it could be a coating defect, contamination, mechanical damage, or another surface condition.
To investigate, map the location, note nearby edges and joints, preserve the part, and identify the material and finish if available. A specialist may need magnification or other examination to determine whether a feature is a pit and how deep it is. Do not infer a material grade or exact environmental cause from the appearance.
Crevice corrosion
Crevice corrosion is associated with shielded spaces or close-fitting interfaces where local conditions can differ from the freely exposed surface. Potential locations in hardware can include a narrow joint, overlap, fastener interface, or area beneath a deposit. The existence of a gap does not prove corrosion is occurring, and a stain at a joint does not prove this mechanism.
Document the geometry, whether liquid can enter or remain, cleaning access, orientation, and the product’s actual exposure. Compare the affected interface with other areas. A detailed crevice-design or corrosion-control decision belongs with the product’s responsible technical owner; this overview does not prescribe geometry or guarantee that a design change will prevent attack.
Galvanic corrosion
Galvanic corrosion is associated with electrically connected dissimilar materials in the presence of an electrolyte. The material pair, electrical continuity, environment, and relative exposed areas can matter. A product may contain multiple metals, but their mere presence in the same assembly is not proof that galvanic corrosion caused a visible mark.
For a hardware investigation, identify the contacting materials, coatings, fasteners, moisture pathway, and any insulating parts. Confirm whether there is a plausible electrical connection and preserve a representative sample. Do not identify an alloy based on color or assume the more visibly affected part determines the cause. A qualified corrosion specialist may be needed to evaluate the mechanism.
Selective leaching
Selective leaching describes preferential removal of one or more constituents from an alloy. The surface may change in appearance or structure, but the exact material and evidence are essential. The term should not be assigned simply because a brass or other alloy changes color.
Record the component designation, supplier information, affected region, service conditions, and any available material documents. If selective loss is suspected, an appropriate technical examination should establish the material and condition. Do not make a material-substitution recommendation from a general article or from a single surface photograph.
Intergranular corrosion
Intergranular corrosion refers to attack associated with grain-boundary regions under susceptible material and processing conditions. It is not reliably diagnosed through ordinary visual inspection alone. The material, thermal or manufacturing history, environment, and failure evidence may all matter.
For a buyer, the practical lesson is to preserve traceability and involve a competent materials specialist when the concern points to a microstructural mechanism. A generic “stainless” or “alloy” label is insufficient to analyze the issue. Do not assign the cause to a manufacturing step without technical evidence.
Environmentally assisted cracking
Some cracking mechanisms involve the interaction of material condition, stress, and a particular environment. A crack in a component can also result from overload, fatigue, forming, weld quality, handling, or other causes. The term environmentally assisted cracking should not be used as a conclusion without evidence that supports the mechanism.
Keep the component intact, document loading and installation history, locate the crack, and gather the drawing revision and material information. Avoid forcing or repeatedly loading the part. Failure analysis should be conducted by a qualified engineer or laboratory using a method appropriate to the suspected mechanism.
Separate the visible observation from the cause
An investigation becomes less reliable when a label is chosen before the facts are collected. A buyer can reduce this risk by maintaining two columns: “what we observed” and “what we believe may explain it.” The first column should be direct and factual; the second should be marked as a hypothesis until verified.
Useful observations include:
- The precise location and approximate area of the mark or damage.
- Whether the feature is a stain, deposit, coating change, pit, crack, or material loss as currently understood.
- The product, component, lot, drawing revision, supplier, and date observed.
- The orientation and whether the area was sheltered, wet, cleaned, or in contact with another material.
- Storage, packaging, installation, cleaning, and use conditions that can be confirmed.
- Photos with a scale and consistent lighting, without cleaning or altering the evidence first.
Keep the original item and packaging if a claim or failure review may follow. Record any cleaning, exposure, or handling after discovery. These steps improve the quality of the handoff but do not replace engineering analysis.
Corrosion review for bathroom and storage hardware
Bathroom products can encounter moisture, cleaning agents, contact with other items, and variable ventilation. The exact exposure depends on installation, care, product design, location, and user behavior. Do not assume that every bathroom produces the same environment or that a particular material is immune to every form of corrosion.
When a distributor receives a report, ask for the product model, installation location, approximate time in use, cleaning routine, photos of the full assembly and affected area, and whether the item has been altered. Ask how the product was stored before installation. These details help a technical reviewer distinguish a manufacturing question from an installation or environmental question, while keeping all causes open until investigated.
For custom products, the buyer and manufacturer should maintain the agreed material, finish, sample, and packaging references. A change to substrate, surface treatment, weld, joint, fastener, or package protection may be relevant, but a change alone does not prove causation. The review should compare the actual production item with the approved specification and determine whether more evidence is needed.
If the issue affects a safety-critical function or creates a risk of falling, sharp edges, or loss of support, follow the buyer’s incident and product-safety procedures immediately. Isolate affected stock where the responsible team requires it. Do not continue using a damaged item to collect more evidence if doing so could put someone at risk.
Distinguish corrosion from adjacent quality questions
An investigation can involve corrosion and other quality issues at the same time, but the terms should remain distinct. A coating that peels, blisters, or changes color may expose a substrate or may have another surface-related cause. A weld discoloration may relate to fabrication or finishing, while a crack could be associated with forming, loading, joining, or an environmental mechanism. A stain near a fastener could come from the fastener, the surrounding surface, a deposit, or the environment. The appearance should be recorded before a mechanism is assigned.
The approved specification helps frame the review. Compare the delivered component with the drawing, sample, material declaration, finish requirement, and agreed inspection criteria. If a defect is confirmed, determine whether it is a nonconformance to a defined requirement or an observed condition without a specified acceptance limit. Those are not automatically the same conclusion. The buyer’s quality agreement and project records govern the disposition process.
When an item is returned, preserve the condition as received where practical. Photograph the whole product and close details before cleaning. Keep a record of who handled it and when. If a lab or specialist requests additional preparation, document the steps. A cleaned or polished surface may remove deposits or alter evidence that would otherwise help identify the mechanism.
Avoid comparing two products based only on one visible mark. If a comparison sample is available, record its model, material, finish, manufacturing lot, age, exposure, and cleaning history. Differences in use history can make a visual comparison misleading. A side-by-side image is useful for communication but does not equal a controlled corrosion test.
Finally, do not convert a classification into a warranty or lifespan statement. A type name does not predict a number of years in service. Product life depends on design, material, finish, environment, care, use, and many other conditions. Any published performance claim should have product-specific support and clearly state what configuration and test or evidence it covers.
Communicate a suspected issue to a supplier
A concise, factual report helps a manufacturer investigate without prematurely assigning blame. Include the item name, SKU, purchase order, production period or lot if known, quantity affected, product revision, installation or storage context, time discovered, and a description of what is visible. Attach overview and close-up photos, ideally with a scale and a neutral color reference. State what has been cleaned or changed since discovery.
Separate the report into three parts: confirmed observations, available records, and open questions. For example, “dark marks appeared at the underside of the mounting plate after storage in a humid room” is an observation. “The plate failed due to crevice corrosion” is a diagnosis and should be marked as a hypothesis until evaluated. Ask the supplier to compare the part against the approved material and finish records and explain what additional evidence is needed.
Agree on custody and next steps before sending a sample away. A supplier may request the full assembly, packaging, unused stock, or photographs. The buyer should decide what evidence is required, who may inspect or test the item, and whether affected inventory should be held. If the issue could affect user safety, the buyer’s product-safety and legal processes take precedence over an informal supplier discussion.
When the supplier response includes a proposed corrective action, ask what evidence supports it and which products or lots it covers. A process adjustment, cleaning instruction, or material change should be connected to the confirmed finding and approved by the right owner. Do not apply a broad corrective action to unrelated products merely because they share a finish or material family.
Preserve the distinction between a possible mechanism and a confirmed root cause in every update to the buyer, supplier, and internal quality record. If the evidence changes, revise the working explanation and retain the earlier report for traceability. This prevents a preliminary hypothesis from becoming an established product claim as the case is handed between teams.
Prepare useful photographs without changing the sample
Photographs are useful for triage when they preserve the scale and location of an observation. Take an overview image showing the full product, then close-ups of the affected region and nearby joints or fasteners. Include a scale placed beside the feature, not over it, and note the lighting conditions. Keep original image files and avoid filters or edits that could change color or apparent depth.
If a mark is difficult to see, do not aggressively polish or scrape the surface to make a clearer picture. That may remove deposits or coating and change the evidence. Ask the quality owner whether gentle cleaning is appropriate and document the method before proceeding. A supplier may request a clean sample for further review, but preserve a record of the as-received condition first.
When sending photos, include the product revision and approximate date, but avoid sharing confidential customer labels or personal information that is not needed for the investigation. The objective is to support a focused technical review while preserving the chain of context, not to make a dramatic image or assign blame in advance.
Common corrosion interpretation errors
Treating every colored spot as corrosion
Discoloration can have multiple causes, including residues, transfer, coating changes, or corrosion. Record the appearance and have it examined instead of assigning a mechanism from color alone.
Treating every pit-like feature as a corrosion pit
A cavity may result from manufacturing, impact, porosity, or other defects. Close examination and process context may be necessary to determine its origin.
Assuming all visible damage proves a specific alloy is unsuitable
Material choice is only one factor. Product geometry, joining, finish, exposure, cleaning, storage, and installation can all be relevant. A single failure does not establish a universal material ranking.
Assigning fault before reviewing evidence
An observation should not be turned into a supplier-fault conclusion without comparing the approved specification, product history, and actual conditions. Preserve records and follow the agreed quality process.
Treating a general corrosion guide as a test method
This article explains broad categories. It does not define a standard inspection method, acceptance limit, test duration, or repair procedure. Use the applicable technical authority for those decisions.
Buyer checklist for an observed corrosion concern
- What is observed, and where is it located?
- Is the feature confirmed as corrosion or only suspected?
- Which product revision, component, supplier, and lot are involved?
- What material and finish are documented for that component?
- What exposure, cleaning, installation, and storage conditions are known?
- Is another material, fastener, coating, or deposit near the affected area?
- Has the product been cleaned, altered, or loaded after discovery?
- Is the original part and package being preserved for review?
- Does the concern affect safety or require an immediate product-control step?
- Which qualified person should select further examination or testing?
Use the checklist to improve the evidence handoff. Do not use it to decide cause, remaining strength, or corrective action without the necessary technical assessment.
Preguntas frecuentes
What are the main types of corrosion?
Commonly discussed forms include uniform attack, pitting, crevice corrosion, galvanic corrosion, selective leaching, intergranular corrosion, and environmentally assisted cracking. The list is introductory; categories may overlap and do not diagnose a specific part.
Can I identify the corrosion type from a photo?
A photo can document a visible pattern but usually cannot establish material, depth, or exact cause. Use it as part of an evidence record, not as the sole diagnosis.
Is pitting always caused by the same environmental condition?
No. The appearance alone does not establish one cause. Material, surface condition, exposure, geometry, and other evidence must be reviewed.
Does galvanic corrosion happen whenever two metals touch?
The mechanism requires more than simply having two metals in one product. Electrical connection and an electrolyte are relevant conditions, and the actual assembly must be examined.
Does this guide recommend a corrosion test?
No. Test selection depends on the product, failure question, and applicable requirements. A qualified technical owner should select a method and interpret its limits.
Sources and scope
- AMPP: Forms of Corrosion — used for bounded category descriptions and the distinction between appearance and deeper examination.
- Gibson Stainless: Types of Corrosion — used as a secondary component-maker overview of common category names; product claims are not transferred to Koitor.
This article is a buyer-oriented overview, not a corrosion diagnosis, alloy recommendation, testing protocol, repair instruction, or claim of laboratory or AMPP qualification.
Trabaja con Koitor Hardware
Share the product facts before discussing a corrective action
For a bathroom or home-storage hardware concern, provide the drawing or sample, product revision, material and finish records if available, observed location, order or lot reference, actual use conditions, and packaging history. Koitor Hardware is a family-owned custom metal hardware factory focused on bathroom and home-storage products. The cause of a reported issue must be assessed against the evidence for that specific project.
Discuss a Hardware Quality Question
Send the product drawing or sample reference, affected component, order details, finish requirement, and clear photos of the observed condition. Koitor can review verified manufacturing information for the project; diagnosis and test selection should involve the qualified technical specialist responsible for the case.
OEM / MARCA BLANCA
Convierte esta guía de abastecimiento en un resumen del producto
Indícanos el producto que deseas, el tamaño, el acabado, la cantidad del pedido y los requisitos de embalaje. Tu equipo recibirá un análisis práctico de la viabilidad de fabricación antes de recibir el presupuesto.

 English
 Español
 Português
 Français
 Deutsch
 العربية