
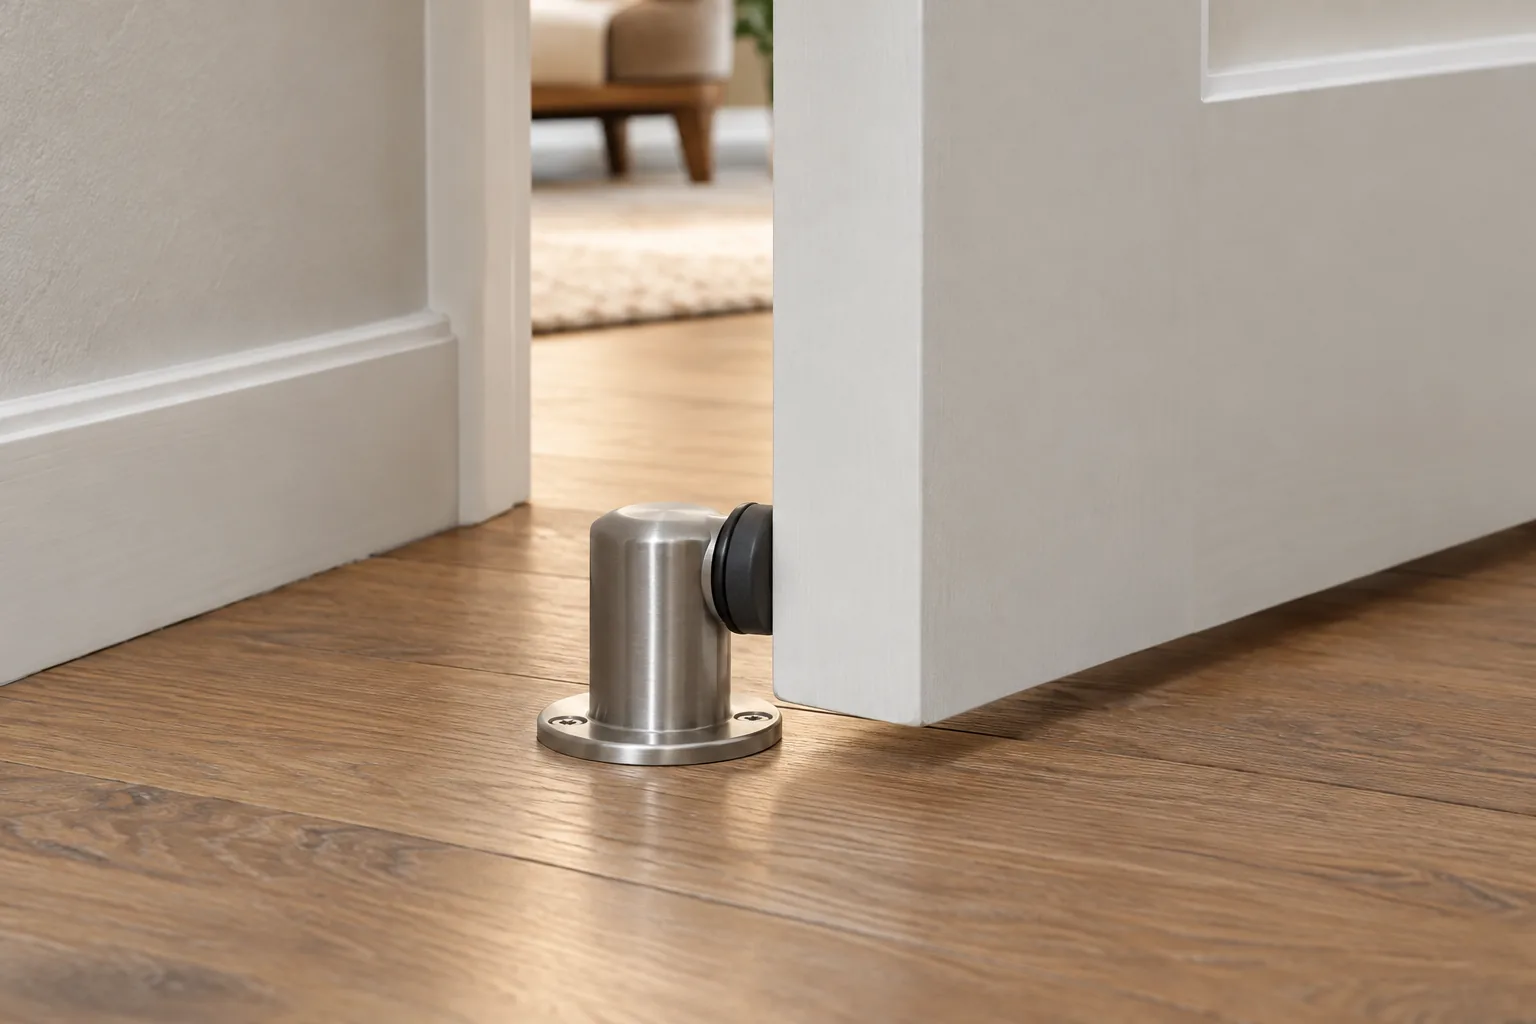
The right floor mounted door stop height is the height that places its bumper in the intended contact area of a particular door, with the actual floor gap and opening path taken into account. Overall body height by itself does not prove fit. A buyer should define the door, floor and stop position; measure the gap at the intended contact point; identify the bumper’s contact band; and review the installed configuration on a representative sample.
This is a product-fit and importer sample-approval guide, not a universal installation instruction. Floor stops vary in body shape, bumper diameter, protrusion, material, finish and fixing kit. Door thickness, bottom undercut, threshold, floor finish and opening angle also vary. A catalog dimension is useful only when it corresponds to the feature that must meet the door.
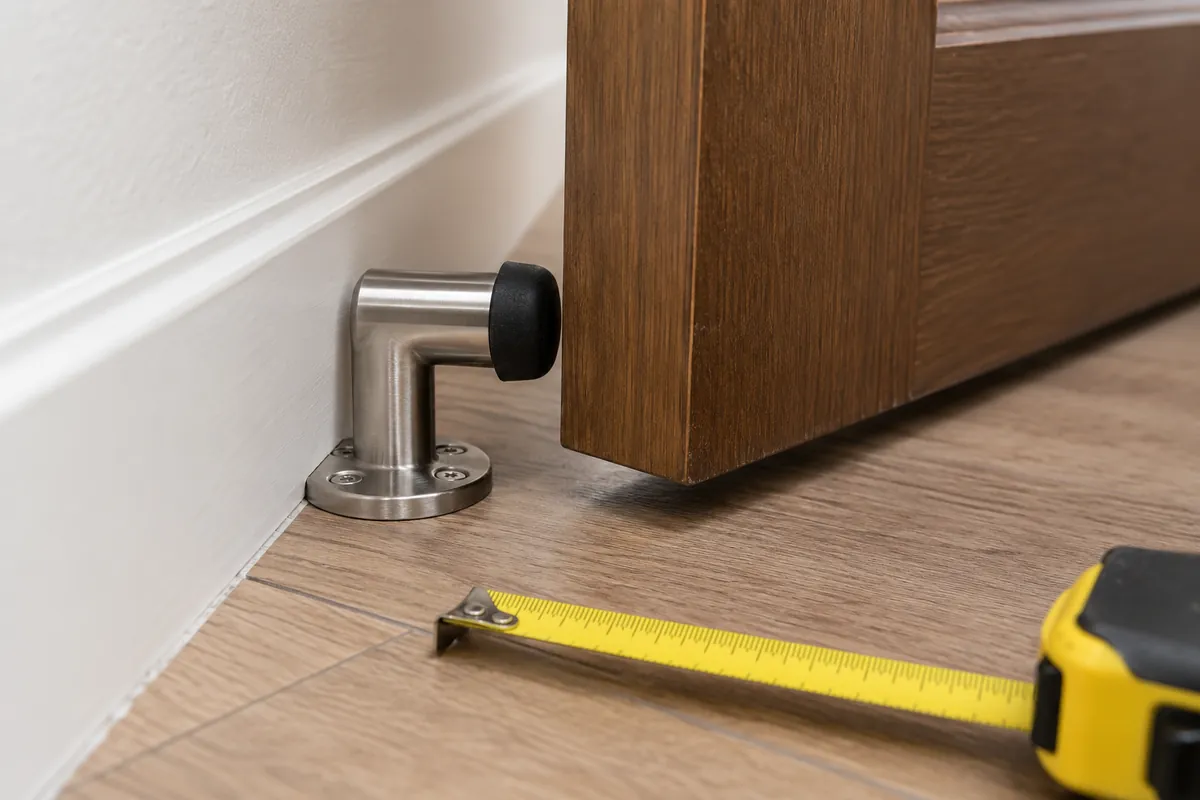
Define the ordinary door and the stop’s job first
Before requesting a quote, describe what the component is expected to do. A simple bumper-style floor stop limits the door’s travel by providing a contact point. A door holder, magnetic catch, closer, or specialized fire-door accessory can have a different mechanism and approval path. Do not use “door stop” as if every product with that name performs the same job.
Record the door type and the location where the stop is intended to contact it. Is the stop for a residential interior door, a cabinet or partition door, or a commercial door? Is the intended contact on the lower face, a rail, or another approved impact surface? Does the door have a sweep, seal, threshold or protective plate near its bottom? If a project involves a rated fire or smoke door, accessibility requirement, or other regulated opening, the responsible design professional must determine suitable hardware and approvals. A generic sample guide cannot establish those requirements.
Then record the operating condition. A stop placed near the handle side may create a different opening envelope from one positioned near a hinge. Furniture, walls, cabinets and nearby traffic can affect where the door should be limited. The buyer’s drawing or sample brief should identify the door swing and proposed stop location rather than leave the factory to infer them from a catalog photo.
A supplier catalog can help form a specification question, but its dimensions and statements apply only to that model. For example, D&D lists its DH-17 floor stop in brass, stainless steel or zamac, and asks buyers to specify their material and finish; that is a model-specific buying detail, not a universal construction or quality rule. The importer should compare the selected model and its fixing details against its own application.
Measure the actual door-to-floor gap at the contact position
The most useful height measurement is taken between the door’s lower edge and the finished floor at the planned stop contact point. Door and floor surfaces are not always perfectly parallel, so a gap at the hinge side may not match the gap near the latch. A threshold, floor transition, tile variation, carpet, door sweep or installation tolerance can change the available clearance.
Measure the assembled door in the intended environment where possible. If that is not possible before sourcing, provide a controlled drawing or a set of representative measurements and clearly label which dimensions are assumed. Do not ask a supplier to select one “standard” body height without showing the door gap and contact geometry.
| Dimension or condition | Where the buyer should define it | Why it matters to approval |
|---|---|---|
| Door undercut or bottom gap | Between the lower door edge and finished floor at the intended stop location | Establishes the vertical space and contact relationship |
| Bumper height and projection | From the installed floor datum to the bumper’s working face | Shows whether the bumper reaches the intended door surface |
| Bumper diameter or contact width | At the actual point that touches the door | Affects the contact band and clearance to door edges or nearby fittings |
| Door thickness and bottom profile | At the lower section that may contact the bumper | Helps confirm where contact occurs and whether trim or a sweep interferes |
| Stop location from hinge and wall | On the plan or installation drawing | Defines the opening arc and nearby clearance |
| Finished floor and fixing assumption | Actual substrate, finish build-up and any threshold | Affects the base position and the suitability of the proposed fixing method |
Use a consistent datum for each measurement. “Stop height” could mean the total body height, the base-to-bumper top, or the working projection from the finished floor. Ask the supplier to label the dimension on the drawing and state whether it is measured before or after the buffer is installed. This prevents a short catalog dimension from being compared with a finished installation measurement that uses a different reference point.
If a project includes several floor finishes, do not assume the same stop will fit all of them. A tile surface, carpet, raised threshold or later-added floor covering can alter the installed elevation. The buyer can define a controlled floor build-up or specify separate variants when the gap differences change the contact relationship. A drawing should make the assumption visible instead of hiding it in a note such as “standard floor.”
Check the contact band and opening envelope
A floor stop can have the correct nominal height and still contact the wrong part of the door. Review the bumper face, diameter, projection and material alongside the door’s bottom rail, bevel, trim, sweep and surface. The preferred contact zone should be identified on the drawing or reference sample. If the stop meets a narrow edge or a decorative surface, the buyer should have the designer or hardware specialist review whether that contact is suitable.
Trace the door’s swing through the intended range. The stop should meet the door where planned without obstructing an adjacent wall, baseboard, cabinet, furniture or traffic path. A useful approval drawing shows the hinge axis, floor-stop center, door edge at the intended limit, and nearby objects. If the stop is being positioned to prevent contact with a wall or a fixture, confirm the protected clearance in the actual layout; do not infer it from the stop’s standalone catalog image.
Sample evaluation should include a repeatable contact check:
- Mark the intended floor location using the approved drawing or installation template.
- Open the representative door slowly through its normal swing and observe where the bumper first contacts it.
- Confirm that contact occurs on the intended area rather than a sweep, edge, trim or unrelated fitting.
- Check whether the bumper face and door surface remain aligned through the contact.
- Observe nearby clearance at the stop location and at the door’s limiting position.
- Record any interference and revise the sample geometry or position before approval.
This is a fit check, not a strength, impact-life or damage-prevention test. If the product needs a defined impact performance, durability or finish requirement, the buyer should state a test method and acceptance criteria with a qualified hardware specialist. A visual contact check cannot establish a service life or prove that the door will never damage a surface.
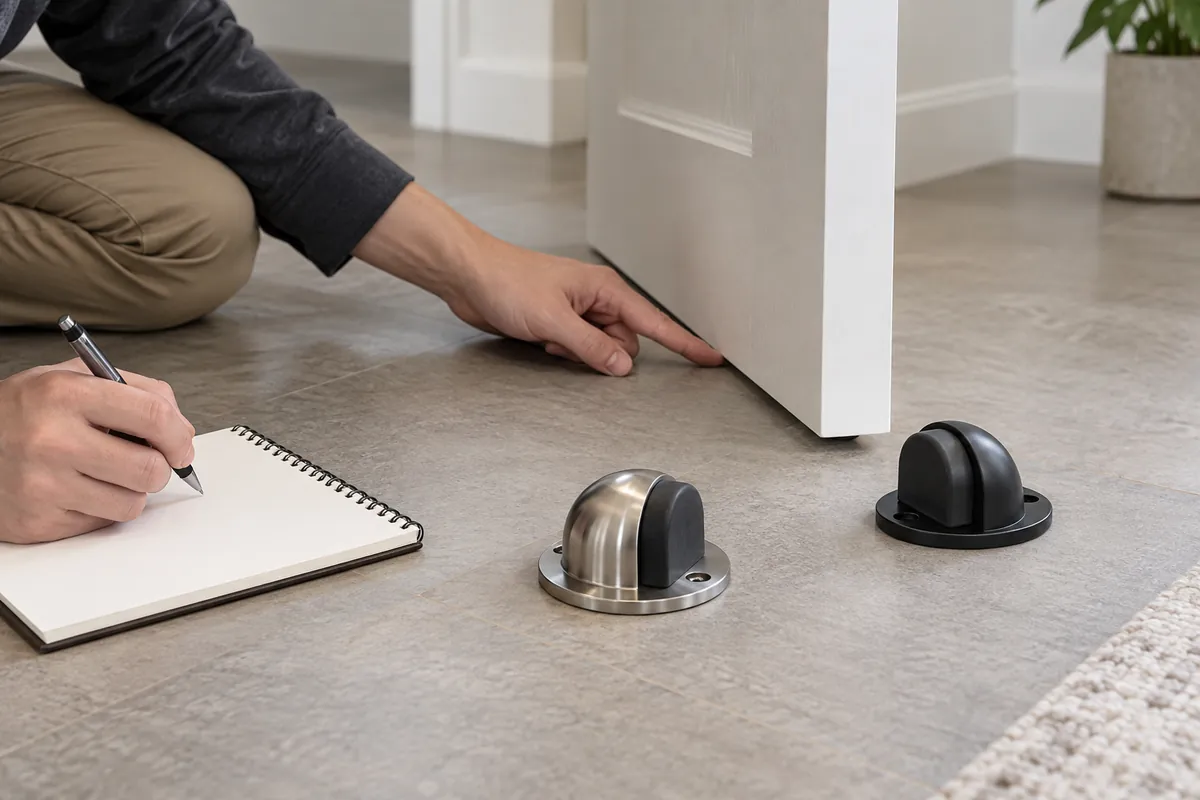
Separate the bumper, body, finish and mounting kit
The exposed bumper may be rubber or another resilient material, while the visible body and base use metal. The product drawing and purchase specification should separate these parts. Identify the body material and finish, bumper material and geometry, fixing method, supplied fasteners, and any caps or washers. A statement such as “stainless stop” might describe only the visible shell or one component; ask the supplier to identify which part each material statement covers.
Also confirm what is included in the retail or project kit. Does the package include a screw, plug, template, cover, adhesive pad or installation instruction? Is the screw intended for a specific substrate? A supplied fastener does not establish suitability for every floor construction. Concrete, wood, tile over a substrate, and other surfaces require different installation considerations. The importer should specify the intended substrate and let the responsible installer or project professional approve the actual fixing method.
Finish selection should be reviewed with the full door-hardware set, not just the stop’s product photo. A polished, brushed or coated finish can look different under other lighting or beside another manufacturer’s lever or hinge. Define the finish name or sample reference and approve a physical comparison when visual coordination matters. If the buyer is sourcing several coordinated pieces, freeze the finish, sample, and allowable appearance variation in the approval file.
A floor stop is not automatically interchangeable with a floor-mounted door holder. A holder may retain the door in an open position, include a release mechanism, or have a different geometry and installation function. If the project brief says “hold open,” confirm the exact function before selecting a bumper stop. The product name in an assortment spreadsheet is not enough to settle what end users need.
Approve a representative sample and freeze the drawing revision
A good sample approval records the setup used to check fit. Include a photo or sketch of the door bottom, gap, intended contact area, finished floor and stop location. The sample should match the proposed body, bumper, finish and mounting kit closely enough that the buyer can judge the relevant interfaces. If the sample uses a temporary fastener or an unfinished surface, note the difference and decide which checks remain open.
The approval record should connect the sample to a controlled product revision. Record the part number, drawing number, sample date, material and finish, buffer supplier or specification, mounting-kit contents, packaging configuration and approving person. If the buyer changes bumper diameter, base height, screw position, finish or kit after approval, route it as a change rather than treating the earlier sample as blanket approval.
For a product family with multiple door-clearance variants, define the differences explicitly. The variants may share a base but use different buffer heights, projections or fasteners. A comparison table can show the validated door-gap range for each sample, but that range must come from actual project measurements and review. Do not publish or promise a universal compatibility range based on one model.
Packaging should also protect the parts the buyer has approved. A projecting bumper, polished surface or small fixing component can be damaged or separated in a pack. Identify the pack quantity, protective material, fastener bag, instruction revision and SKU label. Check that the packaging and labels correspond to the approved variant so a carton does not mix visually similar stops with different heights or fixing kits.
Koitor’s published OEM home-storage hardware information describes documented metal-product sourcing and manufacturing discussions. It does not confirm Koitor’s production of floor door stops, specialized door hardware, cast bodies or anchorage systems. For an adjacent item, discuss the exact drawing, sample and scope through the project contact page before treating it as a manufacturing capability.
Buyer approval checklist for a floor-mounted door stop
Use this short review at RFQ and sample approval:
- Application: ordinary bumper stop, holder or another function? Confirm before quoting.
- Door: type, thickness, lower profile, swing direction and intended contact face.
- Gap: measure at the planned stop location, not only at the hinge or a nominal drawing point.
- Floor: finished build-up, threshold, slope or carpet condition that changes the datum.
- Geometry: base height, bumper height, projection, diameter and exact working face.
- Contact: confirm the bumper meets the selected door area without interference from sweep, trim or edge.
- Location: show hinge axis, stop center, door limit and nearby wall or fixture clearance.
- Mounting: state the substrate assumption, fixing method and exact items supplied in the kit.
- Materials: identify the body and buffer separately; specify finish and sample reference.
- Evidence: retain dimensioned drawing, representative sample photos and the fit-review record.
- Change control: define what changes require renewed review, including buffer, material, finish or fastener.
- Pack-out: check that the approved variant, fixing kit, instructions and labels remain together.
Where a condition cannot yet be verified, record it as a design assumption and assign an owner and deadline. A buyer may need the installer to confirm the substrate, the architect to approve the door hardware, or the supplier to provide a revised sample. An unresolved item should not be converted into an assumed fit statement in a product listing.
Frequently asked questions about floor stop height and sample fit
Does the overall height of a floor stop establish door contact?
No. Overall height may include the base, housing or decorative body. The relevant working dimension is the installed bumper face in relation to the door bottom and the actual floor at the intended contact position. Ask the supplier to label the datum and verify the sample in the representative setup.
Can one floor stop fit every door-to-floor gap?
No. Door gaps, floor build-ups, thresholds and bottom profiles differ. Confirm the intended range from actual dimensions and sample evaluation. Do not infer universal compatibility from a catalog product image or a single sample.
Does the supplied screw prove the stop is suitable for the floor?
No. It identifies part of the kit, not the suitability of the floor substrate or installation. The buyer should state the surface assumption and have the responsible installer or project professional approve the anchor and fixing approach.
Is a bumper-style floor stop the same as a door holder?
No. A stop generally limits travel at a contact point, while a holder can retain a door open or use another mechanism. Confirm the function and product construction before selecting the SKU.
Should the supplier provide a universal minimum or maximum door gap?
Not without a defined product and test setup. Any stated fit range should identify the model, bumper geometry, datum, door profile and floor conditions it covers. The buyer should approve the range against its own application.
Can the sample approval prove long-term impact performance?
A fit approval only confirms the checks actually performed. Impact durability, finish retention, substrate performance and service life require separately defined methods and evidence. Do not infer those outcomes from a door-contact demonstration.
Manufacturer references and project review
Manufacturer catalogs show why a model-specific drawing matters. D&D’s DH-17 floor stop lists brass, stainless steel and zamac options and asks buyers to specify material and finish. Its product page describes that particular model and does not establish a universal dimension, compatibility range or performance rating. The project team should use the source drawing and selected sample for its own application.
For the exact door, floor and fixing conditions, involve the responsible door-hardware or installation professional. For documented metal-product manufacturing scope and a project drawing discussion, see Koitor’s OEM home-storage hardware information or contact the project team.
Record door stop height as a controlled dimension tied to the approved door, floor condition and bumper contact point; do not substitute overall body height. Add the measured door stop height and its reference surfaces to the controlled sample record.
Review the Interface Before Approving the SKU
Share the intended product drawing, representative door-gap measurements and mounting-kit scope so the project team can confirm only the documented manufacturing facts. Site conditions and specialist door-hardware approval remain with the responsible project parties.
OEM / PRIVATE LABEL
Turn this sourcing guide into a product brief
Share your target product, size, finish, order quantity and packaging requirements. Your team receives a practical manufacturability review before quotation.

 English
 Español
 Português
 Français
 Deutsch
 العربية