
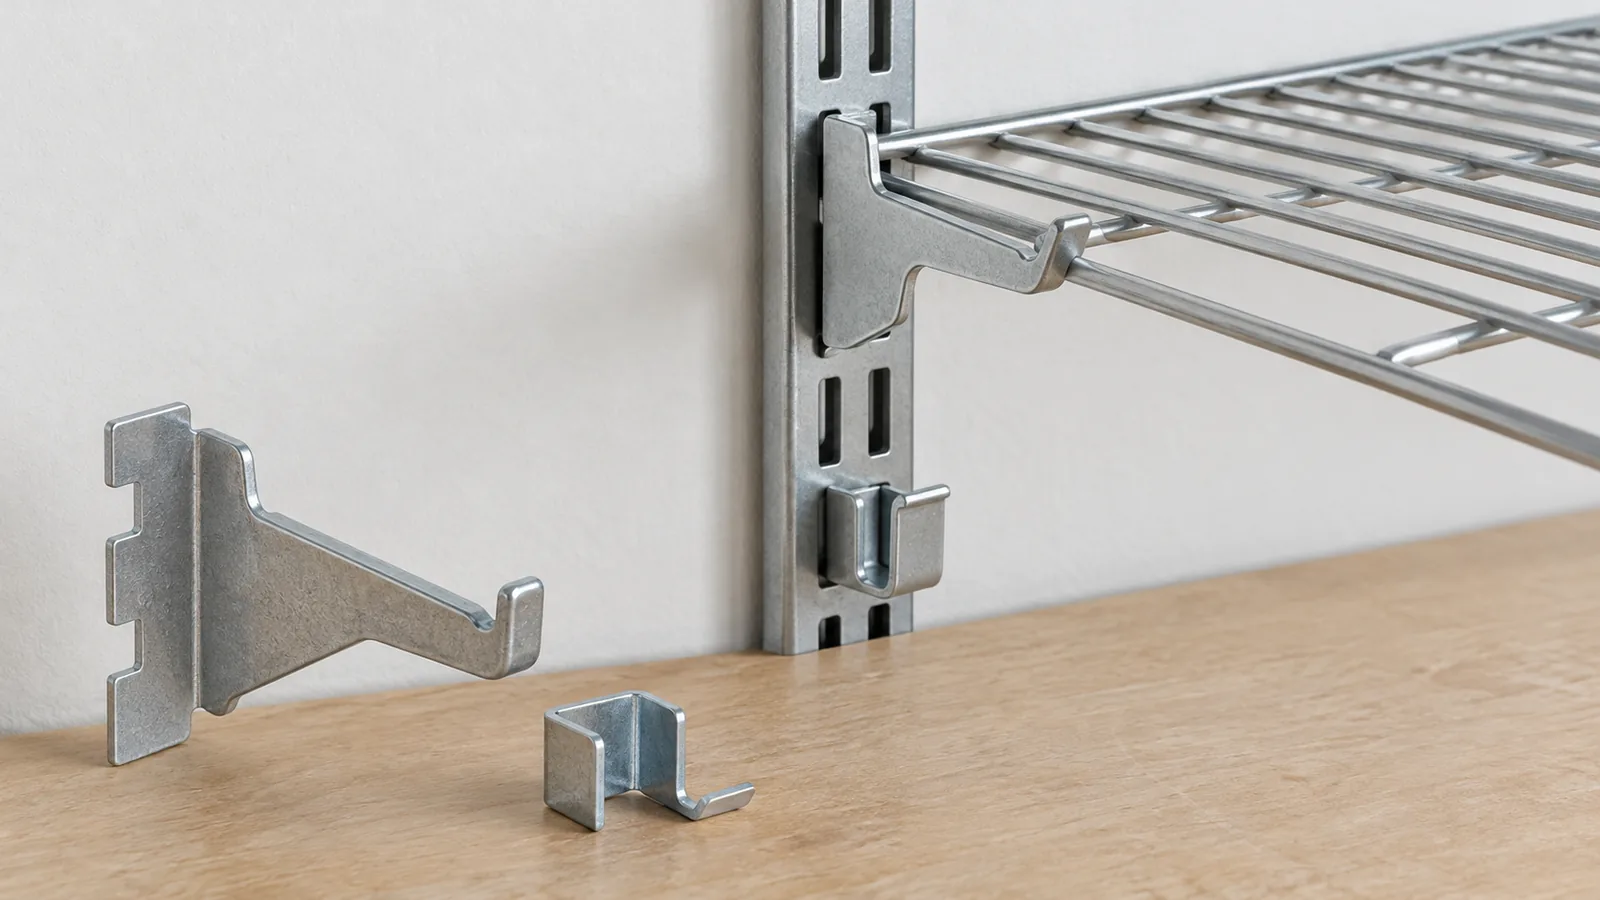
Wire shelf rear wall clip retention depends on the exact shelf profile, wall channel and lower retaining feature supplied for that system. Buyers should confirm how the rear clip locates the shelf and what prevents the front from lifting or disengaging. A wall anchor, rear clip and down clip perform different jobs. Approve the complete installed assembly and its documented wall fixing method; a clip that looks similar is not evidence of cross-brand fit.
This short video shows the product or manufacturing context discussed in this guide.
What do rear clips and down clips each do?
A rear wall clip can locate or support the back portion of a wire shelf against a vertical channel or wall-mounted standard. A separate down clip may retain a lower wire or front section to resist an unintended lift. Names vary by supplier, so ask for the component drawing and installation sequence. Identify the load path from the selected system documentation instead of assuming one small clip performs every support and retention function.
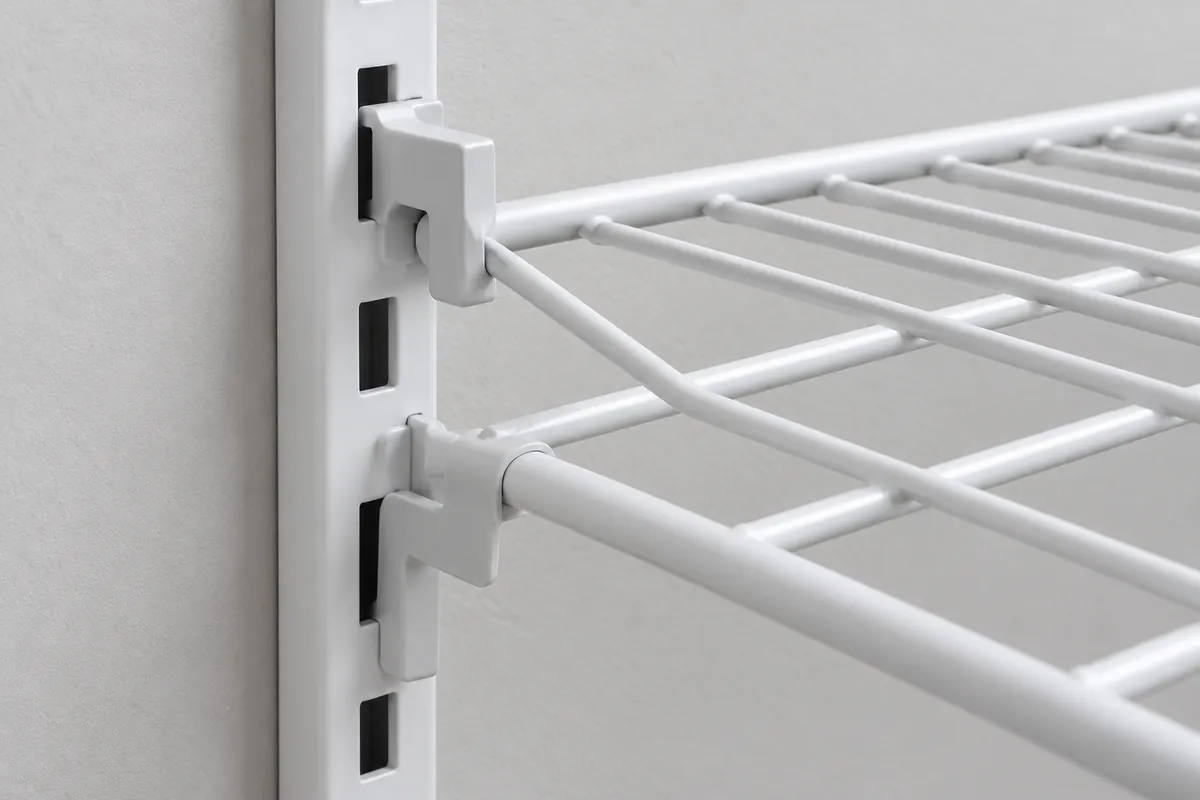
The cited ClosetMaid installation resources show that shelf hardware and wall type must be considered within the manufacturer's product system. This is an example of system-specific compatibility, not a universal specification for another wire shelf. Other profiles may use different clip shapes, channel slots, fastener patterns or retention directions. Keep the source product identity attached to installation details used during a comparison.
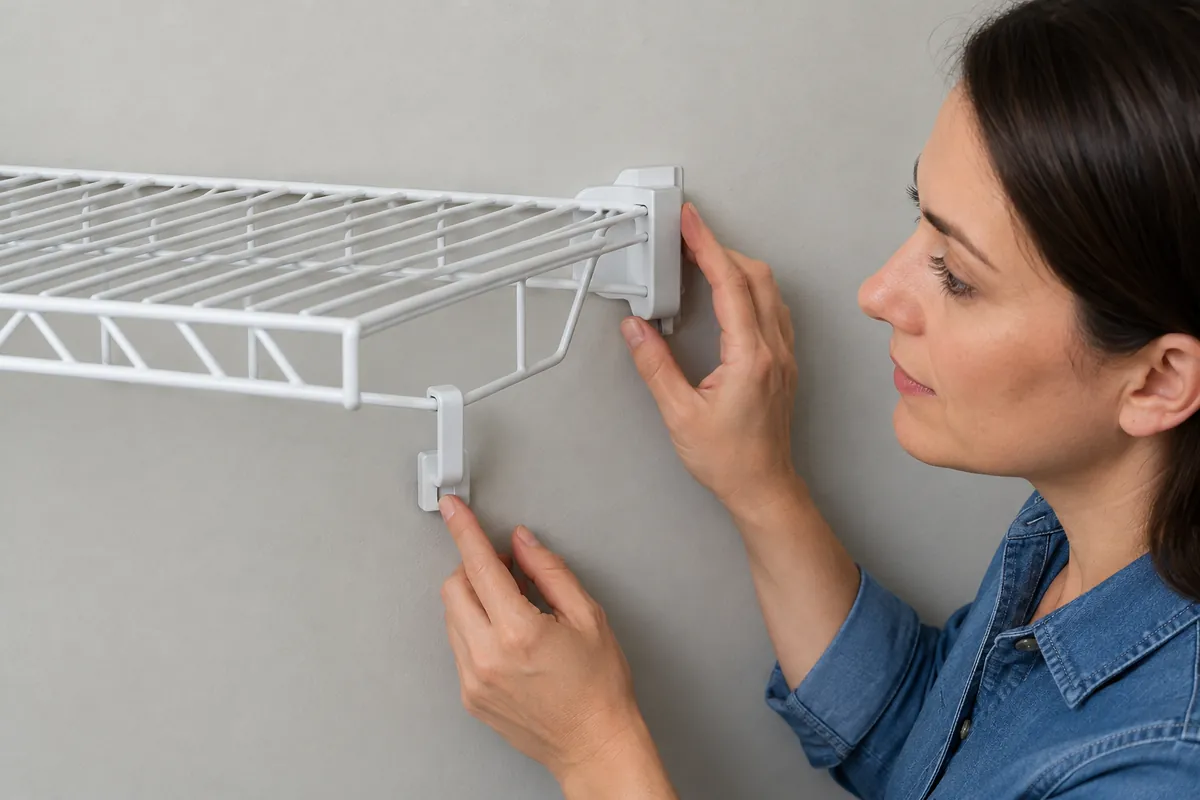
Start the review with the actual shelf wire layout. The rear transverse wire, side rails, front lip and support brackets define the surfaces a clip can capture. A clip may appear seated while missing the intended wire or relying on friction at an unintended point. Ask the supplier to identify which feature the clip engages and how correct installation is visually confirmed.
Separate clip function from wall attachment. The wall anchor and screw transfer forces into the wall; the shelf clips connect the shelf to its support system. A correct clip cannot compensate for an unsuitable anchor or substrate. Name the wall material and the party responsible for selecting fasteners, and state whether the shelf kit includes those parts.
Which shelf, channel and wall inputs belong in the RFQ?
Identify the shelf family, wire profile, finish, orientation and revision. Show the rear wire arrangement and every feature contacted by the clips. Identify the wall channel or standard and its compatible parts according to the system supplier. Buyers should obtain the controlled drawing rather than invent a universal clip measurement. Record whether the rear clip is handed, position-specific or shared across a range.
Document the mounting surface separately from the shelf. State whether the system attaches to masonry, timber, a stud, a partition or another surface, and ask the responsible supplier or installer to specify the anchor method. Do not treat drywall, tile or decorative finish as equivalent structural support. If the project uses an adapter, include it in the approved assembly and name who provides it.
List the clip set as a kit: rear clip, lower down clip, channel, screws, anchors and any bracket or end cap. Confirm whether parts are handed or replaceable. A product image may omit small parts required for retention. For private label, state included quantities and supply an assembly illustration that identifies each clip without suggesting it works with unrelated shelf systems.
Set the operating requirement in ordinary language: the shelf remains seated during intended use and can be removed intentionally by following the supplier instructions. Avoid inventing pull force, load rating or cycle count. If the buyer requires a quantified value, define the substrate, direction of force, test method and acceptance criteria with a qualified system supplier before quotation.
How should buyers compare different retention arrangements?
Compare actual engagement geometry. One clip may capture a rear horizontal wire; another may locate in a vertical channel and rely on a separate lower retainer. A third arrangement may combine support and retention in one bracket. These examples are not interchangeable options. Ask each supplier for an assembly view showing contact points and installation direction; mark which facts are documented and which are only observed on a sample.
The number of clips alone does not determine whether a shelf is securely retained. Placement, wire spacing, clip shape, channel engagement and substrate fixing contribute to the assembled result. An extra clip can be incompatible or obstruct removal if it contacts the wrong wire. Evaluate whether the proposed kit captures the intended shelf features and follows a workable installation sequence.
Compare supplied wall hardware as part of the system. One supplier may include anchors while another sells only shelf clips. Do not compare a complete kit with a shelf-only offer as though they transfer the same installation responsibility. Record shelf, channel, rear clip, down clip, anchors, instructions, substitutions and source for any capacity statement in the same quotation matrix.
Consider replacement and service access. Can a damaged clip be identified and ordered by part number? Can the shelf be removed without deforming the wire? Is the retainer reachable after nearby shelves are installed? These questions help an importer support a product range. Do not promise universal replacement fit based on a generic clip name.
What should the installed sample demonstrate?
Use the quoted shelf, channel, clip set and intended wall or a documented representative fixture. Confirm wall substrate, anchors, fixing positions and channel orientation before attaching the shelf. Record revisions. A tabletop clip demonstration helps explain components but cannot prove installed behavior because the wall fixing and shelf engagement are absent.
Follow the current instructions. Seat the rear clip on the intended wire or support feature, engage the shelf with the channel and install the lower retainer in the specified position. Inspect that each clip captures the intended part and no wire sits outside the receiving surface. Photograph rear and front engagement so reviewers can see the assembled relationship.
Perform only the handling checks agreed for buyer review. Observe whether normal placement, removal or light manual contact causes a clip to lift or shift. Do not call an informal hand check a rated load test. If the shelf moves, describe the direction and contact point, then review the clip, channel, wall fixing and assembly sequence; a symptom alone does not establish the cause.
Record the wall condition, fastener identity, shelf revision, clip numbers, instructions and photos. If another wall type is intended for sale, review that installation separately using its approved fixing method. A sample approved on one substrate cannot automatically represent every wall. State installer responsibilities in packaging and instructions.
How should retention be checked on a production-intent shelf?
Start from the shelf drawing and the exact rear wall clip or support supplied for the project. Record the wire diameter, clip geometry, shelf orientation, wall or standard interface and intended loading arrangement only when these are defined by the responsible product drawings. A wire shelf rear wall clip retention review is not a generic pull test: the observed result depends on the mating profile, installation direction, spacing and the substrate or support system. Ask the supplier to identify the intended seating surfaces and any engagement indicator.
Assemble the sample using the written installation steps, then inspect both ends and the center rather than judging one convenient point. Photograph the clip before and after seating, including a side view that shows whether the shelf rests fully against its support. Note any rocking, local lift, wire interference, incomplete contact or need for unusual force. These are observations for the named sample and setup, not proof of a universal load rating or lifetime.
If a retention test is required, agree on the direction, fixture, loading rate, duration, sample count and acceptance criteria with the product owner. A vertical load may not reveal a rearward or upward disengagement mode. Conversely, an improvised pull can create a failure mode that does not occur in intended use. Keep test evidence tied to the drawing revision and do not publish a numeric capability unless a qualified procedure and result support it.
When the sample does not seat, verify that the clip model, left-right orientation and shelf span match the approved parts list before changing the wire geometry. Inspect the support profile, clip opening, end spacing and any coating or protective pad that could affect fit. A discrepancy should be assigned to the supplier controlling the changed feature, with corrective action reviewed by all affected parties. This avoids masking the mismatch by bending a finished production part.
What records reduce repeat-order and installation risk?
Keep the approved shelf, clip and support identities in one controlled record. Include supplier names, part numbers, drawing revisions, installation instructions and dated sample photographs. If the shelf and clip come from different vendors, name who owns the interface and who approves substitutions. A later clip that looks similar can have a different opening or seating profile, so visual resemblance should not be treated as compatibility evidence.
For incoming inspection, define which features can be checked reliably: overall shelf width, end geometry, wire spacing, clip identity and visible seating condition may be relevant, while hidden interface dimensions may need a gauge or supplier report. State the measurement datum and sampling plan. Inspection should verify the agreed characteristics; it cannot replace correct design ownership or demonstrate performance beyond the inspected setup.
Include packaging and transport in the handoff where clips are removable. Keep small parts identified and protected from deformation or loss, and show the installation orientation in the package insert. A missing or distorted clip can be mistaken for a shelf design defect after distribution. If parts are preassembled, verify that packing does not push the shelf into a position that disengages or bends the retention feature.
A useful purchase specification distinguishes the shelf's material and finish from the clip's material, finish and attachment method. State what is included in the kit, which support it mates with and what sample has been approved. The phrase wire shelf rear wall clip retention should lead to those concrete project records—not a blanket promise that any clip will hold any shelf.
How should an approved clip interface be released?
For wire shelf rear wall clip retention, release the shelf and clip as a named pair, with the support profile and installation direction shown. Record the approved sample, drawing revisions and any defined inspection or test criteria. A production change to the clip opening, shelf end geometry or support profile should trigger review by the interface owner. The evidence should state exactly which sample and setup were checked, without implying that unrelated clip systems are covered.
What should the incoming record contain?
Keep clip identity, shelf revision, support profile, lot and inspection result together. If the clip can be installed in more than one orientation, illustrate the approved one and identify any visual feature that confirms seating. A receiving check can establish that the specified kit and visible condition match the purchase record; it cannot establish long-term retention or performance on a different wall or rail. Escalate any substituted part before assembly rather than treating similar appearance as approval.
Buyer comparison table
| Interface | Buyer record | Evidence |
|---|---|---|
| Rear shelf profile | Wire layout and revision | Supplier drawing and close-up |
| Rear clip | Part identity and contact point | System installation guide |
| Lower retainer | Position and engagement direction | Installed sample observation |
| Wall fixing | Substrate and anchor responsibility | Supplier or installer guidance |
| Kit contents | Clips, channel and fasteners | Approved BOM and pack list |
Lista de verificação do comprador
- Identify shelf family and rear wire profile
- Match rear and down clips to the exact shelf
- Specify wall substrate and anchor responsibility
- Install the complete system per instructions
- Photograph both retention points
- Freeze revisions and replacement parts
For a project-specific detail, consult the manufacturer or technical reference. Its information applies to the stated system and conditions.
See related OEM sourcing information or contacte a Koitor for a metal-product drawing discussion.
Perguntas frequentes
Does the rear clip anchor the shelf to every wall type?
No. Clip-to-shelf and wall-to-channel are separate interfaces; use substrate-specific fixing guidance.
Can a similar clip be substituted?
Only after the system supplier confirms fit for the exact shelf and channel.
Does a seated rear clip mean the shelf cannot lift?
Not necessarily. Check the separate retainer and full assembly according to instructions.
Can a tabletop fit prove installation?
No. Review the wall substrate, channel fixing and installed assembly together.
Discuss a project-specific sourcing question
Koitor Hardware is a family-owned custom metal hardware factory focused on bathroom and home storage products. Share the product drawing or physical sample, the purchased fitting identity, the intended application and the buyer decision that still needs evidence. Specialist drawer runners, closet shelf fittings and coating systems must be confirmed by their responsible suppliers.
OEM / MARCA PRÓPRIA
Transforme este guia de fornecimento num resumo do produto
Indique o produto pretendido, as dimensões, o acabamento, a quantidade a encomendar e os requisitos de embalagem. A sua equipa receberá uma análise prática da viabilidade de fabrico antes da apresentação do orçamento.


 English
 Español
 Português
 Français
 Deutsch
 العربية