
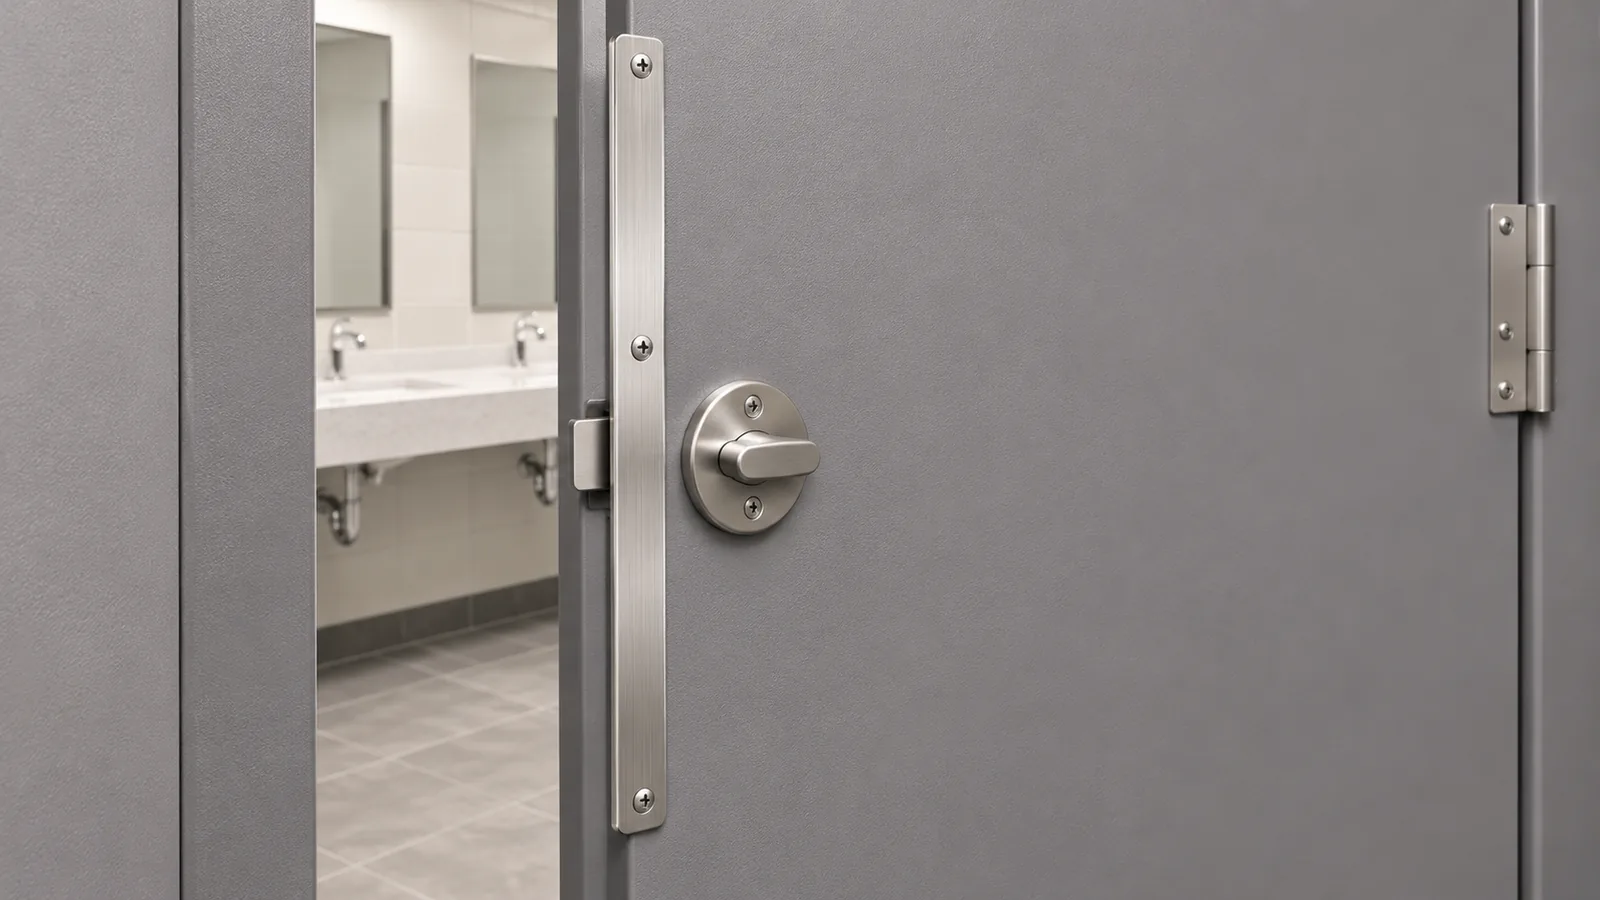
Toilet partition privacy strip sourcing looks like a narrow replacement decision, but buyers need to confirm more than the visible width of a gap. The strip must suit a named partition arrangement, the door must travel without interference, the attachment face must match the maker’s instructions, and the proposed part must address the sightline the project actually wants to reduce. A product photo or nominal length cannot establish those conditions.
This guide is for commercial washroom distributors, project buyers, partition contractors, maintenance teams and importers assembling a retrofit assortment. It explains how to document the interface and compare retrofit routes. It does not promise that a strip creates complete privacy, fits every partition, meets a code, or uses an adhesive compatible with every finish. The original partition maker or responsible project professional should confirm system-specific requirements.
Toilet partition privacy strip: treat the gap as a system interface
A useful purchase decision begins with the installed partition system, not a generic strip dimension. Record which side has the sightline, whether it is the latch or hinge side, the door swing and hand, the partition material and finish, the available attachment face, and the position of hinges, latch parts, fasteners and stops. Then compare a maker-approved retrofit strip with an integrated privacy design or a replacement door/pilaster option.
A strip may reduce a particular direct sightline when its shape, placement and substrate match the system instructions. That is a conditional statement. It does not establish privacy from every viewing angle, complete closure, accessibility, safety, cleanability or long-term attachment. Those outcomes depend on the partition geometry, installation, use, cleaning and project requirements. Buyers should describe the objective precisely: reduce a view through a specific latch-side gap, cover a defined opening, or upgrade the complete partition architecture.
Start the RFQ with a current system identifier where available. Include the maker, series, material, hardware family, finish, installation age if known, and clear photographs of both faces and the relevant edge. Ask the customer or partition maker to identify any previous modifications. A door may have been replaced without replacing its original pilaster or hinges, so visually similar stalls in the same building may not share a configuration.
The strongest first response from a supplier is not an unconditional “universal fit.” It is a request for the missing interface information, followed by a documented candidate part and any limitations. If a supplier cannot identify the intended system or provide an installation document for the proposed part, hold the order rather than treating a photograph as approval.
For a distributor, the practical outcome is a traceable match between an installed condition and a replacement SKU. Keep the source of the system information, revision of the drawing or instructions, photographs, selected side and disposition together. This reduces the chance that a stocked strip is sold as a universal fix when its profile or fastening method addresses only one subset of partitions.
Map the sightline, door movement and attachment face
Describe the gap as a measured feature of an installed assembly. Identify the door, adjacent pilaster, latch or hinge edge, viewed side, and direction of travel. Measure the opening at more than one height if the gap varies, and note whether the measurement was taken with the door at rest or moving. A single measurement may hide a tapered opening, a misaligned door, a protruding fastener or a local interference. The project’s partition provider should confirm how its instructions define the relevant datum.
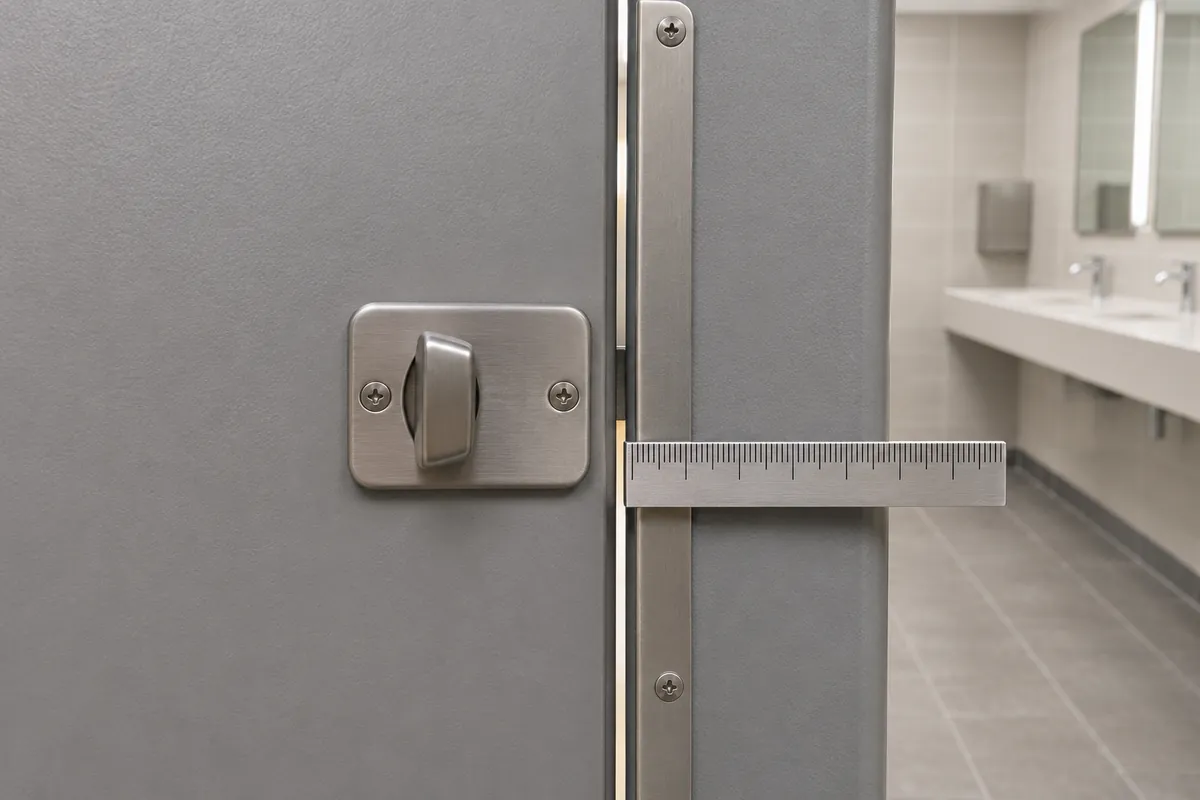
Photographs are most useful when they show context and scale. Take one image of the full stall, one of the latch-side relationship, and one of the hinge-side relationship. Include a ruler or a measurement reference without pressing it into a moving mechanism. Record whether the door is closed, partly open or fully open. Avoid identifying the condition only as “left” or “right”; those terms can change with the viewing position. Use “latch side viewed from corridor,” “hinge side viewed from interior,” or a marked plan view.
Separate the static gap from the moving envelope. A strip can appear to cover an opening when the door is shut yet collide with the pilaster, latch, hinge, stop or neighboring panel during travel. Record the sweep path and the part’s projection from the mounting face. Do not infer safe clearance from a two-dimensional product image. The maker’s fit guidance and a representative sample review are stronger evidence than visual guesswork.
Inspect the available mounting surface without removing hardware or changing the partition. Note whether it is flat, curved, textured, coated, damaged, contaminated or interrupted by a screw head. If the proposal uses an adhesive, identify the finish and request the named maker’s surface-preparation instructions. A solvent recommended for one substrate may damage another finish; do not copy a cleaning method from a generic online instruction into a project work order.
Check whether the gap is uniform across a door’s usable height. A strip that is long enough may still fail to align with the relevant sightline or may overlap the wrong areas. Conversely, a short local shield may address the buyer’s objective better than a full-height profile. Ask the partition provider which length, termination and placement are intended for the model. Do not shorten, drill or bend a strip unless the maker permits that modification.
Document adjacent hardware as part of the fit record. Latches, hinges, fasteners, coat hooks, stops, bumper pads and edge caps may occupy the same envelope. Make a simple annotated sketch with dimensions and orientation labels. The sketch should distinguish measured values, customer-provided nominal values, and values taken from a maker’s drawing. Label assumptions so they do not become false specifications during quotation or reorder.
Compare retrofit strips with integrated and replacement solutions
A retrofit strip is one possible response to a defined sightline. It may be a flat or offset profile, and the attachment may be adhesive, mechanical or specific to a partition maker’s hardware arrangement. The selected profile should correspond to the opening and available face. A strip designed for one side may not be suitable on the other because hinges, fasteners, door swing and adjacent panel position differ.
Manufacturer literature demonstrates that attachment details are product-specific. Prime-Line instructions distinguish latch-side and hinge-side arrangements and call attention to surface preparation and interference around existing hardware. Bradley documentation describes different strip profiles and attachment details. These examples show why buyers should request the current instructions for the exact part number rather than infer a method from a generic product category. They do not prove that either product fits another maker’s partition.
An integrated overlap or privacy-oriented door/pilaster design is a different route. The partition system may achieve its geometry through door shape, pilaster depth, hinge position or a purpose-designed component. Such a design should be reviewed as a complete system, not as a loose accessory substitution. If the project needs a larger architectural change or if the existing panel has insufficient attachment area, replacement of a door or related component may be more appropriate than adding a strip.
Use the following decision sequence. First ask whether the identified sightline is within the accessory maker’s documented application. If yes, confirm the exact side, profile, length and attachment. If no, request a maker-approved alternative. If the requested objective cannot be met by a listed retrofit part, escalate to the partition manufacturer or qualified project professional to review an integrated solution or replacement components. Stop where the system identity or compatibility remains uncertain.
Do not compare options only by unit price. Include the cost and responsibility for system identification, any required preparation, access to the compartment, maker confirmation, replacement parts, disruption, future service and replenishment. These are project-specific inputs rather than universal savings claims. A low-cost profile may create extra handling if it is difficult to stock correctly or if multiple versions are needed for different latch and hinge configurations.
A buyer can also distinguish product scope from installation scope. The supplier may provide a strip and its published instructions; the contractor or facility team may be responsible for the site review and installation; the partition maker may need to confirm system fit. Put that division in the purchase documents. Avoid language that implies the part is an accessibility upgrade, code solution, security measure or complete privacy guarantee unless the competent authority and supporting product documentation establish the specific claim.
For a catalog, define which system or geometry a SKU supports and what information is needed to select it. A useful listing can state that buyer must confirm manufacturer/series, side, door hand, gap range in the maker’s stated datum, finish, attachment route and clearances. If a part is limited to a named system or arrangement, make that limitation visible in the product record and quotation. This is more useful than labeling a part “universal” without evidence.
Verify profile, length and clearances before ordering
The strip’s visible profile should be compared with a section view or a representative physical sample. Record total height, projection, return or offset, edge treatment and relevant mounting dimensions when these are available from the maker. Avoid inventing a fit tolerance from a marketing photograph. If a drawing leaves a dimension unspecified, ask the system owner which feature controls selection and whether a sample comparison is required.
Length must be considered with the actual opening. Check the documented part length, allowed termination, top and bottom clearances, and whether a single profile covers the intended region. A long strip is not automatically better: it can meet a floor, headrail, hinge, stop or adjacent fitting. A short piece is not automatically inadequate if the objective concerns a local sightline and the maker approves it. Record each endpoint and the project’s acceptance criterion.
Door movement should be checked across its intended travel according to the partition maker’s procedure. Buyers who are not qualified to assess the installed system should not perform adjustments or remove components. Instead, request a maker or contractor review. The procurement record should state whether the check was completed by the responsible party, what configuration was reviewed, and whether the strip is approved for that configuration. A static photograph cannot establish the full motion envelope.
Consider both faces and the viewing direction. A profile may block a straight-on view but leave an angled path, an upper or lower opening, or a gap at the opposite edge. If the project’s privacy criterion is not defined, ask the owner to clarify what should be obscured, from which locations and under what configuration. Do not promise a visual outcome that has not been reviewed from relevant viewpoints.
Fasteners can be a hidden conflict. A mechanical strip may overlap a hinge screw, latch fastener or other head. An adhesive strip may cover a service point or prevent later access. Record these locations on the sketch and ask the manufacturer to review them. Do not move a partition fastener, substitute a screw or cover service hardware without approval. The relationship among panel construction, fastener and hardware is a system question.
The same review should consider routine cleaning and maintenance. Ask the partition and accessory makers which cleaning agents and methods are appropriate for the installed finish and strip material. Do not claim that a narrow profile is hygienic, antimicrobial, easy to clean or resistant to a cleaning chemical based only on its shape or material appearance. If a buyer has a documented cleaning protocol, provide it to the maker before selection and retain the answer.
Finish matching is another procurement issue. A metal strip may differ visually from a partition’s coated surface even if the dimensions are suitable. Specify whether finish similarity, color coordination, gloss or substrate compatibility is required. Ask for a finish sample or documented color reference where the project depends on appearance. Do not assume that “stainless look,” “brushed” or “silver” names a precise alloy, coating or reflectance.
Confirm attachment and surface preparation with the system owner
The attachment route is a controlling feature, not a minor installation detail. For adhesive attachment, identify the exact adhesive or supplied tape, the mounting surface, required environment, preparation method, pressure or dwell instructions if specified, and any limitations. For mechanical attachment, identify the fastener pattern, substrate, permitted hole locations and whether the installation changes the original partition. Use the maker’s instructions for the exact part and model.
Do not translate a generic phrase such as “clean surface” into a specific solvent recommendation. Prime-Line’s documentation, for example, includes preparation details for its own product and substrate context. The buyer should verify those directions against the partition finish and instructions. A cleaning chemical may be unsuitable for some coatings or materials. If the surfaces differ from the maker’s application, pause and obtain written guidance rather than treating the accessory as approved.
Surface condition matters. Dust, water, wax, cleaner residue, texture, curvature, damage and previous adhesive can change the contact area or create an uneven mounting face. The buyer should document these conditions and request a disposition. A sample trial may be useful when the maker approves it, but it does not establish performance over every site condition or service period. Define what will be observed, who will observe it and how the result will be recorded.
For mechanical attachment, check whether the proposed fastener will enter the panel in the intended location and whether the manufacturer authorizes drilling. Existing partitions can contain different cores and edge constructions. A visible face may not reveal the internal material or reinforcement. Do not infer that a screw length or pilot hole is safe from panel thickness alone. A qualified partition provider must confirm the arrangement.
Protect the original finish during the review. A sample trial should use an approved location and method; it should not create an uncontrolled permanent mark or compromise a warranty. If the part is removable, establish how removal is managed and whether residue, finish damage or replacement materials are covered by the maker’s documentation. Those are questions for the relevant product supplier and project owner, not assumptions that a buyer can resolve from the profile drawing.
Record cleaning and maintenance requirements alongside the selected SKU. If the strip and partition use different materials or finishes, the owner should confirm a compatible cleaning regime. Include the strip in the facility’s product schedule so staff can identify it later. Do not claim a particular service life or adhesion duration unless a product-specific test or maker statement supports the exact conditions. Even a stated test result applies only to its method and environment.
Run a controlled sample review and approval
A sample review should answer a defined question. Does the part match the specified profile? Does it cover the intended sightline in the approved configuration? Does it interfere with adjacent hardware or movement? Is the finish acceptable? Does the attachment method match maker instructions and the identified substrate? If these questions are mixed together, the team may approve appearance while leaving compatibility unresolved.
Use a sample tied to a part number and revision. Keep the packaging, instructions and supplier response with the sample. Record the partition manufacturer and series if known, the side examined, the measured opening, the position of hardware, the attachment face, the finish reference and the reviewer. Mark the decision as approved, conditionally accepted, rejected or held for clarification. Avoid an informal “looks fine” note with no context.
A mock-up can reveal geometry that a drawing does not make obvious. The sample should be placed only by an authorized party and in a manner consistent with the maker’s directions. Observe the door’s intended motion and clearances under the system owner’s procedure. Do not conduct improvised pull, impact, chemical, privacy or durability tests. If such evidence is needed, ask the manufacturer for an applicable method and have the responsible reviewer decide whether it matches the project.
Define the visual review positions before judging the result. For example, the project may want to assess a direct view from a corridor side, a relevant angle, and the closed-door position. The sample record should state what was observed, not claim “complete privacy” from one angle. If the owner expects a standard or design criterion, document its source and ask the project professional whether the sample meets it.
For a distributor qualification sample, repeatability matters. Keep the approved sample labeled and prevent its accidental substitution with a different profile or finish. When a new order arrives, compare the delivered SKU and documented revision with the approved reference. If the maker changes the profile, attachment or material, request a change notice and decide whether a new review is required. The sample is a controlled reference, not a universal guarantee about future lots.
After the first site trial, collect clear feedback from the project owner. Record whether the strip was approved for that system, whether installation followed the current instructions, and whether an issue was observed. Do not generalize a single site outcome to all partitions. It can, however, improve the buyer’s internal selection notes and help prevent the same missing-information problem on a future quote.

Build a complete RFQ and distributor selection record
A complete request helps the supplier identify the right product and makes quotes comparable. Include the partition maker and series, compartment or door identification, construction and finish if known, gap location, door hand and travel, measured opening at documented points, required length, available face, adjacent hardware and photographs. Identify which values come from field measurement and which come from a manufacturer drawing.
Ask the supplier to respond with the proposed part number and revision, a dimensioned drawing, compatible system statement, installation document, attachment details, finish information, package quantity, included fasteners and known limitations. If the supplier cannot confirm the exact partition, ask what evidence is needed from the original maker. A quote should make assumptions visible, including whether installation labor, preparation materials or separate hardware are included.
| RFQ field | Buyer record | Why it matters |
|---|---|---|
| Partition identity | Maker, series, model and known revision | Prevents a generic appearance match from being mistaken for system fit |
| Gap location | Latch side or hinge side, viewed face and door hand | Establishes which profile and hardware envelope need review |
| Opening | Measurements and the door position when measured | Shows whether the condition is uniform and comparable to maker data |
| Movement | Swing direction, travel and nearby stops or fittings | Identifies potential collision or clearance issues |
| Mounting face | Material/finish if known, flatness, texture and existing damage | Helps the maker confirm attachment instructions and surface preparation |
| Proposed part | Part number, profile, length, finish and revision | Creates a controlled selection record |
| Evidence | Current drawing, instructions and maker response | Preserves the basis for approval and reorder |
| Scope | Strip, fasteners, preparation items, installation and service responsibility | Clarifies what the supplier is quoting and who confirms the site |
For a replacement or repeat purchase, do not rely only on the prior invoice. Verify that the installed partition and strip still match the earlier record. A facility may have had a door, latch or panel replaced since the original purchase. Ask whether the current maker has superseded the SKU or issued updated directions. Retain the response with the latest order.
Use a simple escalation rule: hold when the system cannot be identified, the manufacturer has not confirmed the fit, the proposed attachment conflicts with the finish or hardware, the door motion is uncertain, or the project requires a performance or compliance claim that has not been substantiated. The hold should name the unresolved input and the person or organization expected to resolve it. This makes the next action concrete instead of leaving the quote in an ambiguous review state.
The final product record should be concise enough for sales, customer service and purchasing to use. Include approved systems or configuration, exclusions, required customer measurements, photo angles, documentation to retain and change triggers. If the part applies only to one side or one family, say so prominently. Clear records reduce mistaken substitutions while keeping the buyer’s claims within the supplier’s evidence.
Frequently asked questions
Is a toilet partition privacy strip universal?
No universal fit should be assumed. Profiles, door movement, hardware and attachment surfaces vary. Confirm the proposed part against the identified partition system and current maker instructions.
Does a privacy strip guarantee complete visual privacy?
The product category alone cannot establish that. The result depends on geometry and viewing direction. Define the project’s sightline objective and ask the partition maker or project professional to review the configuration.
Can an adhesive strip be installed on any partition finish?
No. The correct preparation and compatibility depend on the exact adhesive, surface and finish. Use the product maker’s current directions and obtain approval for a different substrate or coating.
Can a buyer trim a strip to fit?
Only if the part maker permits the modification and defines how to finish the end. Cutting can change fit, appearance or serviceability; do not assume it is an acceptable adjustment.
When should a project consider replacing the door or partition component?
When the system cannot be identified, no approved strip matches the geometry, moving clearance is inadequate, the substrate is unsuitable, or the requested outcome exceeds a documented retrofit’s scope. The partition maker should advise on replacement options.
Technical references
- Prime-Line privacy cover instructions — product-specific layouts and preparation guidance.
- Bradley No-Site strip instructions — maker-specific profile and attachment details.
- ASI privacy-oriented partition system — example of integrated partition design.
- Bobrick privacy partition systems — maker-specific system options.
- Koitor OEM manufacturing information — background on verified metal-hardware sourcing scope.
For related projects involving metal components, use Koitor’s manufacturing information to review the documented scope. The partition system owner should confirm product compatibility and any project-specific requirements.
Discuss a Metal Hardware Specification
Share a controlled drawing, finish reference and sample requirements for a project review. The partition manufacturer or responsible project professional should confirm toilet partition privacy strip compatibility and installation scope.
OEM / PRIVATE LABEL
Turn this sourcing guide into a product brief
Share your target product, size, finish, order quantity and packaging requirements. Your team receives a practical manufacturability review before quotation.


 English
 Español
 Português
 Français
 Deutsch
 العربية