
When comparing Phillips vs Pozidriv screws for a hardware kit, specify the drive family and size rather than relying on the phrase “cross-head.” The recess shape and matching driver are designed differently; a familiar-looking cross recess does not establish that one bit is the intended fit for the other. Importers should verify the actual screw, installation tool, assembly sample, and printed instructions together before releasing a mounting kit. Phillips vs Pozidriv screws should be identified in the BOM and verified with the matching driver. A Phillips vs Pozidriv screws decision should remain consistent across the screw, tool, and instructions.
How do Phillips and Pozidriv screws differ?
Both drive families use a cross-shaped recess, which is why buyers and assemblers can confuse them. Phillips drives have a primary cross recess; Pozidriv adds additional smaller ribs between the main arms, creating a different interface for the matching driver. A side-by-side inspection may show the difference, but a small or coated recess can make visual identification difficult. Use a clear specification and supplier confirmation rather than judging only from a low-resolution product image.
The interface includes both the recess in the screw head and the geometry of the driver bit. A driver that appears to enter the recess may still contact the wrong surfaces or have excess movement. The resulting fit can make assembly less controlled, particularly where the installer must apply torque in a constrained location or where a cosmetic head should remain undamaged. Do not interpret a bit’s ability to turn a screw once as proof that the interface is correct.
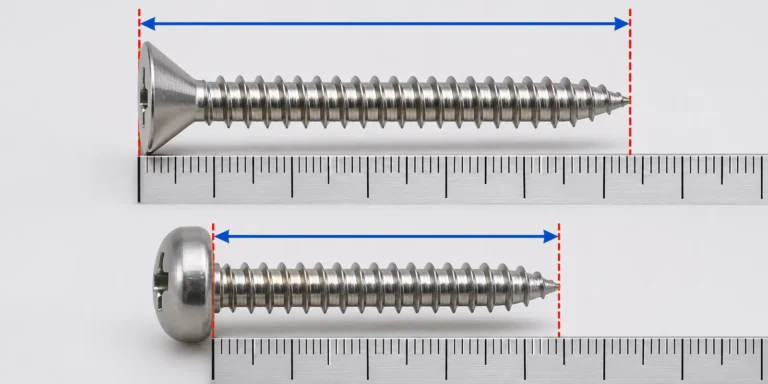
The driver type is only one part of the fastener specification. The buyer also needs the screw size, head style, thread, length, material or finish, and intended mating material. A correct Pozidriv bit does not make an incorrect screw length suitable. A Phillips recess does not define the screw’s thread or corrosion behavior. Keep those fields separate in the drawing, bill of materials, and pack-out list.
A useful reference is the technical identification guidance from fastener-tool manufacturer Wiha, which distinguishes drive profiles and describes their intended bit matching. The page supports the interface distinction, not a universal claim that one drive family is better for every assembly or that any specific screw is suitable for Koitor products. See Wiha’s screw type guide.
For buyers, the practical question is not simply “Which drive is stronger?” It is “Which drive is specified for this product, which bit will the installer have, and how will the kit and instructions preserve that match?” The answer should be established with the supplier and product owner. If a design is still open, the responsible engineer can compare realistic alternatives using the application, supplied tool, assembly access, and available standard components.
| Buyer field | What to specify | Why it matters |
|---|---|---|
| Drive family | Phillips or Pozidriv | Prevents ambiguous “cross-head” descriptions |
| Drive size | Exact size or approved supplier reference | Matching family alone does not identify the bit size |
| Screw geometry | Head style, diameter, length, thread, point | Determines fit and installation in the mating part |
| Material and finish | Buyer-approved requirement | A drive label does not establish corrosion or appearance |
| Tooling | Supplied or user-provided bit and driver | Connects the fastener to the actual installation process |
| Pack contents | Quantity and drive per kit | Prevents mixed or incomplete screw bags |
| Instructions | Matching drive icon or text | Reduces the chance of using an incorrect tool |
| Sample approval | Actual screw and mating product | Confirms practical fit before release |


How should an importer specify a screw drive in an RFQ?
Write the drive family in a field that is visible to purchasing, engineering, the fastener supplier, the kit packer, and the artwork team. Avoid using only “cross recess,” “cross-point,” or an informal photo. If the product has several screws with different drives, list each as a separate bill-of-material line. A kit drawing should identify drive family and size beside the screw designation or in a controlled fastener schedule.
Use the exact standard or supplier reference when the project relies on one. If the buyer’s source file uses a recognized designation, preserve it and ask the supplier to confirm it can provide the specified item. Do not invent a standard number or assume every supplier uses the same shorthand. If a supplier proposes an equivalent, require the equivalence to identify the recess family, size, screw geometry, and the actual sample for approval.
The RFQ should distinguish the component from the tool. State whether the supplier must provide a screwdriver or bit, or whether the end user supplies one. If a tool is included, define its type, size, quantity, and pack location. A hardware set can be technically correct but confusing if the instructions call for a bit not supplied and the product packaging does not identify the required drive.
Ask the supplier to declare assumptions. A legacy drawing may show a cross recess but omit whether it is Phillips or Pozidriv. If the supplier chooses a readily available item, that choice should be proposed and approved, not silently made. The buyer’s approval should update the drawing or bill of materials so a future reorder does not revert to an ambiguous description.
When several manufacturers provide components, identify who is responsible for the screw’s drive callout and incoming verification. The metal product factory may pack purchased fasteners without manufacturing the screw itself. The importer should ask which supplier provides it, which party confirms the designation, and how a change is communicated. Do not assume the metal hardware manufacturer owns the specification for a third-party screw unless the project says so.
How can the buyer verify the screw and bit as an assembly?
Use the actual screw proposed for the kit and the intended driver or bit. Confirm that the bit is the specified drive family and size, seats in the recess as intended, and can be aligned with the fastener in the installation position. Review whether the installer can access the screw without the driver contacting a wall, bracket, finish surface, or adjacent product. A tabletop check can reveal an interface mismatch, but it may not capture access constraints in the installed product.
Observe whether the bit has excessive angular or lateral movement in the recess. A loose fit can reduce control and may increase the chance of cam-out or visible head damage under some conditions. Do not infer an exact torque capacity from a visual check. If the assembly has a defined torque requirement, the product engineer should specify and validate the method for the actual screw, tool, and mating part.
Check the screw in its intended substrate or mating feature. A fastener may enter a threaded insert, metal plate, wall plug, or other component; each has its own fit requirements. Verify thread engagement and length separately from drive fit. If the screw is part of an installation kit for a finished metal product, also check that the head and washer sit correctly without damaging the visible finish or interfering with assembly.
Review the head after the sample assembly. A visually damaged recess can indicate an incorrect bit, poor alignment, installation method, or other problem. Record the observation and investigate rather than attributing it to the screw family alone. If an assembly instruction shows a particular driver, test the same instruction with the supplied components. The sample should include the final screw and the final artwork if the product is customer-installed.
For repeatability, mark the approved sample and retain its identity, supplier, revision, and date. If the fastener is substituted, determine whether drive family, size, head style, material, finish, length, or source changed. A substitution that preserves the screw’s appearance may still change the fit or the instructions required. Require a controlled review proportionate to the change.
What should the hardware kit and instructions contain?
The kit packing list should identify screws individually by item, drive family, size, length, quantity, and any relevant finish or material designation. “Installation screws” is too broad if more than one fastener is included. If different screws serve different locations, use separate bags or clear labels and show each in the instruction diagram. The installer should not have to infer which screw goes into which hole.
If the buyer supplies the fastener, mark the responsibility in the BOM and purchase order. If the factory buys it from a sub-supplier, define the approval sample and change-control expectation. If the buyer provides the screw, confirm that the factory has the correct component before packing. A mismatch can occur at the purchasing handoff even when the product drawing is accurate.
Instruction artwork should match the released screw. It may name the drive family, show a recognizable tool icon, or use another clear identification method. Avoid using a generic cross-head icon if the project requires a specific bit and the icon could mislead. Check the language and diagram scale for the target market and packaging. If instructions refer to a supplied bit, confirm the bit is in the actual pack.
The outer packaging or parts list should help the receiving team distinguish fastener kits from loose bulk components. If a carton contains multiple product SKUs, identify each kit and quantity in a way that connects to the packing list. Do not print unsupported performance claims such as a universal load rating or corrosion statement based only on the fastener drive.
Packaging should protect the recess from damage and prevent components from mixing. A loose screw in a carton may rub against finished surfaces or other hardware. If fastener tips or heads could scratch a product, use a controlled bag or insert. Validate the pack-out sample so the kit remains identifiable after shipping and handling.
What should change control cover after sample approval?
A change to the screw drive family is a product change because it affects tool compatibility and installation instructions. A change to the drive size may also matter even if the family stays the same. Record the old and new screw designations, sample comparison, instruction artwork update, and buyer approval before the changed kit is released.
If a supplier cannot obtain the approved fastener, it should propose the replacement and wait for the agreed disposition. The proposal should say whether only the drive changed or whether size, thread, head, finish, or material also changed. Ask for a production-intent sample or documented technical confirmation appropriate to the risk. Do not accept “equivalent screw” without defining which characteristics are equivalent.
A fastener source change can affect consistency even if the nominal type remains unchanged. The buyer may need to assess the new supplier’s item reference, packaging, sample fit, labeling, and record traceability. The required review depends on the purchase agreement and application. Avoid creating an unnecessary requalification process for unchanged features, but do not assume a name match proves the physical component matches.
If the buyer’s product artwork or instructions are already in production, identify the revision cutoff and disposition of old stock. New screw bags should not be packed with old instructions that specify a different tool. A bundle’s fastener component, product data sheet, assembly video, and service parts list should all refer to the same approved configuration.
Set acceptance criteria for the supplied drive
A buyer can make the acceptance record useful without inventing a torque value or making a general performance claim. Identify the approved screw part number and revision, the stated drive family and size, the supplier-confirmed matching bit, and the product assembly where it will be used. Record the sample date and the people who accepted the component. If the physical sample has a marking or supplier label, capture that reference alongside the drawing instead of relying on a cropped photograph of the recess.
The practical inspection should check that the delivered component matches its approved identity and that the named driver is available to the assembly or end user. Fit the bit into the screw in the intended orientation and observe whether it seats consistently without being forced. Where the screw is installed in the final product, perform the agreed assembly check using the actual mating part and access conditions. If the project specifies an installation torque, the technical owner should define and verify the method separately; a drive-family check alone does not validate a joint torque requirement.
Incoming inspection should be proportionate to the purchase arrangement. For a small kit order, the buyer may inspect a defined sample of packed units. For a larger or recurring program, the inspection plan can identify which cartons or production lots are sampled and what constitutes an identity discrepancy. The supplier should not mix two drive families in one production lot without an approved change. If different product variants intentionally use different screws, segregate and label them so the packer does not have to infer which bag belongs to which SKU.
The order documents should say who supplies the bits and who verifies that they remain paired with the fasteners. If an importer’s assembly line uses a tool already qualified for another product, the buyer still needs to check that the new screw is the specified drive and size. If the finished product is sold to an end user, the instructions and any included bit should reflect the released configuration. These are distinct handoffs, and responsibility can change between factory, importer, brand owner, and fulfillment provider.
When the supplier cannot source the specified drive, request a written deviation proposal before packing begins. It should identify the available alternative and all known changes, attach the relevant part reference, and state whether a sample is available. The buyer can then decide whether to accept the substitution, revise the BOM and artwork, or hold the order. A verbal “same type” assurance does not preserve traceability for the next reorder.
For a mixed kit, sample the entire kit rather than checking a loose screw alone. Verify the fastener count, bag identification, instruction revision, tool inclusion, and product variant as one pack-out unit. Record a photograph of the approved configuration where permitted, but retain controlled part references as the authoritative record. A photo supports visual comparison; it does not replace the component schedule or establish hidden material properties.
Use the same controlled language in every file
Use one released term for the drive family in the drawing, BOM, purchase order, supplier confirmation, receiving checklist, and customer instruction. If a legacy document uses “cross-head,” add a clarification during revision rather than leaving teams to infer the intended form. Where more than one language is used, have the product owner check that the translated term still identifies the same drive family and size. A pictogram may help an installer, but it should accompany the written part reference rather than replace it.
The supplier’s quote should identify the included component and any assumptions about the tool. If the factory is responsible only for assembling or packing a buyer-supplied screw, make that boundary explicit. If a fastener vendor selects the screw, require the buyer’s approval of the proposed designation before the kit drawing is frozen. This prevents a purchasing convenience from becoming an undocumented design decision.
What mistakes cause drive mismatch in hardware kits?
The first mistake is using “cross-head” as the full specification. Phillips and Pozidriv are distinct drive families. Identify the intended family and size.
The second mistake is choosing the bit based only on what appears to fit. A mismatched driver may turn a screw in a casual test but still contact the recess incorrectly. Confirm the tool and screw family from their markings or technical references.
The third mistake is assuming the drive family defines the full screw. It does not specify length, thread, head style, material, coating, or mating part. Keep these requirements in separate fields.
The fourth mistake is approving an empty fastener bag or a substitute sample. Inspect the actual screw that will be packed and the mating assembly. A picture of the intended screw is not the production component.
The fifth mistake is neglecting instructions. A correct screw can still be installed with the wrong bit if the pack or artwork is vague. Align the product, tool, label, and instruction.
The sixth mistake is treating a drive change as cosmetic. A new recess may require a different tool and artwork. Record approval and update affected documents.
The seventh mistake is assuming the hardware factory manufactures every fastener in the kit. Purchased components may come from a sub-supplier. Confirm the responsibility boundary and control the approved part reference.
Buyer checklist and frequently asked questions
Before approving a mounting kit, confirm:
- Drive family: Phillips or Pozidriv.
- Exact drive size and approved fastener part reference.
- Screw diameter, length, head style, thread, and point.
- Material and finish requirements where relevant.
- Mating part, substrate, and installation access.
- Whether the driver or bit is included or user-supplied.
- Actual sample fit with the approved screw and tool.
- Fastener quantity and separate bag or kit identity.
- Instructions and tool icon match the final screw.
- Supplier responsibility and change notification for bought-in components.
- Final pack-out and revision record.
Can a Phillips bit be used with a Pozidriv screw?
A buyer should use the driver type specified for the screw rather than assume one cross-shaped bit fits both. The drive profiles differ, and using a mismatched tool can reduce fit. Confirm the correct driver size for the actual screw.
Is Pozidriv always better than Phillips?
No universal superiority claim is appropriate for every product. The correct choice depends on the design, available fastener, tooling, assembly requirements, and product owner’s specification. Buyers should compare the actual interface and supply chain.
Does screw-drive type determine screw strength?
No. Drive geometry alone does not establish material, dimensions, thread engagement, load capacity, or suitability for a specific assembly. Those properties must be specified and verified separately.
Should an importer include a screwdriver in every hardware kit?
That depends on the buyer’s product, customer, channel, and pack requirements. If a tool is included, specify its drive family, size, and quantity; if not, make the instruction clear about the required tool.
Does Koitor manufacture the screws in its hardware kits?
The available company profile does not establish that Koitor manufactures every included fastener. Buyers should confirm whether a fastener is made, purchased, or supplied by another party and approve the exact component for the order.
Work With Koitor Hardware
For a bathroom or home storage hardware project, share the assembly drawing, fastener schedule, sample, finish, and kit-pack requirements. Confirm whether mounting fasteners are included and who supplies each component before the final quotation and approval.
Discuss Your Hardware Project
OEM / PRIVATE LABEL
Turn this sourcing guide into a product brief
Share your target product, size, finish, order quantity and packaging requirements. Your team receives a practical manufacturability review before quotation.

 English
 Español
 Português
 Français
 Deutsch
 العربية