
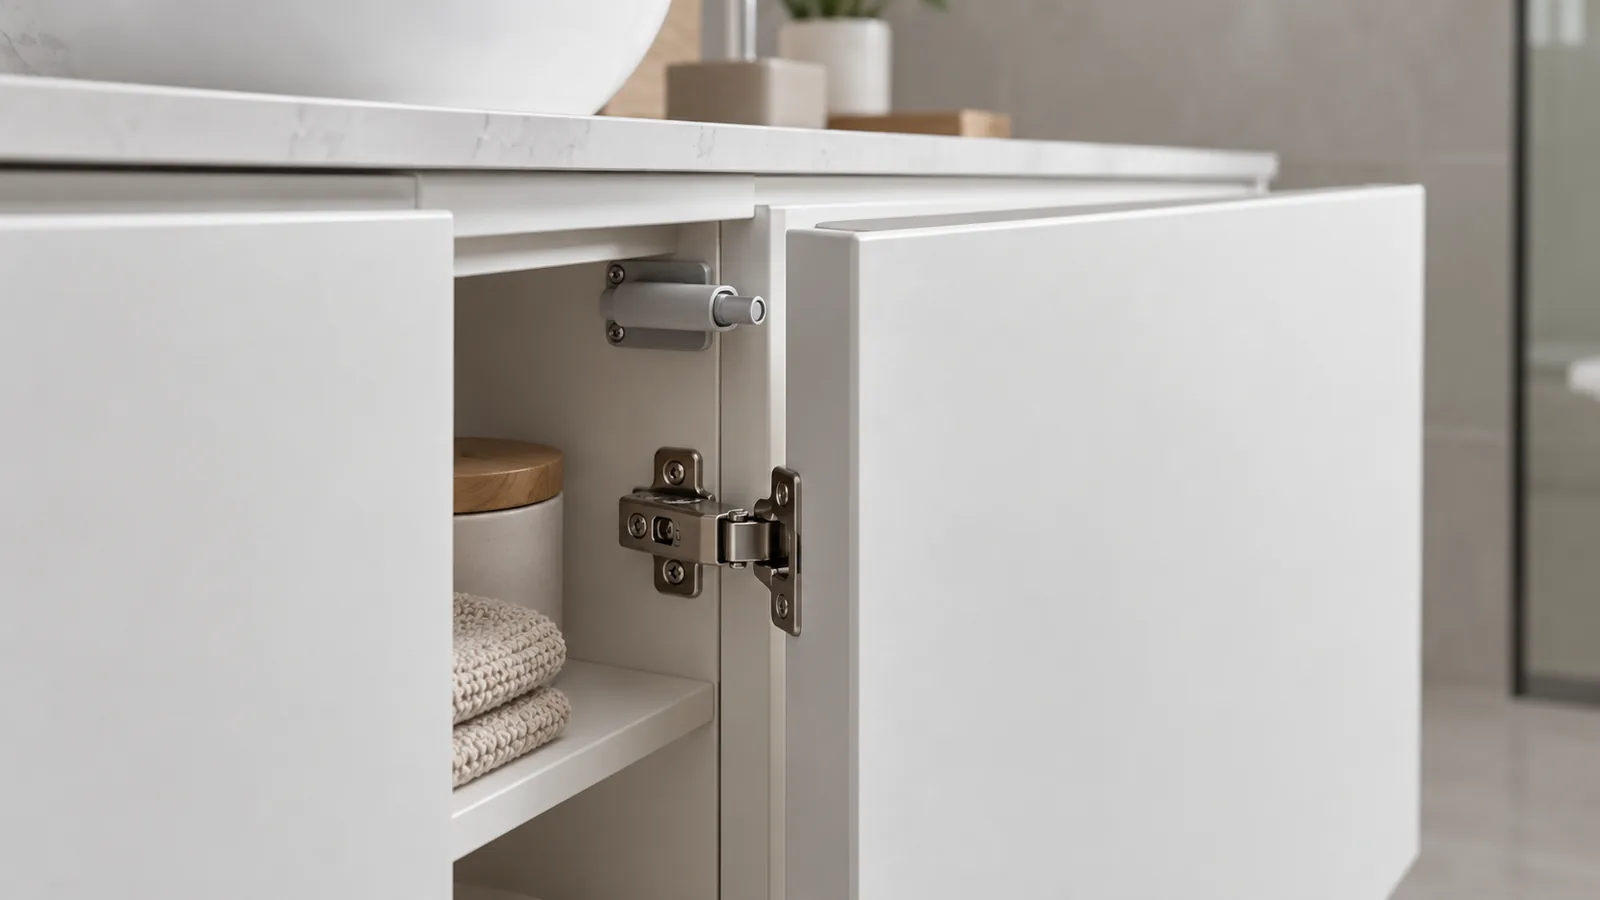
For a handleless bathroom cabinet, push latch stroke cabinet door gap must be reviewed with the selected hinge and the actual door as one assembled interface. Buyers should identify the latch model and its specified travel, set the installed door-to-frame clearance from that supplier’s instructions, and test whether the hinge and door move as intended in the finished sample. A larger gap or a “long stroke” label alone does not prove reliable operation.
That distinction matters for importers and private-label product teams adding a touch latch to a cabinet or storage assortment. A latch can release correctly on a bench yet behave differently after hinge adjustment, door alignment, finish build-up, or a change in panel dimensions. The buying task is to control the complete configuration, not to treat the latch as a standalone commodity.
Why are latch stroke and installed door gap different measurements?
Latch stroke is the movement required at the latch mechanism to move between its latched and released states. The installed door gap is the physical clearance between the door and cabinet frame when the door is closed. They are related because the user pushes the door, but one measurement does not automatically set the other.
The latch supplier determines how its model responds to a push, including the required movement and any specified pushing room. The cabinet designer determines the door position, reveal, hinge geometry and mounting location. The actual release action depends on how these parts interact after installation. A buyer who records only a nominal reveal can miss whether the push point reaches the latch’s activation range.
Conversely, a latch with a longer listed stroke is not universally more forgiving. A longer-travel product may be intended for a particular door size, mounting arrangement or use condition. The buyer should read the exact product sheet, confirm the model and follow its installation instructions. Do not transfer a gap dimension from one latch series to another.
This is the practical push latch stroke cabinet door gap decision: name the latch, record its required pushing space, dimension the installed reveal, then confirm the release action on a representative door. If any one of those inputs changes, recheck the sample.
How do door size, hinge behavior and latch position interact?
The latch, hinge, door and frame form one mechanism. Door mass and size affect how the panel moves; hinge geometry and adjustment affect the closed position and opening behavior; latch position determines where the user applies pressure and where the door releases. The relationship varies by design and cannot be predicted from the latch name alone.
An official Sugatsune ML-120 product specification is a useful example of model-specific guidance: it calls for pushing room between the door and cabinet frame and describes the tested door configuration for that product. Those figures belong to that exact latch and stated setup. They are not general cabinet standards and should not be copied into another supplier’s specification.
Hinge behavior also deserves explicit review. A hinge may have a self-closing or soft-closing action, an adjustment range, or a spring force that changes how the door approaches the latch. If the hinge pulls the door closed too strongly, the latch and door can produce a different feel than expected; if the door does not return consistently, the latch may not engage reliably. These are possible interactions to evaluate on the actual assembly, not universal diagnoses.
Door alignment can change the gap across its height or width. A cabinet may appear acceptable at one corner while the latch side has a different reveal. Finish thickness, edge banding, frame squareness, mounting-surface flatness and hinge adjustment can all affect the final clearance. For a metal cabinet component or hybrid storage product, the flatness and position of the mounting area also matter. Buyers should identify which dimension is controlled and how it will be checked on the production sample.
Accidental contact is another design input. A cabinet below a sink, beside a walkway or near a frequently handled item may be touched unintentionally. One online cabinetry discussion describes an individual door/latch combination that opened unexpectedly during use; it is a single example, not proof that push latches commonly fail. It does point to a useful buyer question: where can incidental pressure occur, and what opening behavior should the sample demonstrate?
What should buyers specify in the RFQ?
The RFQ should describe the intended door system, not merely request a touch latch. List the latch supplier and model when already selected, the door dimensions and material, the intended gap/reveal, hinge model or type, latch mounting location, cabinet frame condition and target use. If the buyer wants the manufacturer to source the latch, say whether the proposed component is for review or already approved.
| RFQ input | What to identify | Por que é importante |
|---|---|---|
| Latch | Exact model, supplier, handedness and revision | Travel and mounting rules can differ by model |
| Door | Material, thickness, width, height and edge treatment | Changes the available mounting area and movement |
| Installed gap | Drawing reference, measurement points and tolerance | Connects the door reveal to the latch’s pushing room |
| Hinge | Type, position, adjustment and closing behavior | Affects door return and latch engagement |
| Latch position | Mounting face, distance from edge and orientation | Determines whether the pressure point reaches the latch correctly |
| Use condition | Expected opening frequency and likely incidental-contact zone | Gives sample reviewers a realistic scenario |
| Packout and instructions | Included parts, fasteners, labels and installation sheet | Prevents confusion between approved and alternate components |
If exact component details are not yet selected, the RFQ should say so and ask for a proposed latch/hinge combination with current technical data. The supplier should identify what is confirmed and what remains for buyer approval. Avoid asking a metal-hardware factory to certify a purchased latch’s performance unless the factory actually has the required evidence and responsibility for that claim.
For private-label packaging, verify that the user-facing installation instructions match the supplied latch, hinge and door layout. Do not reuse generic instructions from a visually similar model. A product photo, catalog description or “long-stroke” marketing phrase is not an assembly drawing.
How should the buyer approve a complete sample?
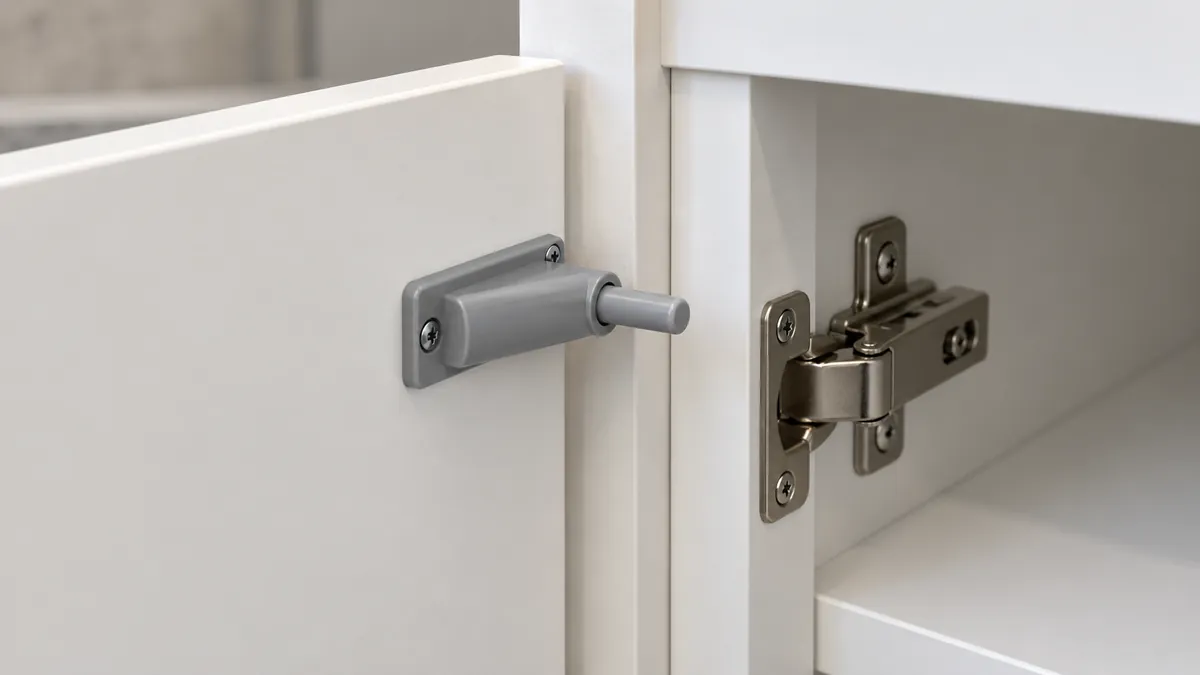
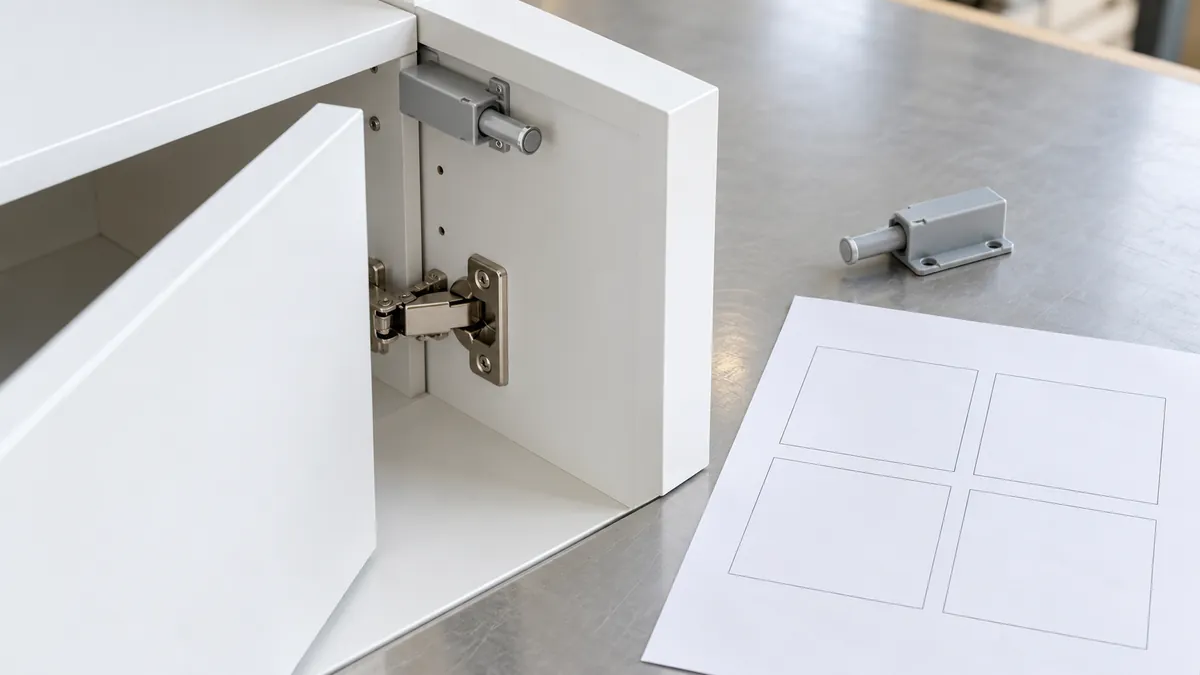
Approve the latch and door as an assembled sample using the production-intent door, hinge, frame and mounting position. A loose latch sample can confirm dimensions and basic operation, but it cannot confirm the installed reveal, hinge interaction or the user’s actual push point.
Start by matching the parts to the RFQ: latch model, hinge model, door dimensions, frame details, finish and revision. Check that the latch is mounted in the specified orientation and that fasteners do not interfere with the mechanism or other hardware. Record the closed gap at the agreed measurement points and verify that the door is aligned before evaluating release action.
Then follow the component supplier’s installation guidance and operate the door through an agreed sequence. Check whether a normal push at the intended location releases the latch, whether the door moves clear enough for the user to open it, and whether it returns and re-engages as designed. Look for bouncing, unintended opening, rubbing, inconsistent release or a need to push at an undocumented point. These observations are sample acceptance notes; they do not establish a lifespan, cycle rating or safety certification.
Repeat the check after any hinge adjustment needed to establish the final alignment. If multiple doors or a left/right-hand configuration are sold, sample the configurations that differ in a way that could affect the mechanism. Keep a short video or dated photos, the drawing revision and signed sample record together. The point is to make later comparison repeatable, not to create an unsupported guarantee.
What problems should trigger a design or supplier review?
Some symptoms are clues that the buyer should inspect the interface, not automatic proof of a particular root cause. A door that bounces open might involve hinge force, latch engagement, installation position, door alignment or another condition. A latch that does not release might reflect insufficient pushing movement, an incorrect gap, a mispositioned latch, binding or a part mismatch. Change one variable at a time during diagnosis and document what was observed.
The following situations should trigger review before the next production release:
- the latch model or supplier changes;
- the door thickness, size, material or edge treatment changes;
- the hinge type, position or closing behavior changes;
- the frame, cabinet construction or reveal dimension changes;
- the mounting location moves or an alternate mounting face is introduced;
- installation instructions or included fasteners are revised;
- production samples show inconsistent release, bounce, rubbing or re-latching.
The engineering response may be to revise the drawing, reposition a component, select a different latch, adjust the hinge, or clarify the installation step. No one fix is universal. If the latch supplier publishes a model-specific installation gap or use limit, compare the design against that document and ask for clarification when the actual door falls outside the stated conditions.
Do not enlarge a gap simply to make a latch release without checking the complete door reveal and product appearance. Do not add a stronger hinge or latch based only on a symptom. Changes can solve one interaction while creating another, so the revised sample should repeat the relevant assembled checks.
Avoid treating latch travel, door clearance and hinge force as interchangeable numbers. They describe different parts of the assembly. A package that says “long stroke” still needs a model-specific gap, mounting position and door setup. Likewise, a measured door gap does not confirm that the latch is mounted at the right point or that the hinge returns the panel consistently.
Common sourcing gaps include specifying only the cabinet style, approving a latch before the cabinet door is designed, using a sample on a different thickness panel, relying on the first installation attempt, and changing a hinge without repeating the latch check. Another risk is publishing a broad “fits all handleless cabinets” claim when the approved combination covers only one door construction.
When evaluating supplier documents, separate what they establish from what they do not. A product sheet may give dimensions and installation conditions for the named model. It does not automatically establish compatibility with a different hinge, door weight, frame, or bathroom environment. If an alternate component is being considered, compare the exact drawings and test the combined assembly.
For a buyer, the practical record is straightforward: approved model numbers, drawing revisions, specified reveal, hinge setup, mounting position, installation sequence and sample results. That record helps production, packaging, customer support and repeat ordering use the same configuration.
What should a product team put on its approval checklist?
Before moving a handleless cabinet or storage product into bulk production, confirm the inputs that affect the interface. The checklist should be concise enough for a supplier and buyer to use together:
- Confirm exact latch and hinge models or clearly mark them as proposed.
- Tie the latch mounting position and orientation to a drawing revision.
- Define the intended door-to-frame gap and measurement points.
- Record door material, dimensions, thickness and relevant edge treatment.
- Assemble and review the production-intent door, frame, hinge and latch.
- Observe release, opening clearance, return and re-latching through an agreed use sequence.
- Record any rubbing, bounce, inconsistent action or installation ambiguity.
- Identify model-specific supplier limits and do not generalize them to other parts.
- Require approval if the latch, hinge, door, frame, gap or instructions change.
- Keep sample photos, instructions, component identifiers and sign-off with the order record.
This is the core push latch stroke cabinet door gap approval: define the exact assembly, verify its behavior, and preserve the approved configuration for production. It reduces avoidable ambiguity without pretending that a checklist replaces product-specific engineering or testing.
Perguntas frequentes
Is a larger gap always better for a push latch?
No. The required pushing room depends on the selected latch and installation. A larger gap can also change the cabinet reveal or appearance. Follow the exact model instructions and validate the complete door assembly.
Does a longer-stroke latch work with every cabinet door?
No. “Long stroke” describes a product feature, not universal compatibility. Confirm door conditions, mounting position, gap and hinge behavior using current supplier data for the specific model.
Can a latch be approved separately from the hinge?
The latch can be reviewed as a component, but final approval should include the hinge and door. Their interaction affects closed position, release and return behavior.
What does one successful opening test prove?
It shows that the tested sample opened in that particular setup. It does not establish performance for other door sizes, hinges, installation conditions, cycle life or a different production configuration.
Discuss a cabinet hardware interface for OEM sourcing
Share the door drawing, selected latch and hinge data, intended gap, use conditions and sample requirements. Koitor can discuss manufacturing and sourcing inputs within its confirmed capabilities; latch performance must be verified for the exact component and assembly.
OEM / MARCA PRÓPRIA
Transforme este guia de fornecimento num resumo do produto
Indique o produto pretendido, as dimensões, o acabamento, a quantidade a encomendar e os requisitos de embalagem. A sua equipa receberá uma análise prática da viabilidade de fabrico antes da apresentação do orçamento.
 English
  Español
  Português
  Français
  Deutsch
  العربية