
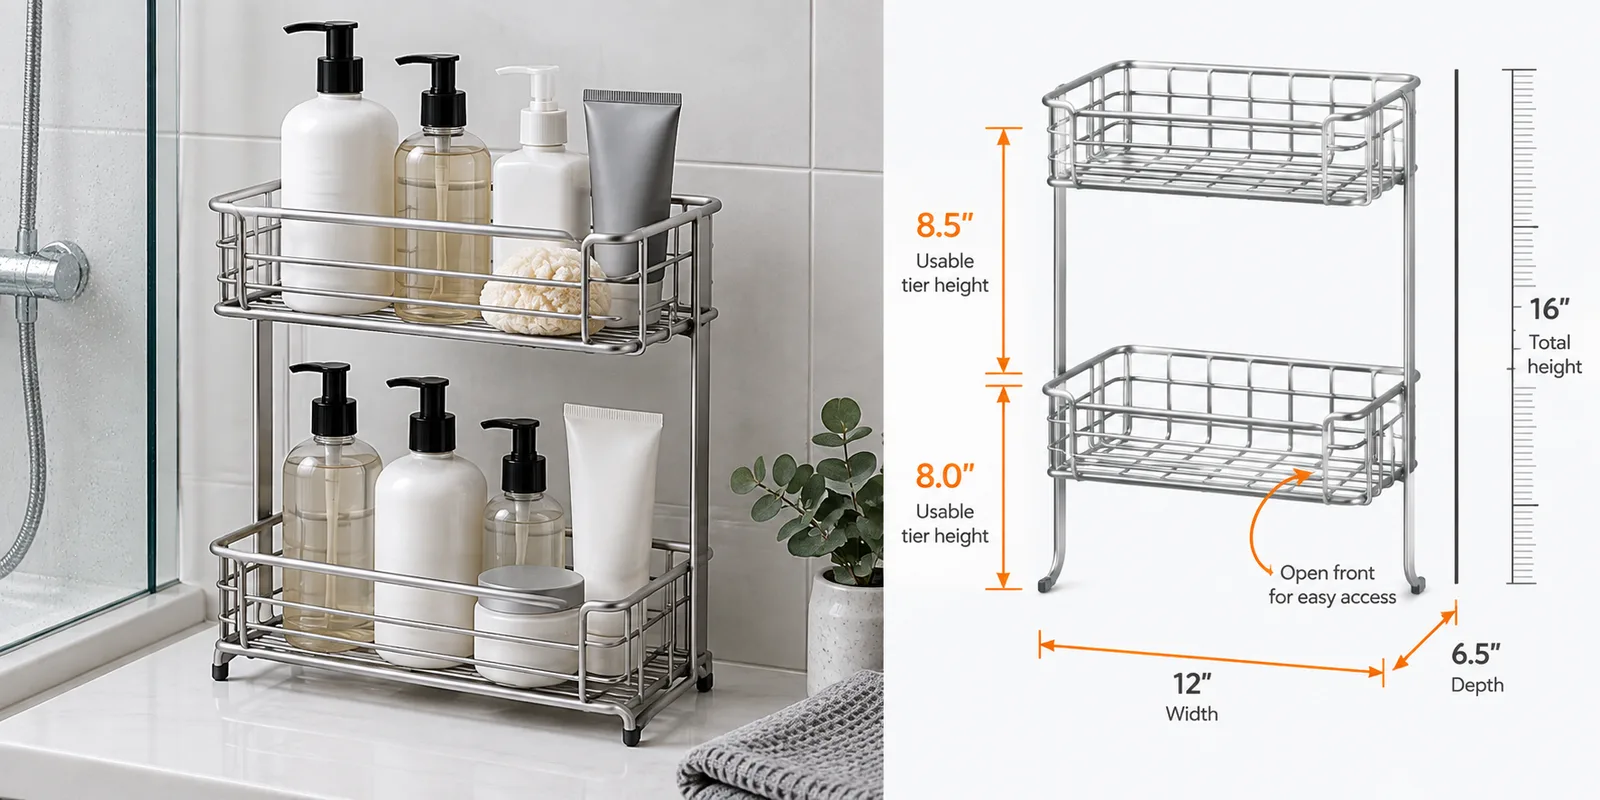
Shower caddy bottle clearance should be planned from the tallest and widest intended containers, including pump heads, caps, labels, and the hand movement required to place and remove them. OEM buyers should specify usable shelf height, basket depth, front-rail height, bottle spacing, drainage, wall projection, and mounting position. Tier-to-tier center distance alone does not describe the space a customer can actually use.
What Does Bottle Clearance Mean in a Shower Caddy?
Bottle clearance is the usable three-dimensional space available for bottles and the access path around them. It includes vertical room above the basket base, internal width and depth, obstruction from upper tiers or brackets, front-rail height, corner geometry, and the movement needed to lift or tilt a product out.
A nominal shelf height can be misleading. If the upper basket has a deep base frame, the real opening below it may be smaller. Pump bottles need space above the pump as well as room for a hand to press it. Wide containers can fit the basket outline but collide with corner radii or closely spaced side wires.
Define a representative bottle set early. It may include a tall pump bottle, a short wide jar, a narrow tube, a soap bar, and a small accessory. Record maximum dimensions and note which items must stand upright. Do not design around one convenient sample if the product range targets several markets or retail categories.
The buyer should provide:
- Tallest bottle height including pump or cap.
- Maximum bottle width and depth.
- Smallest item that the wire grid must retain.
- Number of bottles expected per tier.
- Whether pumps should operate while bottles remain in the caddy.
- Required space for hands and label visibility.
- Shelf or basket internal dimensions.
- Tier spacing and mounting position.
- Front and side rail heights.
- Drainage and cleaning expectations.
Koitor Hardware can review custom shower storage products from drawings or physical samples. The custom shower caddy manufacturing page explains the broader OEM development context.
How Should Buyers Measure Usable Shelf Height?
Usable shelf height should be measured from the surface supporting the bottle to the lowest obstruction above it. The obstruction may be the upper basket base, a cross wire, mounting bracket, decorative rail, hook, or sloping structural member. Measure at the front, center, rear, and corners when geometry varies.
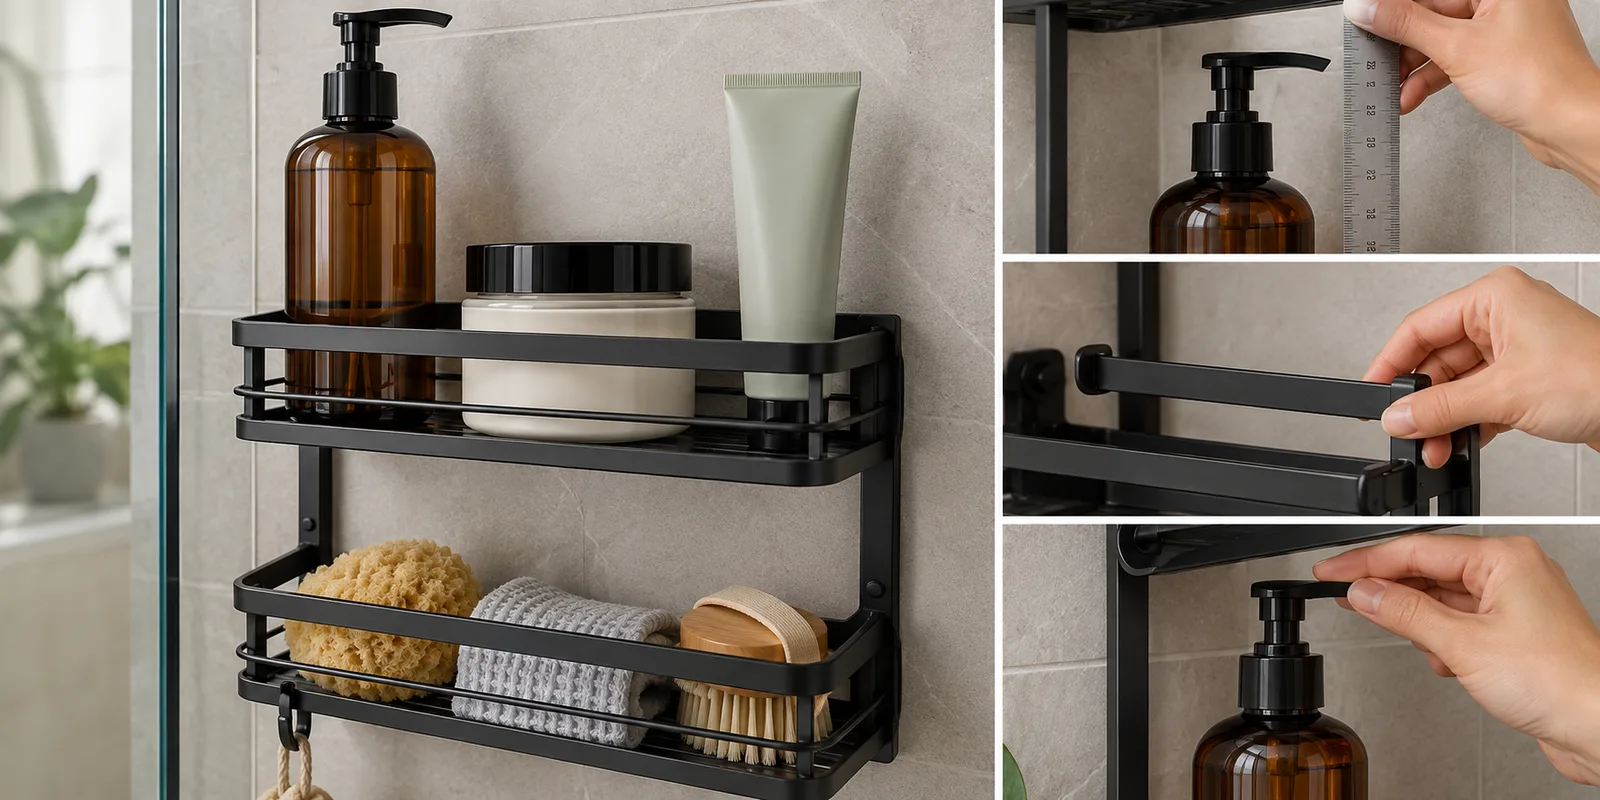
For a two-tier caddy, record both the clear opening and the removal path. A bottle may fit vertically but still be difficult to remove because it must rise above the front rail before tilting outward. Add practical hand clearance based on the intended container and user action.
Pump access creates another condition. If a bottle remains inside while used, the pump head needs room to travel and the user’s hand needs access. If the bottle is removed before use, the design can prioritize easy lift-out instead. State the expected behavior rather than assuming it.
Use actual finished sample measurements. Wire diameter, coating, welds, tray thickness, and assembly variation can change the opening. A computer model is useful for screening, but a product-and-bottle mock-up reveals access issues more quickly.
| Measurement | Reference points | Why it matters | Sample check |
|---|---|---|---|
| Clear vertical opening | Basket base to lowest obstruction | Determines standing bottle height | Place tallest bottle upright |
| Lift-out allowance | Bottle top to removal path | Allows bottle to clear front rail | Remove with one normal hand motion |
| Pump operating space | Pump top to upper obstruction | Enables in-caddy use | Press pump without contact |
| Internal depth | Inside front rail to rear contact | Controls wide bottle fit | Test bottle at rear and corners |
| Internal width | Between side retention wires | Controls quantity per tier | Load planned bottle set |
| Front opening | Rail top to upper tier | Controls access angle | Remove shortest and widest items |
Do not convert these dimensions into a universal compatibility claim. Bottle packaging varies. The approved drawing should identify the tested representative set and minimum usable clearances.
How Do Rail Height, Basket Depth, and Wire Spacing Affect Access?
Rail height, basket depth, and wire spacing must balance retention, access, drainage, and cleaning. A high front rail can reduce the chance of tall bottles tipping outward, but it also increases the lift needed for removal. A low rail improves access but may not retain short or unstable items.
Basket depth should be evaluated internally. A nominal 120 mm projection may provide less usable depth after the rear frame, front rail, wire diameter, and corner radius are considered. Deep baskets can hold larger bottles but project farther into the shower and may require stronger mounting or different packaging.
Side rails control lateral retention. The lowest side opening should be reviewed with small tubes and accessories. If the caddy includes hooks beneath the basket, verify that hanging items do not block the bottle area or interfere with drainage.
Base-wire spacing affects both retention and water flow. Very wide gaps may allow small products to tip. Very close spacing adds wires, welds, finish intersections, and cleaning surfaces. Select the grid from representative contents and the manufacturing process.
Compare the design choices:
| Feature | More open option | More retaining option | Buyer decision |
|---|---|---|---|
| Front rail | Easier removal | Better containment | Which bottle is least stable? |
| Basket depth | Lower projection | More bottle capacity | What wall projection is acceptable? |
| Side-wire gap | More visual openness | Better small-item retention | What is the smallest item? |
| Base grid | Faster open drainage | Broader support | Will narrow bottles remain upright? |
| Tier spacing | Compact product | Taller bottle access | Which tier receives pump bottles? |
| Corner radius | Softer visual form | More rectangular usable area | Do wide containers fit corners? |
A mixed arrangement can work well. The lower tier may hold tall pump bottles while the upper tier holds shorter products. If tiers have different purposes, document them clearly in the drawing, instruction, and marketing information.
How Should Wall Position and Mounting Be Included?
Wall position and mounting should be considered with bottle clearance because brackets and installation height determine the final usable zone. A caddy can pass a tabletop bottle test yet become difficult to use after installation near a mixer, shower rail, corner, niche, or glass screen.
Specify mounting-hole centers, bracket footprints, overall wall projection, and the product’s vertical relationship to nearby fixtures. The buyer or project professional should confirm substrate and site conditions. The factory controls product-side geometry but should not make unsupported claims that one fixing suits every wall.
For corner caddies, check both wall planes and the changing internal depth near the corner. A wide bottle may fit at the front but not sit flat at the rear. For hanging caddies, review the suspension point, shower head or door geometry, and movement under normal handling.
Tool access matters. Mounting screws or set screws should be reachable without the basket rails blocking the driver. Installation should not require removing a welded tier unless the design intentionally supports that sequence.
During sample review:
- Build a representative wall or corner mock-up.
- Install the complete product with the intended bracket system.
- Load all tiers with representative containers.
- Operate pumps and remove bottles from each position.
- Check access near walls, rails, hooks, and adjacent fixtures.
- Verify that the caddy remains level and items remain stable.
- Record the installed height and tested bottle set.
Custom shower caddy dimensions should be approved in the installed condition. Photos of an empty unmounted product are not enough to confirm customer use.
If the caddy will be sold in more than one region, ask the buyer team to collect a small set of representative local containers before the drawing is frozen. The goal is not to promise that every bottle will fit. The goal is to make the tested envelope, tier assignment, and access limits clear enough for product selection, packaging copy, and customer-service answers to remain consistent.
What Material, Finish, and Drainage Details Matter?
Material, finish, and drainage details matter because shower caddies contain many intersections, corners, horizontal surfaces, and wall-contact areas. Buyers should define the material and finish system and inspect the finished product geometry without making unsupported lifetime or corrosion guarantees.
For powder-coated products, review color, texture, gloss direction, coverage at welds, and contact marks from fixtures or packaging. For stainless steel or metallic finishes, define visible surface direction, weld cleanup, and acceptable appearance. Approve the finish on a complete sample, not only a flat coupon.
Drainage should be designed into the basket base. Check whether bottle bases sit across stable supports while water can leave the structure. Closed trays need purposeful openings and should avoid pockets that retain water. Wire grids should not create a narrow unstable contact for the intended bottles.
Cleaning access is connected to clearance. If bottles fill the entire depth and upper tiers sit close, the user may struggle to wipe the base and corners. Removable trays can help in some designs, but they add fit, movement, and replacement considerations.
Inspect bracket covers, caps, and wall spacers because they may project into the bottle zone. A finish sample should include these parts and the actual mounting kit.
How Should Samples, Inspection, and Packaging Be Approved?
Approval should use a complete finished caddy, a controlled bottle set, the released drawing, mounting kit, and final packaging. Buyers should record which containers were tested instead of saying that “standard bottles” fit.
Measure usable openings, basket internal dimensions, rail heights, wire gaps, mounting centers, wall projection, and product level. Check tier parallelism and basket squareness. Then load the product in a realistic arrangement and repeat bottle removal and pump operation.
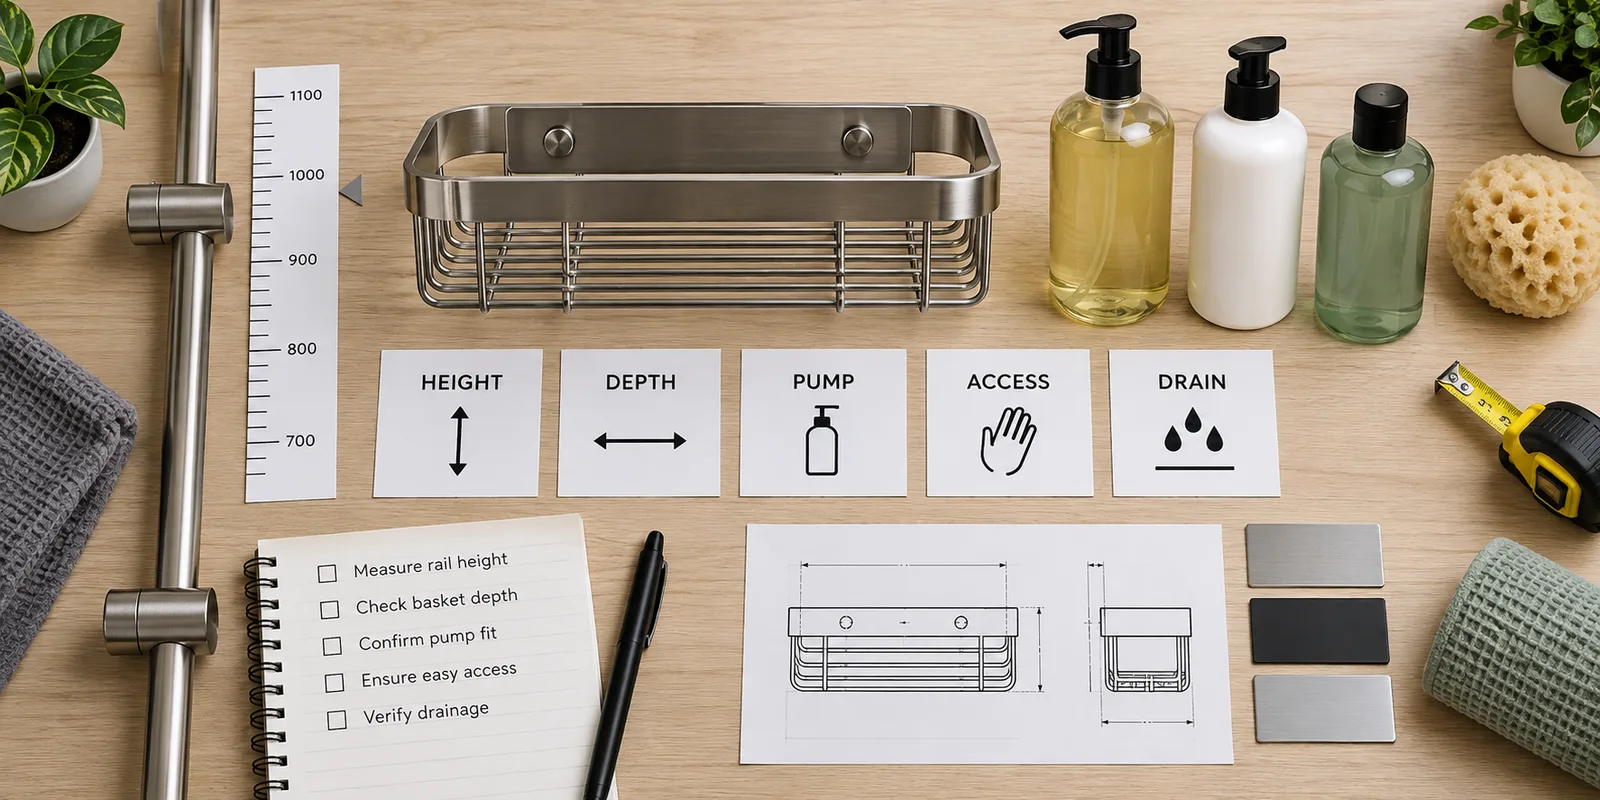
Use this buyer checklist:
- ☐ Tallest pump bottle stands in the assigned tier.
- ☐ Pump can operate without hitting the tier above.
- ☐ Bottle clears the front rail during removal.
- ☐ Wide container fits at front, center, rear, and corners.
- ☐ Smallest item is supported by the base grid.
- ☐ Bottles do not block mounting or adjustment points.
- ☐ Hooks and accessories do not obstruct bottle access.
- ☐ Drainage and cleaning paths remain open.
- ☐ Finished surfaces and weld zones match the sample standard.
- ☐ Unit packaging protects rails, brackets, and projecting corners.
Packaging must support the caddy without bending rails or tiers. Keep mounting hardware away from finished surfaces. If the product is packed assembled, protect projecting baskets and brackets. If knock-down packing is proposed, confirm assembly instructions, joint control, and bottle-space geometry after assembly.
Common mistakes include measuring tier-center distance instead of clear height, testing only one narrow bottle, forgetting pump travel, and approving the empty caddy. Buyers also overlook how front-rail height changes the removal angle or how installation near a wall fixture reduces access.
Keep photographs of the loaded and installed approval sample beside the dimension record. These images help future teams understand why a particular tier spacing or rail height was selected, while the released drawing remains the controlling technical document.
Additional product-development articles are available through Koitor’s bathroom hardware sourcing resources.
Perguntas frequentes
What is a practical way to define shower caddy bottle clearance?
Define a representative container set and record the minimum usable height, width, depth, front opening, pump space, and removal path. Link the results to the approved drawing and sample.
Is tier-to-tier spacing the same as usable shelf height?
No. Tier spacing may be measured between reference lines, while usable height runs from the bottle-supporting surface to the lowest obstruction. Always show the reference points.
How much extra space does a pump bottle need?
There is no universal value because pumps and user actions vary. Measure the selected bottle with the pump raised, include operating travel and hand access, and verify it on the installed sample.
Should every tier hold the tallest bottle?
Not necessarily. A caddy can assign tall products to one tier and short items to another. The drawing, sample, and product information should make that intended use clear.
Can a front rail be lowered to improve access?
It can, but the change may reduce item retention and alter appearance, welding, finish, and packaging. Test the least stable intended bottle before approving the new rail height.
Can Koitor review buyer bottle samples?
Koitor can review buyer drawings, product dimensions, or physical samples as part of a custom project. Scope depends on the caddy structure, finish, mounting, quantity, packaging, and sample plan.
Trabalhe com a Koitor Hardware
Check Bottle Fit Before Releasing Your Shower Caddy
Send Koitor your caddy drawing, representative bottle dimensions or samples, mounting concept, finish target, packaging idea and expected quantity. Our team can review usable clearances, basket geometry and flexible OEM sampling options.
OEM / MARCA PRÓPRIA
Transforme este guia de fornecimento num resumo do produto
Indique o produto pretendido, as dimensões, o acabamento, a quantidade a encomendar e os requisitos de embalagem. A sua equipa receberá uma análise prática da viabilidade de fabrico antes da apresentação do orçamento.
 English
  Español
  Português
  Français
  Deutsch
  العربية