
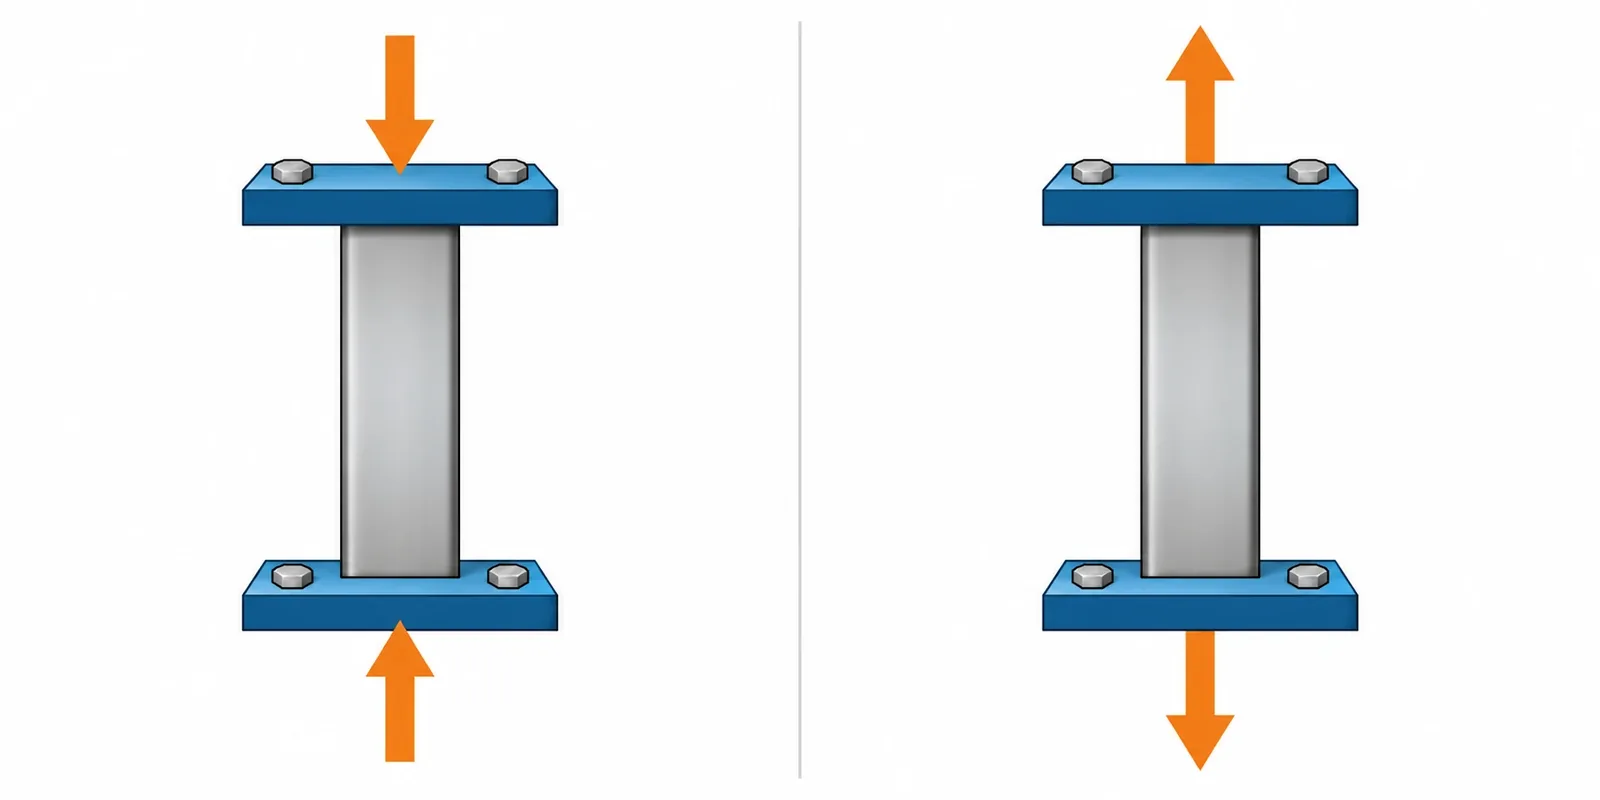
Compression vs tension describes two different directions of loading. Tension is a pulling action that tends to lengthen a member; compression is a pushing action that tends to shorten it. These words describe how a load acts on a particular part. They do not, by themselves, state how much force a product can safely carry, which material is stronger, or whether an assembly is suitable for an application. Buyers should name the member, show the load direction and identify its supports before comparing a material test or product rating.
What is the difference between compression and tension?
The direct difference is the direction of the action on the member being discussed. In a simple tension example, forces pull away from one another at opposite ends of a straight tie. The tie is placed in tension and tends to elongate. In a simple compression example, forces push toward one another at opposite ends of a straight spacer. The spacer is in compression and tends to shorten. These are conceptual models that make the terms easier to discuss; real products often combine multiple load actions.
The TeachEngineering lesson on basic forces describes tension through opposing pulls and compression through opposing pushes. That distinction is useful for a first explanation. It is not a complete analysis of a bracket, rack, hook, wall connection or finished product. The actual response depends on geometry, where the force is applied, how the part is supported, and how its connections transfer the load.
| Term | Direction on the member | Tendency in a simple member | What the term alone does not tell you |
|---|---|---|---|
| Tension | Pulling outward at the ends | The member tends to lengthen | Its material strength, joint quality or complete-product rating |
| Compression | Pushing inward at the ends | The member tends to shorten | Its stability, connection behavior or safe product capacity |
The arrows need to refer to the same member. An assembly can have a part in tension while another part is in compression, and a single component can experience more than one type of action at different locations. A drawing that says only “compression” without marking the component and direction may leave a supplier unsure which condition the buyer means.
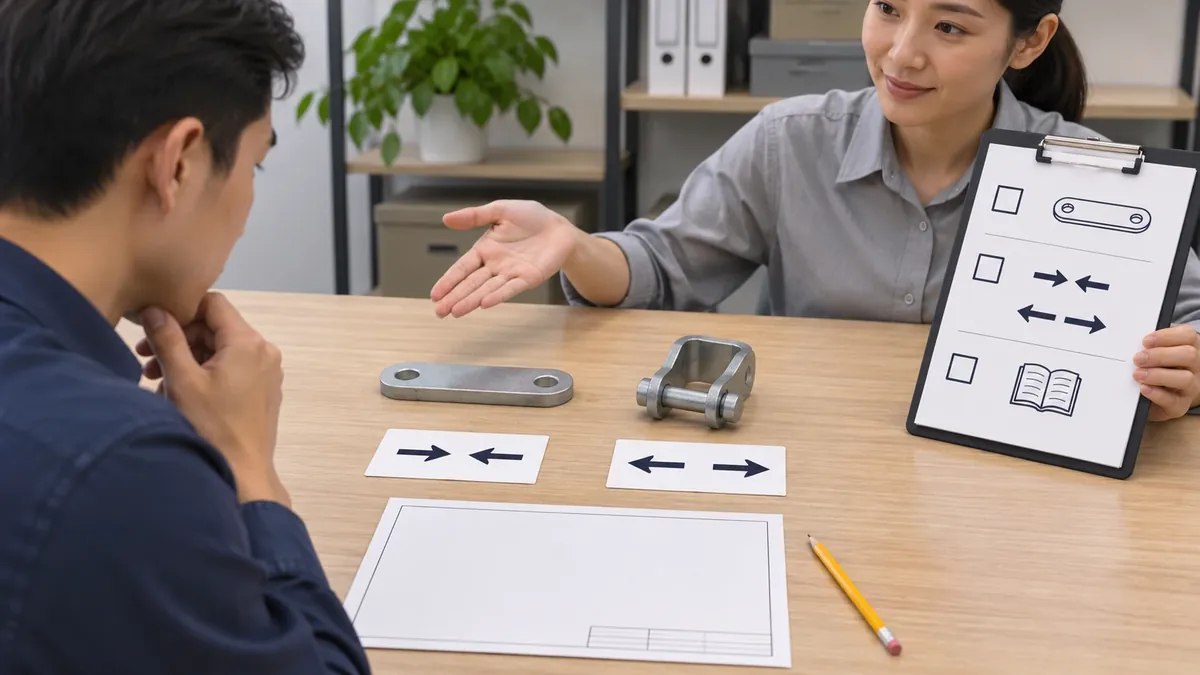
One practical way to keep the comparison clear is to draw a free, simplified view of the member before drawing the complete product. Mark the member, add arrows showing the forces acting on it, and show the supports or connections that react to those forces. This does not calculate a design result, but it exposes missing assumptions. If the arrows point toward the member, the simple description is compression; if they point away, it is tension. If the member is curved, offset or constrained by other parts, note that the simple axial picture is only a first description.
Why should a hardware buyer distinguish the load direction?
Buyers and product developers use loading terms when reviewing a product concept, comparing test evidence or asking a supplier whether a drawing communicates the intended use. If a component is described imprecisely, the discussion can drift toward a number or material property that does not answer the real question. A simple description of which part is being pulled or pushed helps the design owner, manufacturer and test provider talk about the same condition.
Consider a straight tie between two attachment points. If the points pull away from each other, the tie is being asked to carry tension. A spacer held between two surfaces may be compressed as those surfaces push toward one another. Those examples clarify a direction, but they do not predict performance. A threaded joint, weld, thin wall, bend, slot, fastener or support can change how the assembly behaves. The first component to deform may not be the visually obvious one.
The same terminology can make a supplier conversation more efficient when a buyer distinguishes the object from the use case. “This wire is pulled between these two attachment points during operation” describes a clearer question than “the rack needs tensile strength.” The second phrase could refer to a material property, a connection or a complete assembly, and it does not say which test or condition matters. Clear language helps the supplier identify what information is missing and whether it is within the supplier’s scope to review.
In a bathroom or home-storage product, a hanging load may create tension in one feature, bending in another, and local forces at a joint or wall fixing. A shelf support may bend even though the applied item sits vertically on it. A rack connected to a wall can transfer forces through several pieces. These are reasons to identify the component and its supports rather than labeling the entire product with a single force word.
When a buyer sends a request for quotation, a marked drawing can communicate the question more clearly than a broad statement such as “must be strong.” Show the part being discussed, the load location, the direction, the support or attachment points, and the desired outcome. If the buyer needs a numeric requirement, the product design owner should define it and state how it will be verified. A supplier should not be asked to infer a safe capacity from a general description or photograph.
How do tension and compression relate to strength, force and stress?
Force, stress, strength and product capacity describe different things. Force is an applied action. Stress describes how internal force is distributed in a material or cross-section under a defined condition. Strength is a material or component property reported under a particular method and setup. A complete-product rating concerns an assembled product in its defined configuration and use conditions. These terms are related, but they cannot be substituted for one another.
For example, a tensile test applies a pulling load to a specimen using a defined setup. A compression test applies a pushing load to a specimen or component using a suitable arrangement. Instron’s overview of test types distinguishes tensile, compression, flexural and torsion testing; its compression-test explanation discusses compression applied with platens or specialized fixtures. Those descriptions show why the test mode and specimen matter when reading evidence. They do not establish Koitor testing capability, a product rating or a universal acceptance rule.
A tensile strength value for a material does not automatically prove what a finished rack, bracket or hook can carry in compression. The finished part may include bends, holes, joints, coatings, fasteners and supports that are absent from a material coupon. Likewise, a compression result from a short specimen cannot be treated as a rating for a long assembled part without an applicable evaluation. Buyers should ask what object was tested, how it was supported, what direction was used, what result was recorded and which requirement that evidence addresses.
Avoid confusing force with stress or treating a quotient as a complete product answer. A load value without the relevant geometry, boundary condition and measurement context can be misleading. Even when a standard or test method is appropriate, the result applies within its defined scope. A material certificate, supplier declaration or isolated test result should not be presented as proof of the performance of an entire product unless the evidence actually supports that conclusion.
The phrase compression vs tension therefore answers a classification question, not a ranking question. It tells a reader whether the described action pushes inward or pulls outward along the named member. To compare two materials, a buyer needs relevant material data and an understood method. To compare two components, the geometry and connections matter. To evaluate a finished accessory, the complete assembly and intended conditions need to be defined. The evidence should match the decision being made.
Can one component experience both tension and compression?
Yes. A component can experience changing or combined actions as the product moves or as its supports and load location change. A slender member might be pulled in one operating condition and pushed in another. A frame may transfer a force through one part in tension and another in compression. A bracket under an offset load may bend as well as carry axial forces. The correct description depends on the member and the condition being examined.
This is why a product-level label can be too broad. A buyer may say that a rack “is under compression,” while the intended question concerns a specific post, fastener, support, joint or wall contact. If the term refers to the whole assembly, ask which part and which use condition the statement describes. When more than one condition matters, document them separately rather than forcing them into one label.
The same caution applies to load direction diagrams. A simple arrow pair can explain a concept, but it does not replace a structural analysis or a product-specific test. Arrows should identify the direction and point of application, while notes clarify whether they represent an illustration, an engineering requirement or a measured test condition.

Does a tension rod work only in tension?
No. The product name “tension rod” describes a familiar product category, but the rod held between two surfaces may be pressed at its ends. It can therefore experience compression along its length while the contact mechanism and surface interaction determine whether it stays in position. This example illustrates why product names and loading terms do not always use the same frame of reference.
The compression-versus-tension distinction does not determine whether a particular rod, bracket or accessory is safe for a particular installation. End caps, contact surfaces, adjustment, fit, overlap, installation instructions and the product maker’s stated limits matter. A buyer or user should follow the actual manufacturer’s guidance and avoid inferring a safe load from the name or appearance. Questions about rod grip, telescopic overlap and lateral movement belong to their specific product guidance, not to this general mechanics comparison.
Similarly, spring names can describe the spring’s action rather than the stress state of the spring wire. A compression spring is intended to resist being shortened; this does not mean every point in the wire experiences simple compressive stress. Use the supplier’s part designation and drawing rather than treating a name as a complete mechanical description.
What should a buyer put on a drawing or supplier inquiry?
Start with the product or component name and revision. Mark the exact member being discussed. Then show the load location and direction, the relevant supports or attachment points, and whether the drawing represents a proposed use, a test arrangement or a measured observation. If multiple conditions matter, show each one separately. This gives the recipient enough context to ask for missing details rather than guessing.
State the buyer’s intended outcome in practical terms. Does a component need to remain attached, retain its shape, support a specified part of an assembly, or return to a particular position? If the requirement has a numeric limit, identify who owns that requirement and what method is intended to evaluate it. Do not invent a force value, safety factor or test method to make a drawing look complete. A responsible design or engineering owner should define the requirement based on the actual product and use.
It also helps to distinguish the normal operating condition from an exceptional condition. A part may see a different action during assembly, adjustment, shipping, installation or service than it sees during ordinary use. If the buyer is asking about one particular event, name it and show the relevant configuration. Do not combine multiple events into a single ambiguous “maximum load” note unless the design owner has deliberately defined that envelope.
If a part contacts a wall, floor, fastener or neighboring component, mark the contact and restraint in the drawing. A pushed member may slip, rotate, bend or transfer force through another part before its material reaches a simple compression limit. A pulled member may be affected by the attachment, hole edge, weld, thread or fastener rather than by the body alone. These are prompts for clearer review, not predictions of a specific failure.
For purchasing teams, preserve the distinction in the RFQ, sample review and approved specification. A supplier may quote a component based on the dimensions and connection shown, but an unmarked load condition should not silently become a performance promise. If the buyer changes the mounting, material, length or attachment after sampling, the original discussion may no longer describe the revised configuration. Record such changes and ask the design owner whether the load question needs to be reviewed again before approving production.
For a supplier discussion, include the relevant material, geometry, joint and fastener information when available. A drawing or physical sample can help a manufacturer review the metal structure and manufacturability. If a load-related statement depends on a purchased component, identify that component and its supplier as well. Separate what the manufacturing partner can review from what requires engineering design, accredited testing or a project-specific performance assessment.
When reviewing evidence, check that the test object matches the question. Was it a raw material specimen, a component, a joint or the finished assembly? Was it pulled, pushed, bent or twisted? What supports and fixtures were used? Were the product revision and relevant conditions recorded? These questions help determine whether a result is relevant; they do not replace the responsible owner’s acceptance decision.
If two reports appear to disagree, compare their scope before comparing their numbers. They may refer to different specimens, orientations, lengths, support conditions or endpoints. One report may measure material response while another describes an assembly observation. Record the exact item and revision on the purchase specification and retain the report with that record. A supplier explanation can clarify its own document, while the buyer or design owner decides whether the evidence satisfies the product requirement.
Photographs can support traceability, especially when a test fixture, support point or direction is not obvious from a written note. They should supplement, not replace, the method and result. A photo of a loaded product does not by itself show the applied force, duration, configuration or acceptance criteria. If the record is only illustrative, label it as an illustration so it is not mistaken later for a qualification result.
For a simple component, the purchasing brief can state what is already fixed and what remains open. For example, the drawing may control a bracket outline and hole position while the product owner is still evaluating the connection. Marking that distinction prevents a supplier suggestion from being misread as approval to change a controlled feature. If a proposed change affects load path or attachment, route it through the proper design review before production.
The phrase compression vs tension is most useful when it is attached to a clearly named part and a stated condition. It becomes less useful when it is used as a shorthand for “strong,” “safe,” or “rated.” Keep the mechanics vocabulary narrow, then add the project evidence needed to answer the actual sourcing question.
How can a metal hardware manufacturer support the review?
Koitor Hardware is a family-owned custom metal hardware factory specializing in bathroom and home storage hardware. For a project within its confirmed scope, the team can review a buyer’s drawing or physical sample, discuss metal structure and manufacturability, and clarify how a bracket, frame or connection is represented. This supports a practical manufacturing conversation; it is not a structural design certification or an assertion that Koitor provides accredited testing or published load ratings.
Buyers can help by sharing the assembly drawing, identifying the exact metal part, marking the load location and direction, and stating which material or connection details are already approved. If the project needs a capacity value or a specific test, the product owner should define the requirement and the responsible test provider should confirm the method. Koitor can discuss the hardware manufacturing portion within the information and capabilities confirmed for that project.
For broader sourcing context, see the OEM home-storage hardware manufacturing page and custom metal storage rack overview. Use those pages for supplier and manufacturing scope; use a drawing, approved requirement and appropriate evidence for a product-specific load decision.
Buyer checklist and frequently asked questions
Before discussing a tension or compression statement with a supplier, check:
- Which exact member or component is being described?
- Is the member pulled, pushed, bent, twisted or subject to a combination?
- Where is the force applied, and what supports or connections react to it?
- Does the drawing show a conceptual example, design requirement or test setup?
- Is the evidence about raw material, a component, a joint or the finished assembly?
- What product revision, material and configuration does the evidence cover?
- Who defines any numeric requirement and the acceptance method?
- Which supplier owns the design or performance of each purchased component?
Is compression the opposite of tension?
For a simple member loaded along its length, tension is the pulling action and compression is the pushing action. Real assemblies can involve other actions at the same time, so identify the member and condition before applying the comparison.
Does tension mean tensile strength?
No. Tension describes a pulling load action. Tensile strength is a property or result associated with a defined material or specimen test. A material value does not automatically establish a finished product’s capacity.
Is compression always weaker than tension?
There is no universal answer for every material, shape, connection and assembly. The result depends on the object and how it is supported and tested. Use relevant project evidence rather than a general rule.
Can I calculate a safe rack load from this explanation?
No. This guide explains terminology and does not provide a load calculation, rating or test procedure. A qualified design owner should establish the product requirement and applicable verification for the actual assembly.
Work With Koitor Hardware
Clarify the Load Direction in Your Hardware Drawing
Share your drawing or sample, identify the metal member and load location, and note the intended use context. Koitor can discuss confirmed metal hardware and manufacturing scope while your design owner defines performance requirements and evidence.
OEM / PRIVATE LABEL
Turn this sourcing guide into a product brief
Share your target product, size, finish, order quantity and packaging requirements. Your team receives a practical manufacturability review before quotation.


 English
 Español
 Português
 Français
 Deutsch
 العربية