

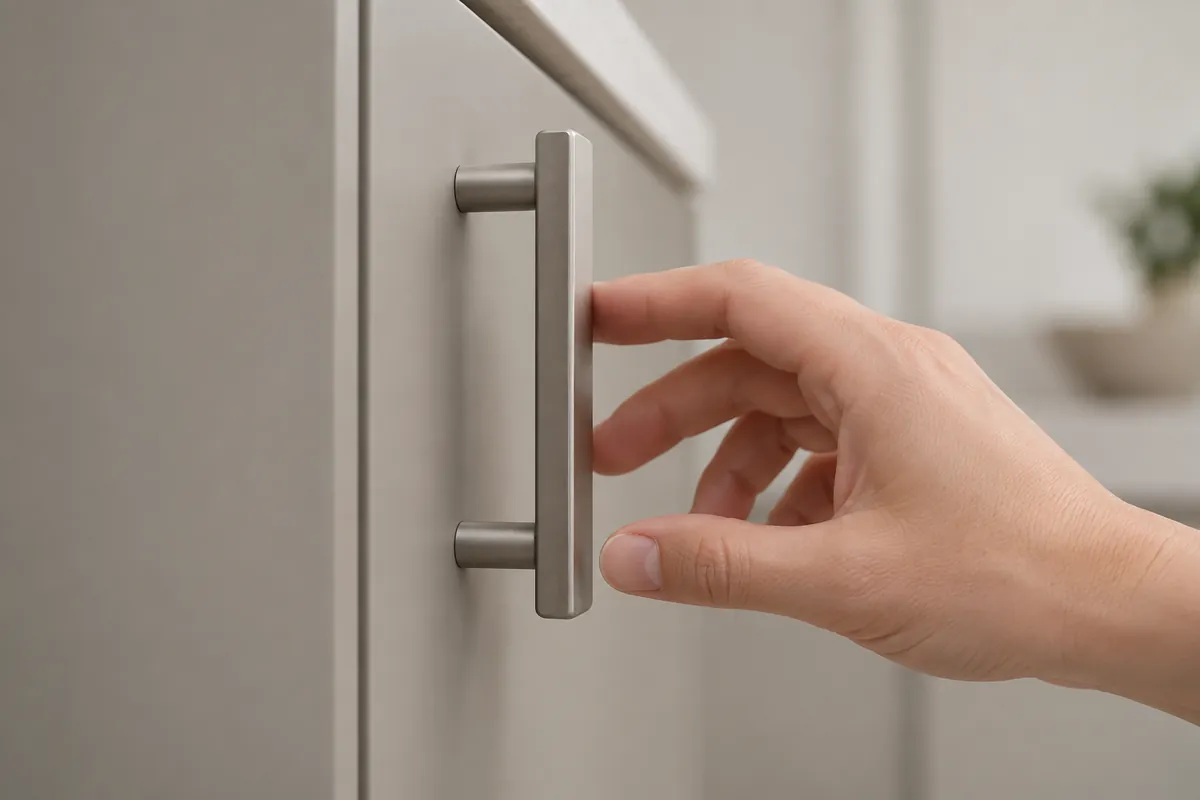
A cabinet handle projection finger clearance specification should define how far the pull stands from the door face, where it sits relative to the door edge, and how a user’s hand approaches it with the cabinet in its real installation. Overall handle length alone does not establish grip comfort or collision risk. Buyers should review the handle, door thickness, adjacent surfaces, opening direction, and representative sample together before approving the drawing.
This is a B2B sourcing and product-development framework for importers and private-label teams evaluating metal cabinet pulls or adjacent hardware. It does not represent a claim that Koitor currently manufactures cabinet handles. The goal is to help buyers turn a vague requirement such as “comfortable clearance” into a controlled interface and sample approval.
Why does projection matter to the buyer?
Projection is the distance a handle extends away from the mounting surface, but the user’s usable finger space depends on more than that one dimension. The handle cross-section, underside shape, bracket or foot geometry, mounting position, door thickness, and hand size all influence access. A pull may look large in a catalog image yet provide little space where fingers actually enter.
Projection also interacts with the environment. A handle can contact a wall, adjacent drawer, appliance, or neighboring door when opened. A long projection may improve grip access but increase the chance of impact or snagging. A low-profile pull may reduce protrusion but be harder to grasp. These are trade-offs for the buyer to evaluate, not universal outcomes.
The buyer question is therefore not “What is the standard projection?” It is “What projection and edge position provide the intended grasp while clearing neighboring surfaces in this installation?” The answer depends on product use, cabinet layout, user group, and the buyer’s design priorities.
Which dimensions should the drawing show?
Show the pull’s overall length, center-to-center mounting distance, cross-section, projection from the finished door face, and location relative to the nearest door edge. If the handle has a return, underside lip, standoff, or mounting foot that limits finger access, dimension or illustrate that region. Include the finished door thickness and any overlay, gasket, or trim that affects mounting.
A useful drawing should identify:
- – projection measured from the finished mounting face to the farthest handle surface;
- – clear gap between the door face and the closest graspable portion;
- – distance from the handle to the door edge and adjacent panel;
- – handle cross-section and edge radius where touch matters;
- – mounting hole positions and fastener access;
- – opening direction and swing envelope;
- – any wall, drawer, appliance, or neighboring-door clearance;
- – finish and visible faces that require appearance approval.
Separate functional dimensions from cosmetic preferences. If the buyer needs a minimum finger gap, define where and how it is measured. If the concern is collision with an adjacent surface, show the installation geometry or state the minimum separation. A standalone handle drawing may not contain enough information to evaluate that system-level requirement.
How should buyers compare low- and high-projection designs?
| Design choice | Possible benefit | Possible trade-off | What the sample should prove |
|---|---|---|---|
| Low projection | Reduced protrusion and potentially less interference | Fingers may have limited access, depending on shape | User can grasp and operate it comfortably |
| Greater projection | More room for fingers on some profiles | Larger swing envelope and greater exposure to impact | Adjacent surfaces clear through the full opening path |
| Rounded or tubular profile | Smooth contact and a continuous grip | The contact zone may roll or feel different by diameter | Grip is secure for the intended user interaction |
| Flat or angular profile | Defined visual edge and hand stop | Sharp-looking geometry may need careful edge review | Touch edges are acceptable after finishing |
| Recessed pull | Minimal protrusion from the door face | Requires a pocket or cutout and more design coordination | Pocket, hand access, cleaning, and assembly all work |
This table is a conversation tool, not a comfort rating. Buyers should consider the actual cabinet and end use. A pull in a compact vanity may have different clearance constraints than a broad storage cabinet. A sample attached to a flat board can help check grasp, but it cannot prove clearance with adjacent doors or walls unless those interfaces are represented.
What information should an RFQ include?
Send the supplier the handle drawing, door material and thickness, finish, mounting method, opening direction, adjacent geometry, and relevant user or channel requirements. State whether the product is a single handle or part of a coordinated family. If multiple lengths share a profile, identify what should remain constant—projection, cross-section, finish, or mounting height—and what may change.
Ask the supplier to confirm:
- – proposed finished projection and how it is measured;
- – clear finger gap at the intended grasp location;
- – mounting-hole pattern and fastener details;
- – door-edge and neighboring-surface clearance assumptions;
- – finish sequence and any effect on the final dimensions;
- – sample configuration and what it represents;
- – manufacturing deviations or open dimensions;
- – packaging protection for the finish and handle ends.
If the buyer has not selected a profile, request a small number of alternatives with the same mounting pattern where practical. Compare actual finished samples against the intended door and adjacent surfaces. Do not approve a projection from a rendering alone; perspective can distort perceived space.
How can a buyer review clearance on a sample?
Mount the sample to a representative door panel with the specified thickness and finish, or use a fixture that reproduces those conditions. Verify the user can approach, grasp, pull, and release the handle with the intended motion. Check both the near edge and underside. If the product will be used by a broad audience, involve more than one reviewer rather than assuming one hand size represents all users.
Next, review the opening path. Move the panel through its normal range and check contact with walls, adjacent doors, drawers, countertops, and appliances. If multiple handles are installed close together, inspect the hand path when two doors or drawers are used in sequence. A clearance issue can be caused by the installation layout rather than the handle alone.
Record the sample revision, door fixture, mounting hardware, measured projection, grip observations, collision checks, and finish condition. Photos should show a side profile and the installed arrangement. If comfort is subjective, record the reviewer and context rather than converting one person’s opinion into an unsupported universal claim.
Reapproval may be appropriate if the handle profile, mounting foot, fastener, finish build, door thickness, hole spacing, or installation layout changes. A minor finish variation may not affect projection, but a changed component or dimension can. The supplier and buyer should agree what change triggers a new fit check.
What quality and finish controls matter?
The visible finish is part of the buyer’s approval. Check color, texture, edge condition, seams, mounting feet, and consistency among handles in a set. Projection and gap measurements should be taken on the finished part if the finished dimensions control function. If the handle is coated, plated, or otherwise finished by an external provider, the supplier should confirm the approved sample includes the same process sequence intended for production.
Packaging can damage protruding handles or create abrasion between parts. Review how each pull is wrapped, separated, oriented, and restrained. If the item is part of a multi-handle pack, ensure fasteners do not rub the visible face. A packed sample should be unpacked and inspected before the finish is approved.
For adjacent manufacturing context, see Koitor’s pages on custom bathroom hardware and OEM home-storage hardware. These pages are context for metal hardware sourcing and do not confirm a current cabinet-pull product line.
Buyer checklist: what must be frozen before purchase?
- – Door context: thickness, finish, mounting face, opening direction, and adjacent objects.
- – Handle geometry: length, center spacing, cross-section, projection, and edge location.
- – Finger access: define the grasp zone and the minimum functional clearance, if applicable.
- – Swing path: check collisions across the intended opening range.
- – Mounting: confirm holes, fasteners, access, and installation method.
- – Sample: review a production-representative finished handle on a matching panel.
- – Inspection: specify measurement datums and appearance review conditions.
- – Packaging: approve separation and restraint to prevent contact damage.
- – Records: save drawing and sample revisions, measurements, photographs, and sign-off.
- – Change control: recheck changes that can alter fit, projection, finish, or installation.
How should the approval record support later orders?
The buyer should also name an owner for each open item. Product engineering may own the interface, sourcing may own price and supplier changes, and quality may own inspection evidence. Smaller teams can combine these responsibilities, but assignment still needs to be explicit. Without an owner, an open dimension or sample deviation can be mistaken for an accepted production condition.
Use sample review to close the highest-risk unknowns first. A photograph or supplier explanation can support the conversation, but a physical, production-representative sample is stronger evidence when the requirement depends on fit, finish, use, or handling. If a full test is not available before purchase, record that limitation and avoid making a performance promise beyond the evidence.A cabinet handle projection finger clearance specification should be reviewed across the full product family, not just a single sample. If several handle lengths share a profile, confirm whether projection and grasp zone remain consistent. If a short version and a long version use different feet or mounting positions, inspect both. The buyer can then state which characteristics remain common and which dimensions are allowed to vary.
Keep installation context with the drawing. Cabinet doors can sit next to walls, drawer fronts, appliances, or other doors. A pull’s swing clearance depends on those relationships as well as on its projection. Use a representative installation board or an assembly drawing to reproduce them. If a layout changes late in development, recheck collision and access rather than assuming the handle remains approved.
At quote comparison, align the finish and mounting assumptions. A supplier may price a different mounting foot, fastener, or surface treatment that changes the finished clearance. Ask for deviations in writing, then verify the final build on a finished sample. This keeps commercial decisions linked to the exact product the buyer has evaluated.
For this project, the cabinet handle projection finger clearance specification requirement should be recorded with the approved sample and drawing. Reconfirm the cabinet handle projection finger clearance specification criteria if material, process, supplier, or intended use changes.
When a handle is fitted to a cabinet door, review the full opening path rather than measuring projection in isolation. Check the door edge, adjacent wall or appliance, neighboring drawer fronts, and the user’s approach angle. A sample mounted on a flat board may appear acceptable but still collide when installed beside a return wall or a projecting countertop. Buyers should therefore provide the intended installation context or a representative mock-up and agree which clearances are critical. Record the mounting-hole spacing and fastener arrangement as well as the visible grip dimensions, because a change to either can shift the installed position. These checks help separate a design-fit issue from a production variation and make sample approval repeatable across suppliers.
FAQ
It is usually measured from the finished mounting surface to the farthest point of the handle, but the drawing should specify the datum and measurement method.
Does more projection always mean better finger clearance?
No. The handle profile, underside, door edge, and adjacent geometry also matter. Review the actual grasp area on a sample.
Can a handle be approved from a product photo?
A photo can support early selection but does not establish installed clearance. Use a representative panel and check the opening path.
What should buyers do if a handle hits a wall?
Document the installation geometry and identify whether the issue is projection, position, opening limit, or cabinet layout. Agree a controlled design or installation change and recheck the assembled configuration.
Does finish change projection?
It can affect finished dimensions depending on the process and geometry. Measure the approved finished part when projection is functionally important.
Is this a Koitor cabinet-handle manufacturing offer?
No. This is adjacent-category sourcing guidance; confirm the exact product and capability for a specific RFQ.

For private-label programs, keep the approved interface drawing, finish reference, package configuration, and inspection notes together under one revision. That makes a later supplier change or repeat order easier to compare without relying on memory or an isolated sample.
Work With Koitor Hardware
Discuss a Custom Metal Hardware Project
Share your drawing, target interface, material, finish, sample needs, and buyer acceptance criteria with Koitor. Confirm exact category capability and process responsibilities for each project.
OEM / PRIVATE LABEL
Turn this sourcing guide into a product brief
Share your target product, size, finish, order quantity and packaging requirements. Your team receives a practical manufacturability review before quotation.

 English
  Español
  Português
  Français
  Deutsch
  العربية