

Shower curtain rod height is best planned from the curtain’s intended lower edge, then checked against the actual curtain, rings, tub or shower edge, and mounting hardware. A commonly repeated mounting number cannot account for every enclosure because curtain lengths, ring drop, rod brackets, ceilings, and floor or tub references vary. Before drilling, measure the hanging assembly that will actually be used and mock up the position.
For an importer or product team, the same principle improves instructions and product reviews: define the reference surface, curtain length, ring or hook contribution, desired clearance, and the rod’s mounting point. The goal is a curtain that reaches the intended position without dragging, leaving an unintended gap, or interfering with the enclosure. This is a layout method, not a universal building-code dimension. Follow the rod and enclosure maker’s instructions and check the actual site.
What Does Rod Height Measure?
The phrase rod height can refer to several different measurements. Someone may mean the distance from a finished floor to the centerline of the rod, the distance from the tub rim to the rod, the height of a bracket screw, or the distance from the rod to a ceiling. These are not interchangeable. A useful plan names both the starting datum and the exact point on the rod or bracket being measured.
For a straight rod, installers often need a level centerline between the mounting points. Yet the curtain hangs from rings or hooks below that line, and a bracket may position the rod center above or away from the screw location. If the mounting plate has multiple holes, measuring to the top hole does not tell you where the rod center will finish. Use the hardware drawing or a physical bracket to identify the relationship.
Choose a consistent datum before comparing alternatives. In a tub enclosure, the tub rim may be the practical reference for the curtain’s lower edge, while a floor-standing shower may use the finished floor or a threshold. If the floor slopes or the tub is not level, note that condition and identify where the measurement begins. Do not mix a floor-to-rod measurement on one side with a rim-to-curtain measurement on the other and then treat them as one dimension.
The room also has a vertical envelope. A ceiling, soffit, window, shower head, door, or existing fixture may limit the available position. A curved rod can have a different end and center geometry from a straight rod. The product’s installation instructions control the allowed mounting locations. Treat an internet example as a starting point only; it does not replace the rod maker’s bracket spacing, fastener, or substrate directions.
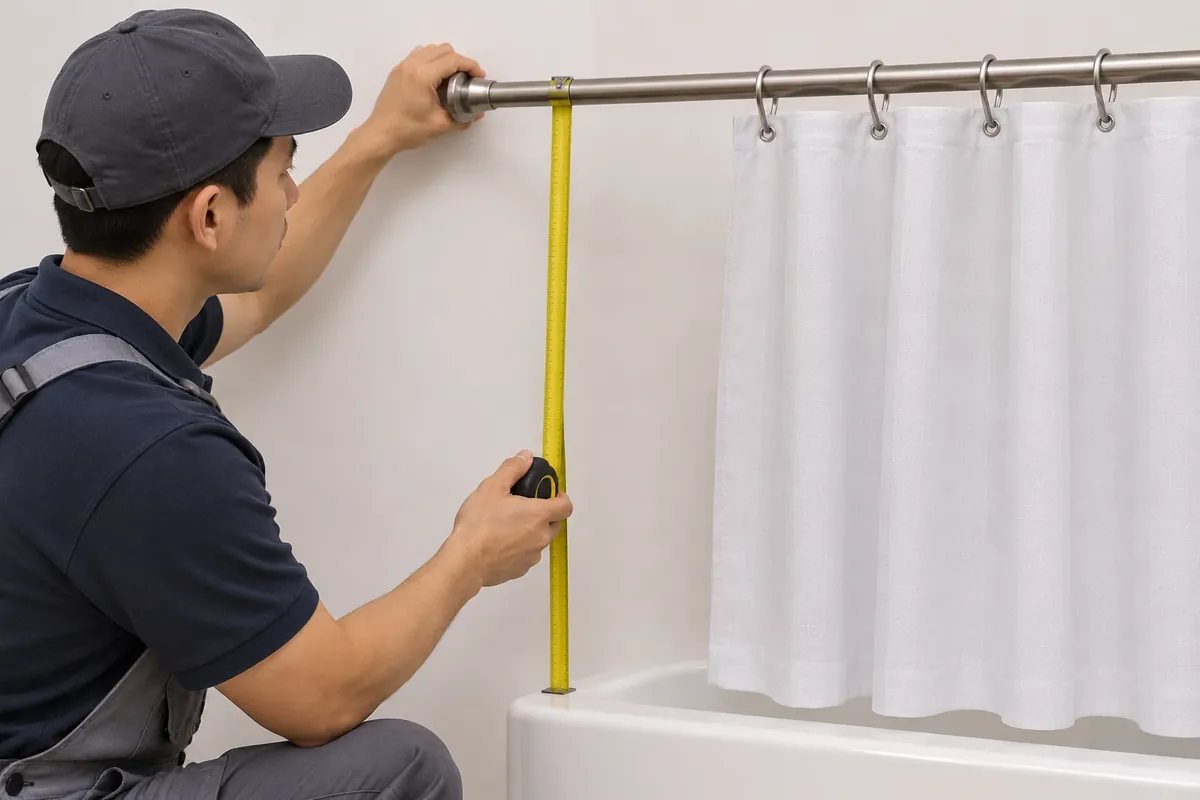
How Can You Calculate a Starting Position?
Start by deciding where the curtain or liner should end in the finished installation. Then measure the actual hanging length from the point that rests on the rod to the lower hem. For a curtain with sewn-in grommets, measure from the top inside bearing point where the rod or ring supports it. For separate hooks, rings, or clips, include the drop from the rod center to the point where the curtain begins. Product labels usually describe nominal panel length, not the complete installed drop from the rod centerline.
A simple planning relationship is: rod centerline above the chosen datum equals the desired lower-edge height above that datum plus the measured hanging drop from the rod centerline to the curtain hem. Because the measurement is from the rod center, the ring geometry is part of the drop. If the curtain top is supported by a ring below the centerline, account for that distance rather than adding the curtain’s nominal length as though it starts at the rod.
For example, lay the curtain and rings out on a clean floor or hold them against a vertical surface. Measure from the rod’s centerline to the bottom hem in the intended hanging configuration. Use the measured curtain, not a different sample from the same package if the final product has a different header or liner. Record the desired bottom position relative to the tub rim or floor. The calculation gives a proposed centerline; it is not final until the rod bracket and room constraints are checked.
Make sure the chosen lower edge works with the actual enclosure. A curtain intended to fall inside a tub has a different position goal from an outer decorative panel. A liner and textile curtain may have different lengths or hang from separate rings. If both panels share the same hooks, check that neither panel lifts the other or changes the lower position. Do not assume the labels use the same measuring convention.
If the product has a recommended height in its instructions, compare that guidance with the measurement and ask the manufacturer about any conflict. Moen’s support guidance frames rod height as dependent on the desired curtain position and provides a particular example; that example is not a universal required height for every rod, curtain, or bathroom. Use manufacturer instructions for the exact model and installation.
| Measurement field | How to record it | Why it matters |
|---|---|---|
| Reference datum | Finished tub rim, threshold, or floor at the curtain line | Makes measurements comparable and ties the hem to the enclosure |
| Desired lower edge | The agreed curtain or liner position relative to the datum | Defines the outcome before rod placement is calculated |
| Hanging drop | Rod centerline to the curtain hem with the actual ring or header | Includes the support hardware that nominal panel length omits |
| Bracket offset | Rod centerline relative to the fixing holes on the exact bracket | Converts the rod position into usable fixing marks |
| Room constraints | Ceiling, trim, window, fixtures, slope, and travel path | Reveals conflicts before any permanent hole is made |
If different people measure the same bathroom, ask them to use this same set of fields. The measurements should describe one installation proposal, not several different origins. A retail support team can also ask for a photograph showing the datum and the complete hanging assembly when troubleshooting a fit question. The image can clarify which point was measured, but it does not replace the model’s installation instructions or a qualified assessment of the wall.
Why Do Rings, Hooks, and Curtain Headers Change the Result?
The hardware between the rod and the fabric contributes real vertical distance. A closed ring, open hook, roller, clip, or grommet can place the curtain edge at a different height even when the rod is fixed in exactly the same position. The shape and size of the hanging part matter. A ring that sits around the rod may suspend a clip below the rod center, while a grommet may place the fabric closer to the centerline. Measure the actual combination.
Consider whether the curtain moves freely. Some hooks have a lower connection point or decorative finial that changes the effective drop. A roller or glide may have a defined attachment eye that differs from a plain ring. If the rod has a telescoping joint, end retainer, or curved section, the ring may not travel or hang the same way along its entire length. The existing Koitor article on ring travel addresses that separate movement question; here the key issue is vertical drop at the intended hanging position.
Header construction also affects the measurement. A fabric pocket can sit over a rod, a snap-on liner may use integrated holes, and a grommet panel may depend on separate rings. Measure from the actual bearing or attachment point, not from the very top edge of the textile. If a package includes both liner and curtain, install the intended rings and panels together during the mock-up. Added fabric layers can change how the assembly rests and can create bunching near the lower edge.
Record the combination in a short worksheet: curtain or liner product, measured panel length, ring or hook type, rod diameter or profile, and drop from rod center to hem. When the hardware is sold as a set, identify which supplied ring was used. For a retail instruction, explain that substitutions may change the final position and invite the customer to measure their own assembly. Avoid declaring that a particular ring size fits every panel or rod unless the product documents confirm it.
Which Reference Surface Should You Use?
For a bathtub, decide whether the curtain should end inside the tub or close to the rim, and use the finished rim as the local reference for that decision. Do not measure from an unfinished floor or a temporary protective board. If the tub rim slopes, measure the relevant section where the curtain falls and check the bottom edge at both ends. A curtain that appears level relative to the rod may have a variable gap if the enclosure itself is not level.
For a shower with a curb or threshold, determine which side of the threshold the panel occupies and where the water-control design expects it to fall. The curtain position should be checked against the product instructions and the actual enclosure. This article does not guarantee a watertight installation or prescribe a universal gap. A shower door, liner, curb, and curtain may have different intended relationships, so confirm the arrangement with the product maker or installer.
In a walk-in or floor-level shower, use the finished floor at the curtain line as the reference, but account for slope, drain location, and the panel’s intended reach. If the floor slopes toward a drain, the floor elevation at one end may differ from the other. Mark both ends of the intended curtain line and check whether the lower edge will remain suitable through its travel. A level rod does not make a sloped floor level.
Accessibility, user preference, and cleaning needs can influence the chosen position. A shorter panel may be easier to handle or keep clear of a particular feature, while a longer one may be selected for a specific enclosure. Those are product and room decisions, not a reason to apply a single height to every installation. Do not make unsupported safety claims about preventing falls, containing all water, or meeting accessibility requirements. Consult the applicable project professional and current local requirements when the installation is part of a regulated project.
Check the Rod, Brackets, and Wall Before Drilling
Translate the planned rod centerline into actual bracket locations using the model’s instructions. The bracket may place the rod center above its fixing screws, and a curved rod may have a specified orientation or end position. Measure the supplied product, not a visually similar rod. Check the total width, any telescoping range, bracket projection, and the distance the rod extends from the wall. The centerline calculation only solves the vertical relationship; it does not establish that the rod fits horizontally or can be fixed safely.
Identify the wall finish and the structure behind it. Tile, glass, painted drywall, masonry, and other surfaces require different installation methods. The rod manufacturer may specify anchors or mounting conditions. This article does not provide drilling instructions or confirm that an adhesive or suction mount is suitable for a surface. Follow the model-specific instructions and use a qualified installer when the substrate or concealed services are uncertain. Do not drill until the chosen points have been checked against the product instructions and the room.
Check the path of nearby features: window trim, tile joints, niches, shower heads, shelves, doors, and any existing grab bar or accessory. A rod end may collide with trim even if the centerline is correct. The curtain may catch on a shelf or handle. Measure from the finished surfaces and mock up the full footprint of both rod and bracket. For a curved rod, check the curve’s projection and the curtain’s position at the widest point.
If the bracket has a template, confirm that it matches the exact model and mounting orientation. Templates can be reversed accidentally, and a template may refer to screw holes rather than the rod center. Use the drawing or physical part to map the relationship. Mark a light pencil line, then hold the curtain and rings at the proposed height before making permanent holes. If the marks cannot satisfy both the curtain position and the specified fixing method, stop and resolve the conflict rather than forcing the bracket into a different location.
Mock Up the Full Hanging Assembly
Before drilling, set up a temporary full-size check. Use the actual curtain, liner if applicable, rings or hooks, rod, and brackets. A helper can hold the rod at the proposed centerline while another person checks the lower edge and room clearances. A temporary support must be stable and must not damage the wall or create a hazard. If that cannot be done safely, use the product’s paper template or ask the installer to verify the proposed location.
Look at both ends and the center. Confirm that the panel reaches the intended lower position across the width and does not bunch against the tub, floor, threshold, or another fixture. Move the curtain through its normal travel. Check that rings do not catch, the panel can open and close, and the rod remains within the maker’s mounting limits. A trial with a different ring or a clipped-up sample can misrepresent the final drop.
Write down the selected datum and dimensions before installation. A concise record can include the floor or tub reference, target curtain lower edge, rod centerline, bracket screw positions, curtain model, ring model, and rod model. Keep a photograph of the mock-up if the installation is part of a product development review. This does not replace the required fastener or substrate approval; it prevents teams from confusing the intended height with the hole coordinates.
After installation, check the position again with the complete assembly in place. The bracket may shift slightly as fasteners seat, and a telescoping rod may move within its adjustment range. Confirm that the installed rod matches its instruction and that the actual bottom edge remains as intended. If the curtain is replaced later, remeasure because a different header, ring, liner, or panel length can change the result.

Turn the Height Decision Into a Clear Product Instruction
Retail and private-label teams should avoid printing one unqualified number as the correct height for every bathroom. If the maker supplies a recommended range or model-specific position, use the approved instruction and explain the measurement datum. If no product-specific value is supported, give customers a measurement method: select the desired lower edge, measure the complete hanging drop, derive the proposed rod centerline, then verify bracket location and room constraints.
An instruction sheet should distinguish centerline height from screw-hole height. A small diagram can show the reference surface, rod center, ring attachment, and curtain hem, but its dimensions must match the actual product and be reviewed. If the rod bracket puts the centerline a known distance above the fixing holes, verify that relationship from the product drawing. Do not copy an image or dimension from another model.
For a product bundle, list the supplied curtain or rings only if they are genuinely included. Identify compatible rod diameters and panel attachment types from approved product records. If customers can substitute their own parts, state that the final drop varies by curtain and ring combination. A package claim should not imply that all standard panels fit unless the compatible dimensions are defined.
A sourcing brief can also capture production details that affect consistency: rod profile, bracket geometry, included hardware, finish, template revision, and packaging layout. If the bracket or rod design changes, review the instruction, template, and stated measurements together. The customer-facing sheet should be updated to the same product revision as the hardware. This keeps an installation diagram from outliving the part it describes.
For an OEM project, send the rod drawing or sample, curtain attachment concept, target room/enclosure, bracket details, and instruction requirements to the manufacturer. Ask which dimensions are controlled by the product and which depend on the installation site. Koitor’s approved scope supports custom bathroom and home-storage metal hardware discussions; it does not establish that Koitor manufactures shower curtains or a branded rod. Verify the actual project scope before making a supplier or capability claim.
Frequently Asked Questions
Is there one standard shower curtain rod height?
There is no single number that accounts for every curtain length, ring drop, tub or floor datum, bracket design, and room constraint. Follow the instructions for the exact product and measure the assembly.
Should I measure from the floor or the tub rim?
Use the finished surface that controls the curtain’s intended lower edge. For a tub installation, the rim is often the useful local reference; for a floor-level shower, use the finished floor at the curtain line. State the datum clearly.
Do rings change shower curtain rod height?
The installed rod itself does not move, but rings, hooks, clips, and header construction change how far the curtain hangs below the rod. Include them in the measurement.
Should the curtain touch the tub or floor?
That depends on the enclosure and the product maker’s guidance. Determine the intended lower edge and check the full curtain and liner combination. Do not infer a universal clearance from another bathroom.
Can I use the curtain’s printed length to locate the rod?
Use it as a starting point, but verify the actual hanging drop from the rod center to the hem. Package measurements may not include the ring or attachment contribution.
Do curved rods use the same planning method?
The same curtain-and-ring measurement helps, but curved rods have model-specific geometry and projection. Follow the maker’s bracket and orientation instructions and check the end and center clearances.
Can a height example from a support page be treated as a code?
No. A manufacturer’s example helps explain one use case. It is not automatically a legal requirement or a universal dimension for other products and enclosures.
What should a buyer specify for a private-label rod?
Record the rod model, bracket geometry, reference datum, supplied rings or hooks, curtain compatibility, template revision, approved installation instructions, and any product-specific height guidance.
Work With Koitor Hardware
For a custom bathroom hardware discussion, share the drawing or sample, rod and bracket dimensions, finish expectation, included components, installation surface, and packaging or instruction needs. Koitor can help clarify the custom metal hardware scope; the exact product maker or installer should confirm model-specific installation requirements.
Review the custom bathroom hardware manufacturing page and OEM home-storage hardware page. For a project review, use the contact page.
Plan the Rod Around the Complete Hanging Set
Share the product drawing, curtain and ring arrangement, room reference, finish, and instruction needs.
OEM / PRIVATE LABEL
Turn this sourcing guide into a product brief
Share your target product, size, finish, order quantity and packaging requirements. Your team receives a practical manufacturability review before quotation.


 English
 Español
 Português
 Français
 Deutsch
 العربية